Batman arkham knight all riddles riddles. Challenge # 4 - Flight School. Open the main gate of the chemical plant
 Live Journal
 Facebook
 Twitter
Read all the latest about games and look at Batman: Arkham knight- side missions "Especially dangerous"
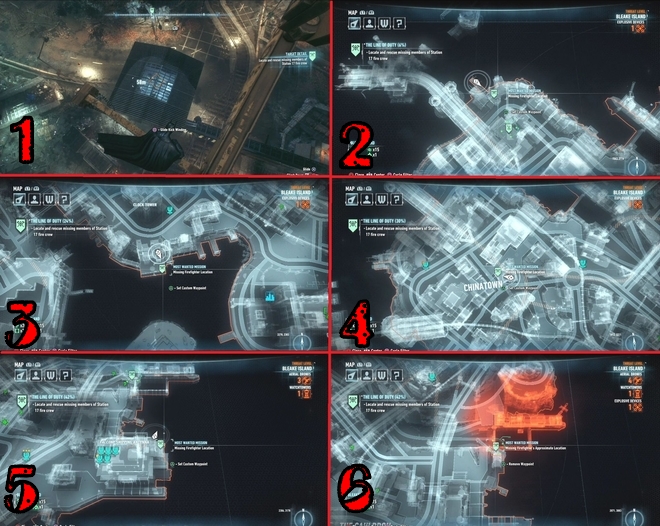
Blake Island
This is the very first firefighter you will need to rescue the moment the mission becomes available. Follow the marker that will lead you to Panessa Studios. The firefighter is inside the building, under the crane. You can use Batman's hook to climb onto the crane, and then attack opponents from the air, breaking the glass on the roof of the building. Defeat all bandits and free the fireman.
Below we suggest you familiarize yourself with the locations of the remaining firefighters on Blake Island:
1. Described above.
2. Northwest corner of Chinatown, in a side street.
3. Chinatown, the back of a building located northwest of the police station.
4. Chinatown, the center of the area.
5. North-eastern part of Falcone Shipping Antenna courtyard.
6. At the top of the crane.
Location of all kidnapped firefighters on Blake Island.
Move to these locations, enter the detective mode and you can easily find each of the kidnapped firefighters.
Miagani Island
Below is the location of each of the abducted firefighters and displaced to Miagani Island:
1. Under the bridge connecting the islands of Blake and Miagani (enemies will be armed with firearms).
2. Not far from Grand Avenue, on the upper ledges of the Gotham Herald building. You need to get to the vantage point in the upper right to see the bandits and the fireman.
3. Grand Avenue station, surrounded by turrets. There is no ventilation shaft or sewer ditch to help you deal with the bandits one at a time. You must fight "in the open", but at the same time be in the blind sight of the turret. The bandits won't have weapons. Use smoke bombs to disorient enemies while you deal with the turrets. The turret in the center is especially dangerous. The task will become much easier if your jailbreak device is improved. So you can temporarily disable the optics of the turrets, which will help you get closer to them and destroy them.
4. Southeast corner of Wayne's Tower.
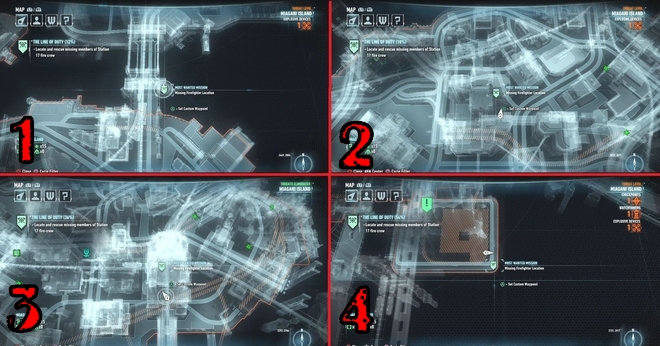
Location of all kidnapped firefighters on Miagani Island.
Founders Island
The following is the location of each of the abducted firefighters and displaced Founders:
1. Building in the center of Port Adams.
2. Urbarail Station in Riker Heights. There are three thugs and a cache from where they get their weapons. First of all, using the disintegrator, disable their weapons.
3. On a hill northwest of Wayne International Plaza. There is also a cache nearby. First, deal with the cache, and then defeat the bandits.
4. Lighthouse to the northeast of the airships. Detective Mode cannot be activated in this area. There is a sniper at the lighthouse. First, kill the sniper, and then deal with the rest of the opponents.
5. The last firefighter is harder to find than the rest. First, you must find the Killinger Dept Store. There will be a wall in front of him, which can be moved using the Batmobile drive. The exact location is shown in the screenshot below. Take an advantageous position and deal with two armed bandits. If you have improved your multi-hit technique, you will be able to cope with at least five opponents at a time.
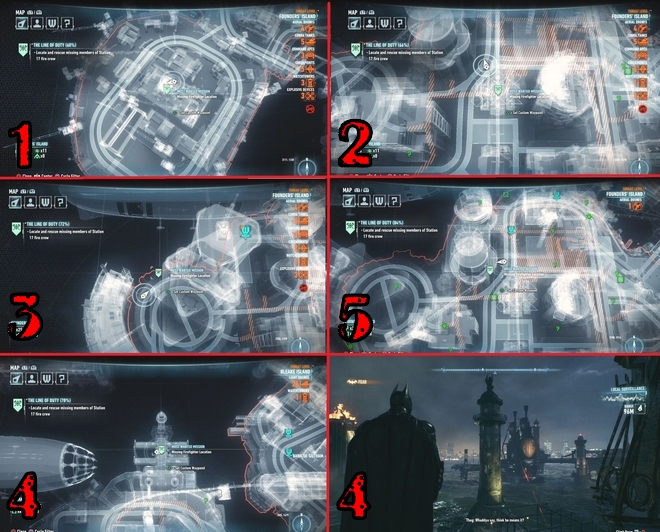
Location of all kidnapped firefighters on Founders Island.
After rescuing the last firefighter, you will need to rescue their boss. Its location will be marked on the map. Move to the indicated location - Cityvision Construction. The location will be filled with bandits, but you have freedom of action. When you have dealt with all the enemies, then find the chief of the fire station and free him. Next, go with him to the police department to close the case and complete the mission.
Mission 2. Perfect crime
Immediately shortly after taking on the side mission, you will find the first victim. Go to the Trade Bridge and examine the body. After analyzing the victim's blood, you must use a special scanner. Scan the victim's skin, hold the button to get evidence. Switch the scanner to "Muscle" mode and check the victim's small intestine to find the ring. Scan again.
Finally, switch the scanner to Bones mode and check the victim's left thigh. The crime scene will be completed. As soon as you unlock the next area of Gotham, a new part of the mission will become available.
One of the bodies is at the top of the Gotham Herald, on the roof just below the tower. Use the scanner to find abrasions or other evidence on the victim's body:
"Skin" mode: a scar on the left hand;
Muscle mode: left side of the chest;
Bone mode: deformed bones on the left knee.
The third victim is located on the roof of the Heavenly building on Miagani Island. Use the scanner to find abrasions or other evidence on the victim's body:
"Skin" mode: a mole on the chest;
"Muscle" mode: a bullet in the right bicep;
Bone mode: missing toes on the left foot.
You can find the fourth victim after helping Poison Ivy with her plant, which helped to neutralize the Scarecrow's toxins. The victim is on top of a small building northeast of the orphanage, where there is still a railroad. Use the scanner to find abrasions or other evidence on the victim's body:
"Skin" mode: a bite scar on the victim's left side;
"Muscle" mode: prosthesis instead of the right eye;
Bone mode: fracture of the right arm.
The fifth dead body is in the lower streets southeast of Stagg's second airship. Use the scanner to find abrasions or other evidence on the victim's body:
"Skin" mode: chemical burn on the left thigh;
"Muscle" mode: voice box on the throat;
Bone mode: the sixth finger on the left hand (WTF?).
The last corpse can be found on the wall near the springboard, not far from the church. Use the scanner to find abrasions or other evidence on the victim's body:
Skin mode: a wound from a removed tattoo on the right thigh;
Muscle mode: remote right kidney;
Bone mode: a tantalum plate on the victim's skull.
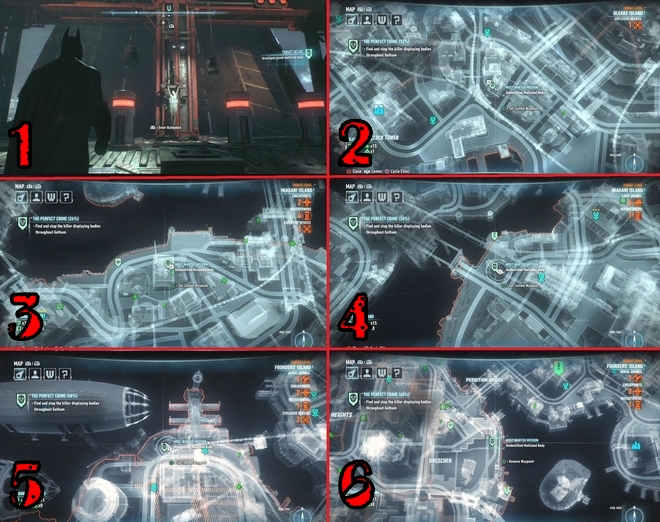
Location of all corpses from the mission "Perfect Crime".
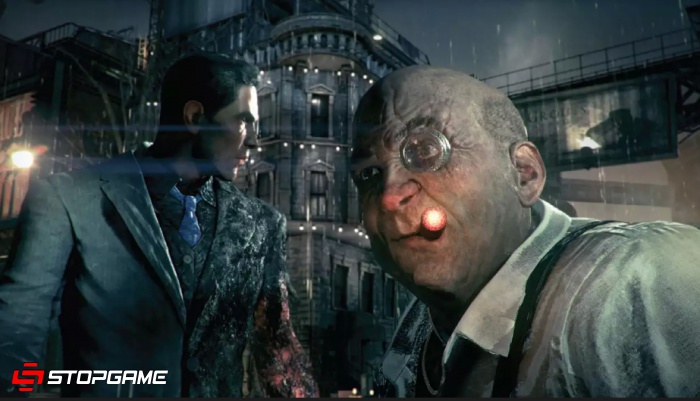
After examining the last body, Alfred will tell you the location of the killer. Move to the Pretty Dolls salon marked on your map. Go inside (there will also be a Riddler trophy inside). Get under the floor through the grate and blow up the cracked wall with the gel.
Back out and go through the front door to the operating room. Keep moving forward and you will find the killer red-handed. Come closer and watch the cut-scene. You need to leave the assassin's minions on the ground as long as possible, since they do not feel pain. Use combo attacks. When Pig calls all his henchmen, he will stand at his "workplace". Approach him, and he will run back to the corner. When you have dealt with all the enemies, and the last enemy must be defeated with a special technique, go to Pig and destroy his workplace.
After beating Pig, break the electrical box nearby to free the people trapped in the cage. Talk to them, escort Pig to the Batmobile and go to the police department.
Mission 3. Disarmament
This mission is entirely dedicated to road safety in Gotham. The bandits have planted bombs at some points and you need to defuse them.
The mission becomes available almost from the very beginning of the "City of Fear" storyline. At the same time, it is not possible to go through it immediately from beginning to end. To find all the bombs, you will at least need to get access to all the islands of Gotham. As always, carefully examine the locations using the detective mode.
At a certain point during the main story mission, Alfred will direct Batman to a checkpoint where he will need to dismantle the bomb. In order to disable the bomb, you need to look at a large red object. Put the Batmobile into combat mode and use the powerful drive (winch).
Exact location of all bombs
Below are the coordinates of all the points where the bombs are located:
Bomb # 1: visited during the main plot - X: 2105 and Y: 2920;
bomb # 2: Blake Island - X: 1790 and Y: 2420;
bomb # 3: Blake Island - X: 1920 and Y: 2680;
bomb # 4: Blake Island - X: 2370 and Y: 2910;
Bomb # 5: Founders Island - X: 2150 and Y: 1915;
bomb # 6: Founders Island - X: 2050 and Y: 1570;
bomb # 7: Founders Island - X: 2270 and Y: 1540;
bomb # 8: Founders Island - X: 2745 and Y: 1739;
bomb # 9: Founders Island - X: 2939 and Y: 1449;
bomb # 10: Miagani Island - X: 3269 and Y: 2109;
bomb # 11: Miagani Island - X: 2999 and Y: 2299;
bomb # 12: Miagani Island - X: 2899 and Y: 2729;
bomb # 13: Miagani Island - X: 3049 and Y: 2919;
bomb # 14: Miagani Island - X: 3159 and Y: 2729.
Mission 4. Kings of the roads
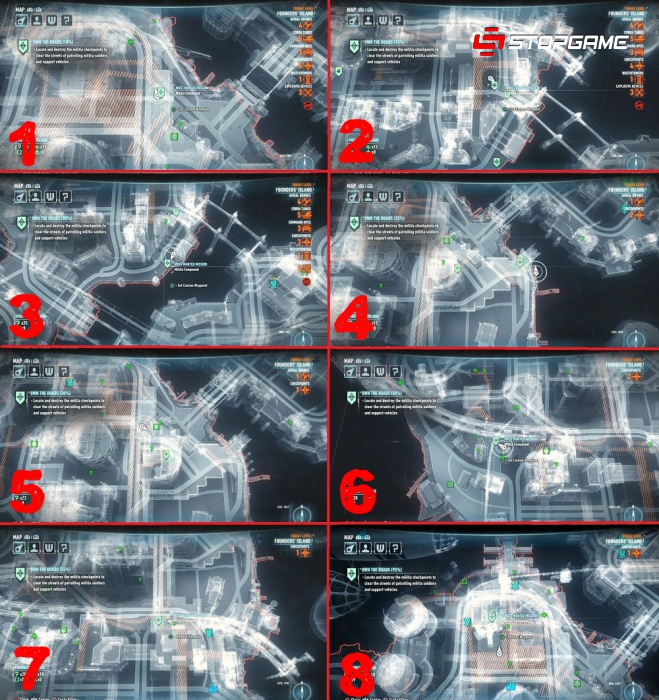
The first checkpoints of the Arkham Knight soldiers are located on Founders Island. Checkpoints are usually set on walls, around which there are several guards. The barrier around the checkpoint (checkpoints) cannot be destroyed, even with the Batmobile's cannons. You must get over and destroy all the guards. After winning, find the commander using the detective mode. Then destroy the checkpoint to remove the barricade.
Founders Island
1. Located west of the Doom Bridge.
2. Located west of the Repentance Bridge.
3. Located in the coastal strip between the "Repentance" and "Salvation" bridges. There are fewer guards here, but there are two thugs with weapons and two with shock batons.
4. This checkpoint is located south of the Doom (Damnation) Bridge, in the eastern part of the Founders Island. There are two armed soldiers here. Use the disintegrator to disable their weapons, then go down to the ground.
5. This checkpoint is located inside the campound building. Use the Batmobile winch to pull the gate northwest of the checkpoint. Deal with the turrets and guards using the battle mode of the Batmobile.
6. Checkpoint becomes available after colliding with Harley Quinn in the story mission. There are several sentry drones. It's good if you have an improved disintegrator that will help destroy the drone.
7. On the top landing. Use the Batmobile for increased firepower.
8. The checkpoint is located at the crossroads near the church.
9. Checkpoint will become available only after you save Barbara (Oracle) and get the second Batmobile. This is on one of the buildings on a construction site in the middle of the northern part of the island. There is an unmanned drone inside. Try to take control of the drone and deal with opponents. You can also use the ventilation shaft and attack enemies with a multi-hit. There is a switch nearby that will open the gate for the Batmobile.
Location of all militia checkpoints on Blake Island.
Miagani Island
1. Checkpoint is located near Elliott Hospital.
2. Checkpoint is located at Urbarail Station in Bristol, east of the Salvation Bridge. You can use the Batmobile to kill the militias at the outpost.
3. Checkpoint will be available after the Harley Quinn incident as you progress through the story missions. It is located near a building previously used by the Penguin as a weapons cache. Nearby, you still destroyed the watchtower in the previous mission "Occupation of Gotham".
4. The checkpoint will be available after the Harley Quinn incident as you progress through the story missions. It is located inside the Ranelagh Ferry Terminal. There are several drones that can be blinded using a remote hacking device. Place explosives on the lower balcony of the station and lure enemies there. You need to lure the outpost commander, after which you can get his controller. Please note that the drones will not deactivate after this, so leave the area to avoid being shot.
5. The checkpoint will be available after the Harley Quinn incident as you progress through the story missions. It is located in front of the theater.
6. The outpost is located near the Gotham Globe building.
7. This outpost (checkpoint) will be available after you save Barbara (Oracle) and get the second Batmobile. Located in the botanical garden. Use the Batmobile, drive over the ledges and fly your car straight to the outpost.
8. On the top level of Elliott Hospital. You can use the Batmobile using the adjacent aisle.

Location of all militia checkpoints on Miagani Island.
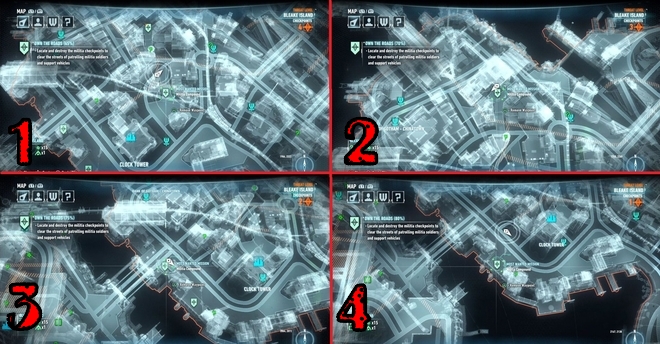
Blake Island
1. This checkpoint will be available after you save Barbara (Oracle) and get a new Batmobile. After you destroy another outpost, Deathstroke will call you.
2. Checkpoint is located in Chinatown. There are turrets (near the entrance) and infantrymen. From above, you can perform a multi-hit. When fighting on the ground, avoid the sight of the turret.
3. This checkpoint is located near the Scarecrow hideout in Chinatown. There are turrets and one bandit. Blind one of the turrets, then disable the other when it turns to the side.
4. Near the "Doom" (Curse) bridge. Defeat the guards outside, or simply use your burglar device to pry open the switch near the door. There will be a commander inside the building. Go through the side door and multi-hit while on the ledge.
5. The checkpoint is located near the clock tower. There are two drone drones here, but they shouldn't be a problem for you if you've upgraded your disintegrator. Use it to make drones self-destruct. Exploding drones will cause serious damage to ordinary soldiers.
Location of all militia checkpoints on Founders Island.
Mission 5. Occupation of Gotham
This mission will become available as soon as you get to the Island of the Founders. You must neutralize the militia towers on the rooftops of buildings in each of the districts of Gotham. First you need to deal with all the guards, and then apply the explosive gel to the terminal attached to the buildings. Finally, don't forget to blow up the gel.
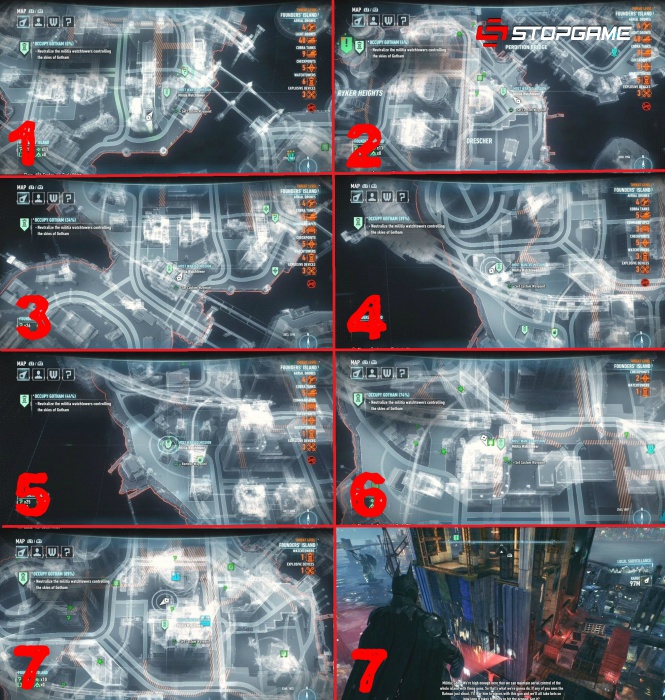
Miagani Island
1. Look on the roof of a building near Heavenly. Destroy the guards outside the sight of a turret installed on another building.
2. On the roof of the hospital. There are several guards and two terminals. One of the terminals will be unguarded. Destroy it first so that some of the turrets are out of order. Look around the site and see two thugs and bandits with shock batons.
3. On the wing connecting the two buildings at the intersection of Grand Avenue. There are no guards, only turrets. Disable the towers first.
4. Near the Mainland Bridge, northeast of Wayne's Tower. There are two terminals that you need to destroy. One of them is on the roof, not guarded. This terminal is responsible for the functioning of the turrets on the walls. There are few guards around the two towers farther from the others, so start from there.
5. North-east of the orphanage, on the river bank.
6. The terminal will be available after meeting Harley Quinn in story missions. The terminal is located on the bank of Gotham.
7. The terminal will be available after meeting with Harley Quinn in story missions. The terminal is located on top of a building previously used by the Penguin as a weapons cache. The checkpoint is almost nearby.
8. The terminal will be accessible after repelling the attack on the police department. It is located under the tower near the botanical garden. Guarded by one drone and several bandits.

The location of all militia watchtowers on Miagani Island.
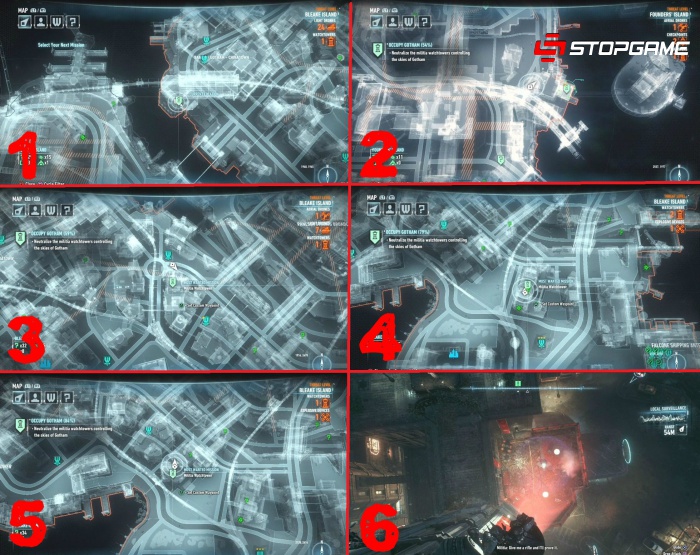
Founders Island
1. On the roof of the building near the church and the bridge.
2. Not far from the "Damnation" (Doom) Bridge and Riker Heights.
3. On a building northeast of Port Adams and northwest of the Salvation Bridge. Use the jailbreak device to load the security codes into the drone, and then use it to destroy the security of the facility.
4. The terminal is located south of Wayne International Plaza, which is also close to the airships. Disable weapon caches using a disintegrator so the guards cannot arm themselves.
5. Watchtower north of Port Adams. There will be a burning Otisburg fire station right next to the terminal.
6. The terminal will be available after meeting Harley Quinn in story missions. It is located at the top of the building in the center of the construction site. This location is unprotected, so it will be quite easy to destroy the watchtower.
7. The terminal will be accessible after repelling the attack on the police department. It is located on top of a building under construction.
The location of all militia watchtowers on Founders Island.
Blake Island
1. The only way to get to the terminal is to smash the window with your feet. Plan on a cloak and deal with two enemies, then destroy the watchtower without any problems.
2. This watchtower is located near the docks, north of the Repentance Bridge on Founders Island. The console is located at ground level. There are no ventilation holes here, so it is almost impossible to deal with opponents without making a noise.
3. This watchtower becomes available after Harley Quinn appears in the story. Tucked away on a train in Chinatown. There will be two drones and several militias nearby.
4. Becomes available after repelling an attack on the police department in the story of the game. Located northeast of the police headquarters.
5. Becomes accessible only after repelling the attack on the police department and is located immediately north of the police department. There will be a turret at the top, which complicates the task. Use the Batmobile to destroy all the soldiers.
The location of all militia watchtowers on Blake Island.
Battle with Deathstroke
When you have completed the last three missions (Disarmament, Kings Riders, Occupation of Gotham), you will be able to fight Deathstroke. This will not happen before you throw down the Arkham Knight's "Heavy Rain" tank. After that, the command of the army will take over Deathstroke.
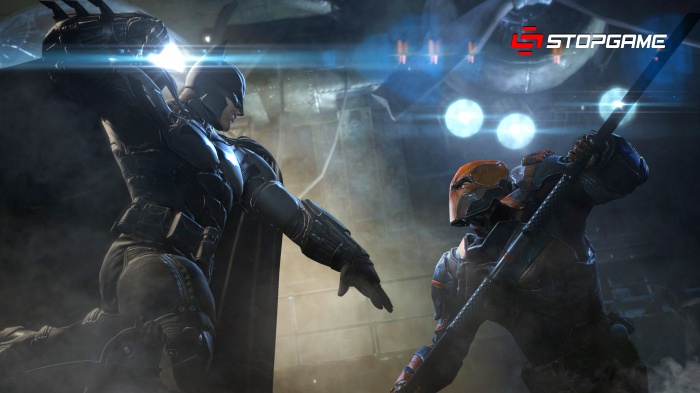
Battle with Deathstroke.
So, provided that you have completed the last three tasks, the battle with Deathstroke will begin. Focus on the Cobra drones first. When all five "Cobras" are destroyed, then start dealing with Deathstroke himself. Maintain your distance while avoiding its homing missiles and then direct your energy shot and your missiles at it. When Deathstroke is defeated, the mission will end.
Mission 6. Gotham is on fire
The mission will become available after the story chapter, where you will follow in the footsteps of the car of the Arkham Knight's companions, in which the kidnapped Barbara (Oracle) was taken away. You will find yourself at the crash site and pick up the scrambler thrown out by Barbara. Move to the fire station and use the batmobile winch to activate the fire extinguishing systems.
Firefly will fly out of the flames. Pursue him. Dodge the walls of flame that the Firefly will leave behind on the ground. Chase until Firefly runs out of fuel. Catch him in the air.
As the game progresses, you will receive a lot additional information about the latest "achievements" of the Firefly. Move to the next burning fire station and repeat the process of capturing the Firefly. The last fire station to be set on fire by the villain is in Otisburg, on the island of the Founders. You will have to come here on a Batmobile, so you will be able to complete the final stage of the additional mission only after the destruction of the rocket launcher, which will be in the main plot of the game. As before, chase the Firefly until his fuel supply runs out. Catch and beat him. Take him to the police station and complete the mission.
Mission 7. Heir to the Knight
The mission will become available after the story chapter, where you will follow in the footsteps of the car of the Arkham Knight's companions, in which the kidnapped Barbara (Oracle) was taken away. You will find yourself at the crash site and pick up the scrambler thrown out by Barbara. Follow the roof to see the flaming symbol " bat". Talk to Azrael and you will control him in the battle against a crowd of bandits. Complete the challenge successfully without getting injured to prove Azrael is worthy.
Azrael's next location is Founders Island, north of Port Adams. As before, you need to defeat all enemies without taking damage. Use the same combos and skills as Batman himself. Deal with small opponents, and then defeat the brute.
Azrael's next location is Chinatown. In this challenge, you will have to face the medic and other rebels. Avoid touching electrified enemies. Use the Batclaw to disable them. Deal with the medic as quickly as possible.

The next part of the mission will become available only after Harley Quinn appears in the story. Move to the Lady of Gotham statue on the small island in the center of the entire map and climb to the top to see the bat symbol. To pass this test, you need to deal with the Arkham Knight fighters.
According to the next part of the mission, you need to return to the clock tower and use the bat-computer to analyze the unusual brain activity of Azrael. After playing with Azrael's memory, rewind the footage and examine the details with strange symbols to complete and reconstruct the real message.
Azrael will appear inside the clock tower, and you will be able to control him. You will need to get the sword on top of the cabinet. Make a choice: either try to kill Batman or throw away the sword. In the second case, break the sword and leave the clock tower in the elevator to complete the mission.
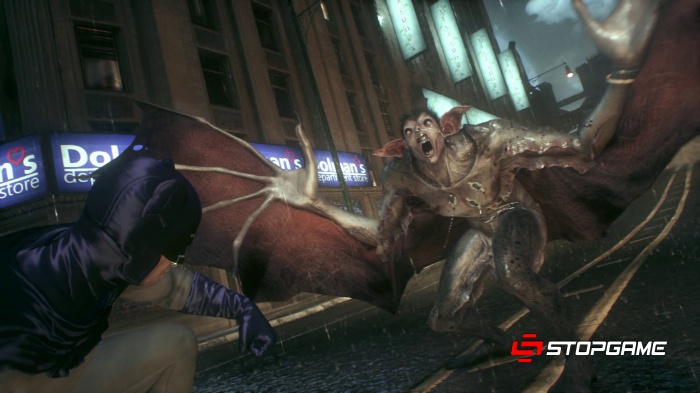
Mission 8. Night flyer
You can encounter this creature on the rooftops of Miagani Island. Catch up with this monster in the air. It is difficult to notice, and even more difficult to catch up. The creature sometimes makes sounds, which will help you determine its approximate location, as well as the direction in which it is moving. Just catch up with the flying creature and get a sample of its blood.
Next, head to Chinatown to find Dr. Langstrom's laboratory. It is located in a side street. Go there and take the elevator down. Enter the laboratory and examine the lying body. Get access to a computer nearby, on which you will have to find (create) an antidote. Rotate the DNA strand to restore it to the end. Incorrect tension will reduce chain integrity. After you have a clean DNA sample in front of you, you will complete part of the mission.
Batman".
Go to Blake Island, move to the rooftops in search of the bat. You can activate the detective mode, which will help you recognize the desired creature. As you find a creature, then follow him and get closer as possible to introduce the antidote. However, the dose of the antidote appears to be insufficient. Wait until you learn new information about the location of the flying creature.
At the end, the Nightflyer will hover in the skies over Founders Island. He will definitely appear after completing a story mission with Harley Quinn. Catch him up again and inject the medicine. Deliver the creature to the police headquarters to complete the mission.
Mission 9. Armored and very dangerous
You will receive this mission after installing the second upgrade on the Batmobile after the main story mission on Miagani Island in the tunnels. The areas will be patrolled by Arkham Knight armored personnel carriers. They may have drones with them. After destroying an armored vehicle, you will have to wait until another appears. Check the mission screen from time to time.
For the destruction of each armored vehicle, you will earn "tech-points" to upgrade. Please note that armored vehicles will be escorted. You need to dodge the homing missiles. With each new stage, armored vehicles will be strengthened.
To find armored vehicles on the Founders Island, you will first need to destroy the rocket launcher.
Mission 10. Weapon smuggling
According to the plot of the mission, you need to find and destroy all the caches with weapons of the old rascal Penguin. Nightwing will provide you with data on all the Penguin's weapon vans. Go to this place, track the van and intimidate the bandits. When they try to pull away from you, then climb onto the roof and watch the van. Hold on to them until they get to Zionis Industries near Falcone Shipping Antenna on Blake Island.
Enter the building through the side door and hack the console on the wall on the other side. Use a remote hacking device to open the main gate. Switch to the Batmobile and take out all the turrets. Find a grate that you can climb higher, use the switch to open a passage to the roof.
Move to the roof and break the windows. After you go down below, you will defeat the thugs along with Nightwing. Apply explosive gel to the weapon crates inside the vault, then detonate it.
The second storage with weapons will be available after you destroy the rocket launcher based on the story mission on airships, on the island of the Founders. Move to the place where the van is and start attacking it. Knock on the truck or call the Batmobile to scare enemies. Follow them along the rooftops until they lead you to one of the Penguin's weapon caches.
Deal with the guards outside the building and go through the door. Enter the ventilation nearby and get to the wall with a crack. Use an explosive gel, but do not explode it. Then return to the ventilation. When there are two enemies at the wall, then blow up the same gel. Deal with the rest.
Use the bat claw to pull out the grate covering the hole in the ceiling. Move through this hole, use the disintegrator to disable the weapon box and deal with the two armored soldiers near it. The multi-hit technique works well here. Blow up the weapons vault to complete part of the mission.
This storage becomes available only after Harley Quinn appears in the story mission. Move to the marked place where the van is on the map, then intimidate enemies with the Batmobile or knock on the door. Chase them across the rooftops until they reach a cache at the Water Filtration Plant on Blake Island. Examine the gate where the truck passed, after which Alfred will help you to get into the tunnel.
Move forward along the path leading to the sewers. There are several armed opponents, so it will be easier to kill them with the Batmobile. Go to the room above to find the electrical box that controls the barrier below. Pull the lever, and from the table, if you wish, take the Riddler's trophy.
Get into the Batmobile and use the powerful winch to lift the heavy gate. Sneak up to enemies and use multi-hit. There are three grates at the top that you can get through. There are no armed enemies inside.
After you eliminate the guards inside, place the explosives (gel) on the weapon boxes and close the door to the vault. Blow it up a bit later. In this case, a cut-scene is activated, and you will see that Nightwing was captured by the Penguin. Travel to the Penguin's location to rescue him.
Climb to the roof and check the location. You cannot use Detective Mode here as there is interference from one of the guards. If you manage to deal with the bandit wearing a backpack, then the interference will disappear. First, climb to the observation point and deal with the sniper. After eliminating all the guards on the roof, access the fuse box to open the elevator door. Climb down until you see the bandits surrounding Nightwing.
You need to get inside and attack enemies unexpectedly. There is a hole in the wall that you can crawl through. There will be a turret in the corridor. Disable it with a jailbreak device and then destroy it. Open the ventilation grate and crawl through the shaft. Make your way through the hole. As a result, you should find yourself at a cracked wall, on the other side of which is Nightwing and the bandits.
Meeting with the Penguin at the end of the "Weapon smuggling" mission.
Blow up the wall and defeat all opponents. Next, place the explosives and close the door of the last storehouse. The penguin will take Nightwing hostage. Perform a team double hit and detonate the explosives. The last vault is blown up, so you can safely deliver the Penguin to the police department.
Mission 11. Two-faced bandit
Move to the Gotham Bank and go inside. The alarm will be on, so crawling past the bandits is completely unnecessary. While they can't see you, you can catch them off guard without attracting the attention of nearby thugs. After you destroy the first enemy wave, other opponents will appear. Just deal with them all to achieve the goal of the mission. This will unlock new challenges. The Drescher District is located on the Founders Island.
After you clear the branch in the Drescher area, you will need to move to Kingston. This is the largest bank and therefore you will have to face a lot of bandits. There will also be two transports. Use tricks, combos and your gadgets.

The two-faced bandit will try to rob all the banks of Gotham.
After the destruction of the last enemy, Two-Face will arrive at the bank, accompanied by a retinue. Use multi-hit. In detective mode, be careful as there is an elite specialist in the enemy group. Use the disintegrator to disable the weapon. This also applies to the Two-Faced Bandit, who will have a firearm in his hands.
Finally, after defeating all enemies, defeat Two-Face and take him to the police department.
Mission 12. A friend in need
This mission will become available after the Harley Quinn incident during the story chapter. Move to Wayne's Tower on Miagani Island to start the mission. Access the elevator in the underground parking lot (walk from the southeast side of the Gotham Bank), go to the computer and use the retinal scan.
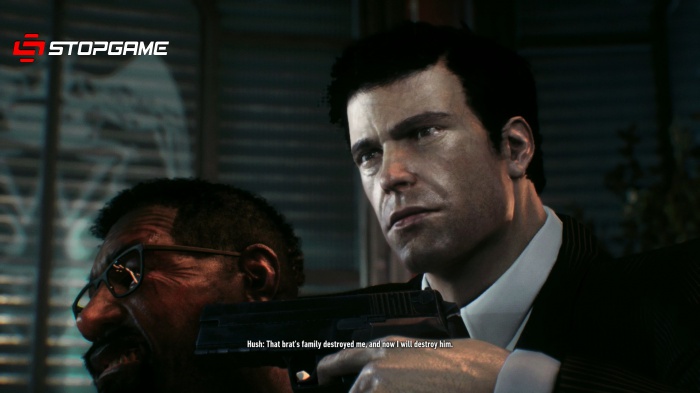
Hush took Lucius Fox hostage.
When you control the real Batman, go to the door and watch the cut-scene in which you will reveal the intruder. Follow the inside of the office to deal with it. Save Lucius by pressing the button (key) that appears on the screen. When Khash turns the weapon in your direction, then click on the button to disarm him.
Mission 13. The Sacrificial Lamb
You will receive this mission after clearing the clock tower and reestablishing contact with Barbara (Oracle). Move towards the Lady Gotham statue on the island in the city center. You will find yourself in a cage with a crazy crowd. Deal with everyone, use remote charge to shut down the generators. After that, you will need to get out of the cage.
Mission 14. Revenge of the Riddler
In Batman: Arkham Knight, Edward Enigma, known to you as the Riddler, has sold out in earnest. There are about 240 different mysteries scattered by Edward throughout Gotham. You will have to search for the Riddler's trophies, rescue victims, solve riddles and destroy various objects.
However, in order to defeat the Riddler and save Catwoman, you must complete the 10 challenges marked on your map.
P.S. 10 completed challenges will allow you to fight the Riddler and his robots for the first time. But if you want to end the villain once and for all and take him to the police department, you will have to collect ALL trophies and solve ALL the riddles scattered around Gotham.
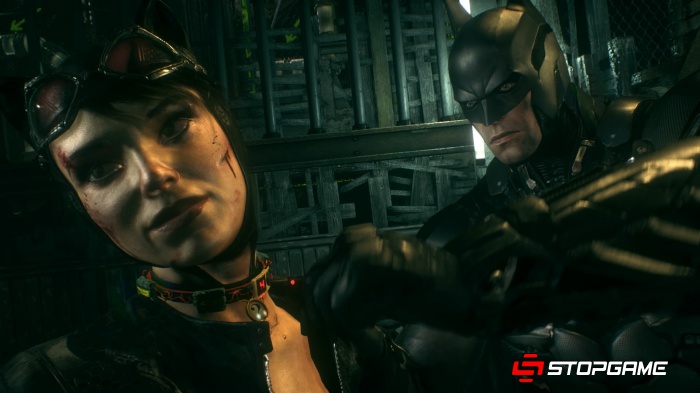
Based on the mission "Riddler's Revenge," Batman must remove the bomb necklace from Catwoman's neck.
First test
First of all, get into the Batmobile and move to the first marker. Stop by the Riddler's garage. In the basement, you have to rush in a circle and go around various obstacles. With each new circle, the number of obstacles will increase. If you do not complete the circle within the allotted time, then you will need to try again. Follow the road and press the B (circle) button to remove the Riddler's obstacles when you encounter them.
After you complete 3 laps, you will be in control of Catwoman. You need to get access by entering the correct key. While you are driving the Batmobile, you will see a green light on the wall surrounded by red lights. Same as Catwoman sees. If you are playing on normal difficulty, then the green key will be located in the fourth row and third column. In New Game + mode, look for the key in the first row and third column.
Second test
You need to follow the Ace Chemicals factory and take the bridge on the left side. A little further there will be a door with the inscription Balancing Act. Follow through it, the second trial will begin. You need to climb the frame and leave the Batmobile. Step on the switch, switch to the Batmobile and ride the balancing platform. This will allow you to activate the first block and open the way further.
For red and green platforms, an immobilizer must be used. Place yourself on the second balance platform, then use the colored blocks to get to the very end. You will need an afterburner to jump over the abyss. To activate the platform, you need to go around the elevator and use the winch on the right. Step on the gas pedal while holding the arrow in the orange zone.
For normal game mode, the key is on the last row and in the second column. For the "New Game +" mode, look for the key on the fourth line of the first column.
Third trial
Move to the Pinckney Shelter on Miagani Island for a puzzle. There will be three question marks here. Throw a controlled betarang at each of these signs. Align the circles to form a question mark. After that, stand in such a way that your reflection in the mirror becomes the point for this question mark. Scan the entire sign. Go to the Numeracy room, with Batman to the right switch, and Catwoman to the left switch. Now you need to hit the question marks in this order: 3-1-4-5-2 Batman and 1-3-5-2-4 Catwoman. The fight will begin.
Fourth trial
Follow the direction of the hospital in Bristol on Miagani Island, go through the door with the inscription Crushonator. Kill the enemies and go to the third cave. Make three laps, passing obstacles and keeping within the allotted time. At normal difficulty, the key is on the last row and in the fourth column. When passing in the "New Game +" mode, look for the key on the third line and in the last column.
Fifth trial
Move to the Kingston area on Miagani Island. Go down to the flight school garage to find the fourth cave. You need to achieve a concentration of air, which will help you get to the three platforms. It will be difficult to pass this test the first time. On normal level The difficulty key is in the fifth row and fourth column. On the "New Game +" difficulty level, look for the key on the second line and in the third column.
Sixth trial
Revisit the Pinckney Shelter on Miagani Island for a new puzzle. Go through the door labeled Physics. To solve the puzzle, you need to throw the batarang at the question mark on the left wall and step on the left switch. Next, Catwoman must step on another switch, and Batman must be moved to the third switch. After that, take out Batman. Stand with Batman on the second platform, and with Catwoman place yourself on the first platform. When the discharge passes, then go to the first site near the Cat. To get the key, you must jump as Batman to the area on the right side. Use the Catwoman to pick up the key.
Seventh trial
Continue to Otisburg on Founders Island towards the church. Go down to the garage labeled Drain Pain in the church and access the cave. You need to use a winch, and then slide down the wall to the blades. Move to the right until you see that there is a gap in the wall. Place yourself on the platform to lower the water level, and on the Batmobile follow to the second number on the right.
Shoot the winch again and go down into the water. Follow the left side until you see a hole on the weak wall, which you will destroy with a cannon shot. Leave the Batmobile and move to the opening to stand on the platform and remove the water. Return to the Batmobile and follow forward to the blades. Move along the wall and find the third number. Get down with the winch, rotate along the wall and go upstairs. Leave the Batmobile and climb into the hole. Use the pad and then destroy the turrets using the Batmobile. Place yourself on the platform at the bottom of the pit and take the key.
On normal difficulty, the key is in the third row and fourth column, and in New Game +, it is in the third row and fifth column.
Eighth trial
Stand as Batman on the trap located on the right side. Catwoman should climb to the ceiling and stand on a panel in the adjacent room. There will be a light on the board that reflects the movement. If the character stands on the correct panel, then the amount of light will increase. Move to the desired location. The dot on the question mark is the beginning of the path. Control one or the other character until you get to the panel equalizing opponents. Kill the red and blue opponents and get the key.
Ninth trial
The new cave will have the same race as before. You need to drive three circles with obstacles in the allotted time. You will need an immobilizer to remove obstacles. At normal difficulty, the key is in the second row of the fourth column. At the "New Game +" difficulty level, look for the key in the fourth line and in the last column.
Tenth trial
Go through the door of the Final Exam Shelter. Follow to the second room and inside you will see a platform of 5x5 cells. A generator is located at the end of each row of platforms. Use a device to fire an electric charge and hit the generator near an open area. This will pull the platforms in or out. You cannot stand on these platforms and must jump from the ceiling while controlling Catwoman. Standing on a platform will prevent Catwoman from moving other platforms behind her. The empty square should be where the red ray falls. This is the meaning of the riddle. When this happens, Catwoman must jump onto the ceiling to avoid the thorns.
A ray with an empty square must be lined up three times. When you do this, then go to the previous room to get the key, and then try to leave the shelter. When you try to leave, the Riddler will appear with his robots. This time, the robots randomly change color from red to blue. Batman has to attack the blue robots, and Catwoman has to attack the red ones.
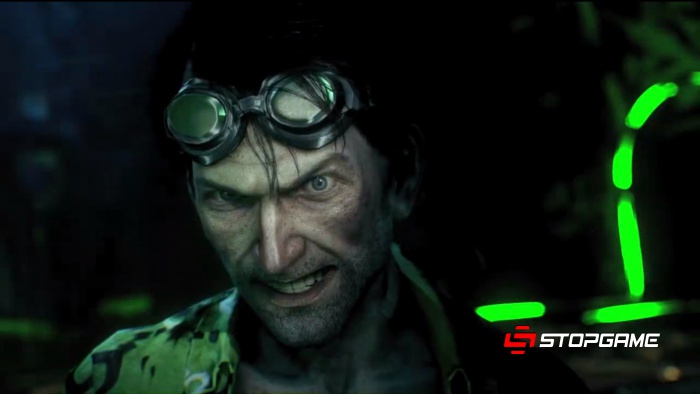
The Mad Riddler, whose name is Edward Enigma.
Destroy all robots to end the first round of the Riddler battle. The mission has not yet been completed. Collect all the Riddler trophies and solve all the Riddler puzzles posted throughout Gotham. After that, return to the shelter to fight the Riddler a second time.
Access the question mark panel and deal with the Riddler and the robots. At first, the robots will be almost all blue, but in the end you will find several red enemies. A device for shooting an electric charge will help you scare the red robots. When Catwoman is near them, switch to her and defeat the red robots.
The Riddler will hit the ground using his mechanical arm. The color of the fist indicates who can attack the Riddler. As a reminder, red is Catwoman and blue is Batman. If the fist is green, then the Riddler can be attacked by any of your characters. Continue to attack the first fist of the Riddler until you have dealt with all your HP. Next, take the Riddler to the station and complete the mission.
Batman: Arkham Knight - Wanted Side MissionsBatman: Arkham Knight has a total of 14 missions from the "Wanted" series. We offer you a description of each of these missions. One of the parts is called "Revenge of the Riddler". This is the longest and in some places tiring mission.
Mission 1. Duty calls
It is necessary to find and provide assistance to the missing rescuers of the Fire Station No. 17. It should be noted right away that the location of the firefighters is not marked on the map. You need to use the detective mode, examining locations from the hills. Take a look at the close group of people surrounding the victim. This is how it looks like every place where one of the abducted firefighters is. Pay attention to the messages on the police wave, and also listen to the conversations of the bandits.
From left to right "Wanted" villains: Penguin, Riddler (Edward Enigma), Two-Faced Bandit
We begin the passage of side missions of the game Batman: Arkham Knight.
Blake Island
This is the very first firefighter you will need to rescue the moment the mission becomes available. Follow the marker that will lead you to Panessa Studios. The firefighter is inside the building, under the crane. You can use Batman's hook to climb onto the crane, and then attack opponents from the air, breaking the glass on the roof of the building. Defeat all bandits and free the fireman.
Below we suggest you familiarize yourself with the locations of the remaining firefighters on Blake Island:
1. Described above.
2. Northwest corner of Chinatown, in a side street.
3. Chinatown, the back of a building located northwest of the police station.
4. Chinatown, the center of the area.
5. North-eastern part of Falcone Shipping Antenna courtyard.
6. At the top of the crane.
Batman Walkthrough: Arkham Knight - Wanted side missions
Location of all kidnapped firefighters on Blake Island.
Move to these locations, enter the detective mode and you can easily find each of the kidnapped firefighters.
Miagani Island
Below is the location of each of the abducted firefighters and displaced to Miagani Island:
1. Under the bridge connecting the islands of Blake and Miagani (enemies will be armed with firearms).
2. Not far from Grand Avenue, on the upper ledges of the Gotham Herald building. You need to get to the vantage point in the upper right to see the bandits and the fireman.
3. Grand Avenue station, surrounded by turrets. There is no ventilation shaft or sewer ditch to help you deal with the bandits one at a time. You must fight "in the open", but at the same time be in the blind sight of the turret. The bandits won't have weapons. Use smoke bombs to disorient enemies while you deal with the turrets. The turret in the center is especially dangerous. The task will become much easier if your jailbreak device is improved. So you can temporarily disable the optics of the turrets, which will help you get closer to them and destroy them.
4. Southeast corner of Wayne's Tower.
Batman: Arkham Knight Walkthrough - Wanted Side Missions
Location of all kidnapped firefighters on Miagani Island.
Founders Island
The following is the location of each of the abducted firefighters and displaced Founders:
1. Building in the center of Port Adams.
2. Urbarail Station in Riker Heights. There are three thugs and a cache from where they get their weapons. First of all, using the disintegrator, disable their weapons.
3. On a hill northwest of Wayne International Plaza. There is also a cache nearby. First, deal with the cache, and then defeat the bandits.
4. Lighthouse to the northeast of the airships. Detective Mode cannot be activated in this area. There is a sniper at the lighthouse. First, kill the sniper, and then deal with the rest of the opponents.
5. The last firefighter is harder to find than the rest. First, you must find the Killinger Dept Store. There will be a wall in front of him, which can be moved using the Batmobile drive. The exact location is shown in the screenshot below. Take an advantageous position and deal with two armed bandits. If you have improved your multi-hit technique, you will be able to cope with at least five opponents at a time.
Batman: Arkham Knight Walkthrough - Wanted Side Missions
Location of all kidnapped firefighters on Founders Island.
After rescuing the last firefighter, you will need to rescue their boss. Its location will be marked on the map. Move to the indicated location - Cityvision Construction. The location will be filled with bandits, but you have freedom of action. When you have dealt with all the enemies, then find the chief of the fire station and free him. Next, go with him to the police department to close the case and complete the mission.
Mission 2. Perfect crime
Immediately shortly after taking on the side mission, you will find the first victim. Go to the Trade Bridge and examine the body. After analyzing the victim's blood, you must use a special scanner. Scan the victim's skin, hold the button to get evidence. Switch the scanner to "Muscle" mode and check the victim's small intestine to find the ring. Scan again.
Finally, switch the scanner to Bones mode and check the victim's left thigh. The crime scene will be completed. As soon as you unlock the next area of Gotham, a new part of the mission will become available.
One of the bodies is at the top of the Gotham Herald, on the roof just below the tower. Use the scanner to find abrasions or other evidence on the victim's body:
"Skin" mode: a scar on the left hand;
Muscle mode: left side of the chest;
Bone mode: deformed bones on the left knee.
The third victim is located on the roof of the Heavenly building on Miagani Island. Use the scanner to find abrasions or other evidence on the victim's body:
"Skin" mode: a mole on the chest;
"Muscle" mode: a bullet in the right bicep;
Bone mode: missing toes on the left foot.
You can find the fourth victim after helping Poison Ivy with her plant, which helped to neutralize the Scarecrow's toxins. The victim is on top of a small building northeast of the orphanage, where there is still a railroad. Use the scanner to find abrasions or other evidence on the victim's body:
"Skin" mode: a bite scar on the victim's left side;
"Muscle" mode: prosthesis instead of the right eye;
Bone mode: fracture of the right arm.
The fifth dead body is in the lower streets southeast of Stagg's second airship. Use the scanner to find abrasions or other evidence on the victim's body:
"Skin" mode: chemical burn on the left thigh;
"Muscle" mode: voice box on the throat;
Bone mode: the sixth finger on the left hand (WTF?).
The last corpse can be found on the wall near the springboard, not far from the church. Use the scanner to find abrasions or other evidence on the victim's body:
Skin mode: a wound from a removed tattoo on the right thigh;
Muscle mode: removed right kidney;
Bone mode: a tantalum plate on the victim's skull.
Batman: Arkham Knight Walkthrough - Wanted Side Missions
Location of all corpses from the mission "Perfect Crime".
After examining the last body, Alfred will tell you the location of the killer. Move to the Pretty Dolls salon marked on your map. Go inside (there will also be a Riddler trophy inside). Get under the floor through the grate and blow up the cracked wall with the gel.
Back out and go through the front door to the operating room. Keep moving forward and you will find the killer red-handed. Come closer and watch the cut-scene. You need to leave the assassin's minions on the ground as long as possible, since they do not feel pain. Use combo attacks. When Pig calls all his henchmen, he will stand at his "workplace". Approach him, and he will run back to the corner. When you have dealt with all the enemies, and the last enemy must be defeated with a special technique, go to Pig and destroy his workplace.
After beating Pig, break the electrical box nearby to free the people trapped in the cage. Talk to them, escort Pig to the Batmobile and go to the police department.
Mission 3. Disarmament
This mission is entirely dedicated to road safety in Gotham. The bandits have planted bombs at some points and you need to defuse them.
The mission becomes available almost from the very beginning of the "City of Fear" storyline. At the same time, it is not possible to go through it immediately from beginning to end. To find all the bombs, you will at least need to get access to all the islands of Gotham. As always, carefully examine the locations using the detective mode.
At a certain point during the main story mission, Alfred will direct Batman to a checkpoint where he will need to dismantle the bomb. In order to disable the bomb, you need to look at a large red object. Put the Batmobile into combat mode and use the powerful drive (winch).
Exact location of all bombs
Below are the coordinates of all the points where the bombs are located:
Bomb # 1: visited during the main plot - X: 2105 and Y: 2920;
bomb # 2: Blake Island - X: 1790 and Y: 2420;
bomb # 3: Blake Island - X: 1920 and Y: 2680;
bomb # 4: Blake Island - X: 2370 and Y: 2910;
Bomb # 5: Founders Island - X: 2150 and Y: 1915;
bomb # 6: Founders Island - X: 2050 and Y: 1570;
bomb # 7: Founders Island - X: 2270 and Y: 1540;
bomb # 8: Founders Island - X: 2745 and Y: 1739;
bomb # 9: Founders Island - X: 2939 and Y: 1449;
bomb # 10: Miagani Island - X: 3269 and Y: 2109;
bomb # 11: Miagani Island - X: 2999 and Y: 2299;
bomb # 12: Miagani Island - X: 2899 and Y: 2729;
bomb # 13: Miagani Island - X: 3049 and Y: 2919;
bomb # 14: Miagani Island - X: 3159 and Y: 2729.
Mission 4. Kings of the roads
The first checkpoints of the Arkham Knight soldiers are located on Founders Island. Checkpoints are usually set on walls, around which there are several guards. The barrier around the checkpoint (checkpoints) cannot be destroyed, even with the Batmobile's cannons. You must get over and destroy all the guards. After winning, find the commander using the detective mode. Then destroy the checkpoint to remove the barricade.
Founders Island
1. Located west of the Doom Bridge.
2. Located west of the Repentance Bridge.
3. Located in the coastal strip between the "Repentance" and "Salvation" bridges. There are fewer guards here, but there are two thugs with weapons and two with shock batons.
4. This checkpoint is located south of the Doom (Damnation) Bridge, in the eastern part of the Founders Island. There are two armed soldiers here. Use the disintegrator to disable their weapons, then go down to the ground.
5. This checkpoint is located inside the campound building. Use the Batmobile winch to pull the gate northwest of the checkpoint. Deal with the turrets and guards using the battle mode of the Batmobile.
6. Checkpoint becomes available after colliding with Harley Quinn in the story mission. There are several sentry drones. It's good if you have an improved disintegrator that will help destroy the drone.
7. On the top landing. Use the Batmobile for increased firepower.
8. The checkpoint is located at the crossroads near the church.
9. Checkpoint will become available only after you save Barbara (Oracle) and get the second Batmobile. This is on one of the buildings on a construction site in the middle of the northern part of the island. There is an unmanned drone inside. Try to take control of the drone and deal with opponents. You can also use the ventilation shaft and attack enemies with a multi-hit. There is a switch nearby that will open the gate for the Batmobile.
Batman: Arkham Knight Walkthrough - Wanted Side Missions
Location of all militia checkpoints on Blake Island.
Miagani Island
1. Checkpoint is located near Elliott Hospital.
2. Checkpoint is located at Urbarail Station in Bristol, east of the Salvation Bridge. You can use the Batmobile to kill the militias at the outpost.
3. Checkpoint will be available after the Harley Quinn incident as you progress through the story missions. It is located near a building previously used by the Penguin as a weapons cache. Nearby, you still destroyed the watchtower in the previous mission "Occupation of Gotham".
4. The checkpoint will be available after the Harley Quinn incident as you progress through the story missions. It is located inside the Ranelagh Ferry Terminal. There are several drones that can be blinded using a remote hacking device. Place explosives on the lower balcony of the station and lure enemies there. You need to lure the outpost commander, after which you can get his controller. Please note that the drones will not deactivate after this, so leave the area to avoid being shot.
5. The checkpoint will be available after the Harley Quinn incident as you progress through the story missions. It is located in front of the theater.
6. The outpost is located near the Gotham Globe building.
7. This outpost (checkpoint) will be available after you save Barbara (Oracle) and get the second Batmobile. Located in the botanical garden. Use the Batmobile, drive over the ledges and fly your car straight to the outpost.
8. On the top level of Elliott Hospital. You can use the Batmobile using the adjacent aisle.
Batman: Arkham Knight Walkthrough - Wanted Side Missions
Location of all militia checkpoints on Miagani Island.
We continue to go through the side Arkham missions Knight.
Blake Island
1. This checkpoint will be available after you save Barbara (Oracle) and get a new Batmobile. After you destroy another outpost, Deathstroke will call you.
2. Checkpoint is located in Chinatown. There are turrets (near the entrance) and infantrymen. From above, you can perform a multi-hit. When fighting on the ground, avoid the sight of the turret.
3. This checkpoint is located near the Scarecrow hideout in Chinatown. There are turrets and one bandit. Blind one of the turrets, then disable the other when it turns to the side.
4. Near the "Doom" (Curse) bridge. Defeat the guards outside, or simply use your burglar device to pry open the switch near the door. There will be a commander inside the building. Go through the side door and multi-hit while on the ledge.
5. The checkpoint is located near the clock tower. There are two drone drones here, but they shouldn't be a problem for you if you've upgraded your disintegrator. Use it to make drones self-destruct. Exploding drones will cause serious damage to ordinary soldiers.
Batman: Arkham Knight Walkthrough - Wanted Side Missions
Location of all militia checkpoints on Founders Island.
Mission 5. Occupation of Gotham
This mission will become available as soon as you get to the Island of the Founders. You must neutralize the militia towers on the rooftops of buildings in each of the districts of Gotham. First you need to deal with all the guards, and then apply the explosive gel to the terminal attached to the buildings. Finally, don't forget to blow up the gel.
Miagani Island
1. Look on the roof of a building near Heavenly. Destroy the guards outside the sight of a turret installed on another building.
2. On the roof of the hospital. There are several guards and two terminals. One of the terminals will be unguarded. Destroy it first so that some of the turrets are out of order. Look around the site and see two thugs and bandits with shock batons.
3. On the wing connecting the two buildings at the intersection of Grand Avenue. There are no guards, only turrets. Disable the towers first.
4. Near the Mainland Bridge, northeast of Wayne's Tower. There are two terminals that you need to destroy. One of them is on the roof, not guarded. This terminal is responsible for the functioning of the turrets on the walls. There are few guards around the two towers farther from the others, so start from there.
5. North-east of the orphanage, on the river bank.
6. The terminal will be available after meeting Harley Quinn in story missions. The terminal is located on the bank of Gotham.
7. The terminal will be available after meeting with Harley Quinn in story missions. The terminal is located on top of a building previously used by the Penguin as a weapons cache. The checkpoint is almost nearby.
8. The terminal will be accessible after repelling the attack on the police department. It is located under the tower near the botanical garden. Guarded by one drone and several bandits.
Batman: Arkham Knight Walkthrough - Wanted Side Missions
The location of all militia watchtowers on Miagani Island.
Founders Island
1. On the roof of the building near the church and the bridge.
2. Not far from the "Damnation" (Doom) Bridge and Riker Heights.
3. On a building northeast of Port Adams and northwest of the Salvation Bridge. Use the jailbreak device to load the security codes into the drone, and then use it to destroy the security of the facility.
4. The terminal is located south of Wayne International Plaza, which is also close to the airships. Disable weapon caches using a disintegrator so the guards cannot arm themselves.
5. Watchtower north of Port Adams. There will be a burning Otisburg fire station right next to the terminal.
6. The terminal will be available after meeting Harley Quinn in story missions. It is located at the top of the building in the center of the construction site. This location is unprotected, so it will be quite easy to destroy the watchtower.
7. The terminal will be accessible after repelling the attack on the police department. It is located on top of a building under construction.
Batman: Arkham Knight Walkthrough - Wanted Side Missions
The location of all militia watchtowers on Founders Island.
Blake Island
1. The only way to get to the terminal is to smash the window with your feet. Plan on a cloak and deal with two enemies, then destroy the watchtower without any problems.
2. This watchtower is located near the docks, north of the Repentance Bridge on Founders Island. The console is located at ground level. There are no ventilation holes here, so it is almost impossible to deal with opponents without making a noise.
3. This watchtower becomes available after Harley Quinn appears in the story. Tucked away on a train in Chinatown. There will be two drones and several militias nearby.
4. Becomes available after repelling an attack on the police department in the story of the game. Located northeast of the police headquarters.
5. Becomes accessible only after repelling the attack on the police department and is located immediately north of the police department. There will be a turret at the top, which complicates the task. Use the Batmobile to destroy all the soldiers.
Batman: Arkham Knight Walkthrough - Wanted Side Missions
The location of all militia watchtowers on Blake Island.
Battle with Deathstroke
When you have completed the last three missions (Disarmament, Kings Riders, Occupation of Gotham), you will be able to fight Deathstroke. This will not happen before you throw down the Arkham Knight's "Heavy Rain" tank. After that, the command of the army will take over Deathstroke.
Batman: Arkham Knight Walkthrough - Wanted Side Missions
Battle with Deathstroke.
So, provided that you have completed the last three tasks, the battle with Deathstroke will begin. Focus on the Cobra drones first. When all five "Cobras" are destroyed, then start dealing with Deathstroke himself. Maintain your distance while avoiding its homing missiles and then direct your energy shot and your missiles at it. When Deathstroke is defeated, the mission will end.
Mission 6. Gotham is on fire
The mission will become available after the story chapter, where you will follow in the footsteps of the car of the Arkham Knight's companions, in which the kidnapped Barbara (Oracle) was taken away. You will find yourself at the crash site and pick up the scrambler thrown out by Barbara. Move to the fire station and use the batmobile winch to activate the fire extinguishing systems.
Firefly will fly out of the flames. Pursue him. Dodge the walls of flame that the Firefly will leave behind on the ground. Chase until Firefly runs out of fuel. Catch him in the air.
As the game progresses, you will receive a lot of additional information about the latest "achievements" of the Firefly. Move to the next burning fire station and repeat the process of capturing the Firefly. The last fire station to be set on fire by the villain is in Otisburg, on the island of the Founders. You will have to come here on a Batmobile, so you will be able to complete the final stage of the additional mission only after the destruction of the rocket launcher, which will be in the main plot of the game. As before, chase the Firefly until his fuel supply runs out. Catch and beat him. Take him to the police station and complete the mission.
Mission 7. Heir to the Knight
The mission will become available after the story chapter, where you will follow in the footsteps of the car of the Arkham Knight's companions, in which the kidnapped Barbara (Oracle) was taken away. You will find yourself at the crash site and pick up the scrambler thrown out by Barbara. Follow the roof to see the flaming bat symbol. Talk to Azrael and you will control him in the battle against a crowd of bandits. Complete the challenge successfully without getting injured to prove Azrael is worthy.
Azrael's next location is Founders Island, north of Port Adams. As before, you need to defeat all enemies without taking damage. Use the same combos and skills as Batman himself. Deal with small opponents, and then defeat the brute.
Azrael's next location is Chinatown. In this challenge, you will have to face the medic and other rebels. Avoid touching electrified enemies. Use the Batclaw to disable them. Deal with the medic as quickly as possible.
Batman: Arkham Knight Walkthrough - Wanted Side Missions
Azrael.
The next part of the mission will become available only after Harley Quinn appears in the story. Move to the Lady of Gotham statue on the small island in the center of the entire map and climb to the top to see the bat symbol. To pass this test, you need to deal with the Arkham Knight fighters.
According to the next part of the mission, you need to return to the clock tower and use the bat-computer to analyze the unusual brain activity of Azrael. After playing with Azrael's memory, rewind the footage and examine the details with strange symbols to complete and reconstruct the real message.
Azrael will appear inside the clock tower, and you will be able to control him. You will need to get the sword on top of the cabinet. Make a choice: either try to kill Batman or throw away the sword. In the second case, break the sword and leave the clock tower in the elevator to complete the mission.
Mission 8. Night flyer
You can encounter this creature on the rooftops of Miagani Island. Catch up with this monster in the air. It is difficult to notice, and even more difficult to catch up. The creature sometimes makes sounds, which will help you determine its approximate location, as well as the direction in which it is moving. Just catch up with the flying creature and get a sample of its blood.
Next, head to Chinatown to find Dr. Langstrom's laboratory. It is located in a side street. Go there and take the elevator down. Enter the laboratory and examine the lying body. Get access to a computer nearby, on which you will have to find (create) an antidote. Rotate the DNA strand to restore it to the end. Incorrect tension will reduce chain integrity. After you have a clean DNA sample in front of you, you will complete part of the mission.
Batman: Arkham Knight Walkthrough - Wanted Side Missions
Batman".
Go to Blake Island, move to the rooftops in search of the bat. You can activate the detective mode, which will help you recognize the desired creature. As you find a creature, then follow him and get closer as possible to introduce the antidote. However, the dose of the antidote appears to be insufficient. Wait until you learn new information about the location of the flying creature.
At the end, the Nightflyer will hover in the skies over Founders Island. He will definitely appear after completing a story mission with Harley Quinn. Catch him up again and inject the medicine. Deliver the creature to the police headquarters to complete the mission.
Mission 9. Armored and very dangerous
You will receive this mission after installing the second upgrade on the Batmobile after the main story mission on Miagani Island in the tunnels. The areas will be patrolled by Arkham Knight armored personnel carriers. They may have drones with them. After destroying an armored vehicle, you will have to wait until another appears. Check the mission screen from time to time.
For the destruction of each armored vehicle, you will earn "tech-points" to upgrade. Please note that armored vehicles will be escorted. You need to dodge the homing missiles. With each new stage, armored vehicles will be strengthened.
To find armored vehicles on the Founders Island, you will first need to destroy the rocket launcher.
Mission 10. Weapon smuggling
According to the plot of the mission, you need to find and destroy all the caches with weapons of the old rascal Penguin. Nightwing will provide you with data on all the Penguin's weapon vans. Go to this place, track the van and intimidate the bandits. When they try to pull away from you, then climb onto the roof and watch the van. Hold on to them until they get to Zionis Industries near Falcone Shipping Antenna on Blake Island.
Enter the building through the side door and hack the console on the wall on the other side. Use a remote hacking device to open the main gate. Switch to the Batmobile and take out all the turrets. Find a grate that you can climb higher, use the switch to open a passage to the roof.
Move to the roof and break the windows. After you go down below, you will defeat the thugs along with Nightwing. Apply explosive gel to the weapon crates inside the vault, then detonate it.
The second storage with weapons will be available after you destroy the rocket launcher based on the story mission on airships, on the island of the Founders. Move to the place where the van is and start attacking it. Knock on the truck or call the Batmobile to scare enemies. Follow them along the rooftops until they lead you to one of the Penguin's weapon caches.
Deal with the guards outside the building and go through the door. Enter the ventilation nearby and get to the wall with a crack. Use an explosive gel, but do not explode it. Then return to the ventilation. When there are two enemies at the wall, then blow up the same gel. Deal with the rest.
Use the bat claw to pull out the grate covering the hole in the ceiling. Move through this hole, use the disintegrator to disable the weapon box and deal with the two armored soldiers near it. The multi-hit technique works well here. Blow up the weapons vault to complete part of the mission.
This storage becomes available only after Harley Quinn appears in the story mission. Move to the marked place where the van is on the map, then intimidate enemies with the Batmobile or knock on the door. Chase them across the rooftops until they reach a cache at the Water Filtration Plant on Blake Island. Examine the gate where the truck passed, after which Alfred will help you to get into the tunnel.
Move forward along the path leading to the sewers. There are several armed opponents, so it will be easier to kill them with the Batmobile. Go to the room above to find the electrical box that controls the barrier below. Pull the lever, and from the table, if you wish, take the Riddler's trophy.
Get into the Batmobile and use the powerful winch to lift the heavy gate. Sneak up to enemies and use multi-hit. There are three grates at the top that you can get through. There are no armed enemies inside.
After you eliminate the guards inside, place the explosives (gel) on the weapon boxes and close the door to the vault. Blow it up a bit later. In this case, a cut-scene is activated, and you will see that Nightwing was captured by the Penguin. Travel to the Penguin's location to rescue him.
Climb to the roof and check the location. You cannot use Detective Mode here as there is interference from one of the guards. If you manage to deal with the bandit wearing a backpack, then the interference will disappear. First, climb to the observation point and deal with the sniper. After eliminating all the guards on the roof, access the fuse box to open the elevator door. Climb down until you see the bandits surrounding Nightwing.
You need to get inside and attack enemies unexpectedly. There is a hole in the wall that you can crawl through. There will be a turret in the corridor. Disable it with a jailbreak device and then destroy it. Open the ventilation grate and crawl through the shaft. Make your way through the hole. As a result, you should find yourself at a cracked wall, on the other side of which is Nightwing and the bandits.
Batman: Arkham Knight Walkthrough - Wanted Side Missions
Meeting with the Penguin at the end of the "Weapon smuggling" mission.
Blow up the wall and defeat all opponents. Next, place the explosives and close the door of the last storehouse. The penguin will take Nightwing hostage. Perform a team double hit and detonate the explosives. The last vault is blown up, so you can safely deliver the Penguin to the police department.
Mission 11. Two-faced bandit
Move to the Gotham Bank and go inside. The alarm will be on, so crawling past the bandits is completely unnecessary. While they can't see you, you can catch them off guard without attracting the attention of nearby thugs. After you destroy the first enemy wave, other opponents will appear. Just deal with them all to achieve the goal of the mission. This will unlock new challenges. The Drescher District is located on the Founders Island.
After you clear the branch in the Drescher area, you will need to move to Kingston. This is the largest bank and therefore you will have to face a lot of bandits. There will also be two transports. Use tricks, combos and your gadgets.
Batman: Arkham Knight Walkthrough - Wanted Side Missions
The two-faced bandit will try to rob all the banks of Gotham.
After the destruction of the last enemy, Two-Face will arrive at the bank, accompanied by a retinue. Use multi-hit. In detective mode, be careful as there is an elite specialist in the enemy group. Use the disintegrator to disable the weapon. This also applies to the Two-Faced Bandit, who will have a firearm in his hands.
Finally, after defeating all enemies, defeat Two-Face and take him to the police department.
Mission 12. A friend in need
This mission will become available after the Harley Quinn incident during the story chapter. Move to Wayne's Tower on Miagani Island to start the mission. Access the elevator in the underground parking lot (walk from the southeast side of the Gotham Bank), go to the computer and use the retinal scan.
Batman: Arkham Knight Walkthrough - Wanted Side Missions
Hush took Lucius Fox hostage.
When you control the real Batman, go to the door and watch the cut-scene in which you will reveal the intruder. Follow the inside of the office to deal with it. Save Lucius by pressing the button (key) that appears on the screen. When Khash turns the weapon in your direction, then click on the button to disarm him.
Mission 13. The Sacrificial Lamb
You will receive this mission after clearing the clock tower and reestablishing contact with Barbara (Oracle). Move towards the Lady Gotham statue on the island in the city center. You will find yourself in a cage with a crazy crowd. Deal with everyone, use remote charge to shut down the generators. After that, you will need to get out of the cage.
Mission 14. Revenge of the Riddler
In Batman: Arkham Knight, Edward Enigma, known to you as the Riddler, has sold out in earnest. There are about 240 different mysteries scattered throughout Gotham by Edward. You will have to search for the Riddler's trophies, rescue victims, solve riddles and destroy various objects.
However, in order to defeat the Riddler and save Catwoman, you must complete the 10 challenges marked on your map.
P.S. 10 completed challenges will allow you to fight the Riddler and his robots for the first time. But if you want to end the villain once and for all and take him to the police department, you will have to collect ALL trophies and solve ALL the riddles scattered around Gotham.
Batman: Arkham Knight Walkthrough - Wanted Side Missions
Based on the mission "Riddler's Revenge," Batman must remove the bomb necklace from Catwoman's neck.
First test
First of all, get into the Batmobile and move to the first marker. Stop by the Riddler's garage. In the basement, you have to rush in a circle and go around various obstacles. With each new circle, the number of obstacles will increase. If you do not complete the circle within the allotted time, then you will need to try again. Follow the road and press the B (circle) button to remove the Riddler's obstacles when you encounter them.
After you complete 3 laps, you will be in control of Catwoman. You need to get access by entering the correct key. While you are driving the Batmobile, you will see a green light on the wall surrounded by red lights. Same as Catwoman sees. If you are playing on normal difficulty, then the green key will be located in the fourth row and third column. In New Game + mode, look for the key in the first row and third column.
Second test
You need to follow the Ace Chemicals factory and take the bridge on the left side. A little further there will be a door with the inscription Balancing Act. Follow through it, the second trial will begin. You need to climb the frame and leave the Batmobile. Step on the switch, switch to the Batmobile and ride the balancing platform. This will allow you to activate the first block and open the way further.
For red and green platforms, an immobilizer must be used. Place yourself on the second balance platform, then use the colored blocks to get to the very end. You will need an afterburner to jump over the abyss. To activate the platform, you need to go around the elevator and use the winch on the right. Step on the gas pedal while holding the arrow in the orange zone.
For normal game mode, the key is on the last row and in the second column. For the "New Game +" mode, look for the key on the fourth line of the first column.
Third trial
Move to the Pinckney Shelter on Miagani Island for a puzzle. There will be three question marks here. Throw a controlled betarang at each of these signs. Align the circles to form a question mark. After that, stand in such a way that your reflection in the mirror becomes the point for this question mark. Scan the entire sign. Go to the Numeracy room, with Batman to the right switch, and Catwoman to the left switch. Now you need to hit the question marks in this order: 3-1-4-5-2 Batman and 1-3-5-2-4 Catwoman. The fight will begin.
Fourth trial
Follow the direction of the hospital in Bristol on Miagani Island, go through the door with the inscription Crushonator. Kill the enemies and go to the third cave. Make three laps, passing obstacles and keeping within the allotted time. At normal difficulty, the key is on the last row and in the fourth column. When passing in the "New Game +" mode, look for the key on the third line and in the last column.
Fifth trial
Move to the Kingston area on Miagani Island. Go down to the flight school garage to find the fourth cave. You need to achieve a concentration of air, which will help you get to the three platforms. It will be difficult to pass this test the first time. At normal difficulty, the key is in the fifth row and fourth column. On the "New Game +" difficulty level, look for the key on the second line and in the third column.
Sixth trial
Revisit the Pinckney Shelter on Miagani Island for a new puzzle. Go through the door labeled Physics. To solve the puzzle, you need to throw the batarang at the question mark on the left wall and step on the left switch. Next, Catwoman must step on another switch, and Batman must be moved to the third switch. After that, take out Batman. Stand with Batman on the second platform, and with Catwoman place yourself on the first platform. When the discharge passes, then go to the first site near the Cat. To get the key, you must jump as Batman to the area on the right side. Use the Catwoman to pick up the key.
Seventh trial
Continue to Otisburg on Founders Island towards the church. Go down to the garage labeled Drain Pain in the church and access the cave. You need to use a winch, and then slide down the wall to the blades. Move to the right until you see that there is a gap in the wall. Place yourself on the platform to lower the water level, and on the Batmobile follow to the second number on the right.
Shoot the winch again and go down into the water. Follow the left side until you see a hole on the weak wall, which you will destroy with a cannon shot. Leave the Batmobile and move to the opening to stand on the platform and remove the water. Return to the Batmobile and follow forward to the blades. Move along the wall and find the third number. Get down with the winch, rotate along the wall and go upstairs. Leave the Batmobile and climb into the hole. Use the pad and then destroy the turrets using the Batmobile. Place yourself on the platform at the bottom of the pit and take the key.
On normal difficulty, the key is in the third row and fourth column, and in New Game +, it is in the third row and fifth column.
Eighth trial
Stand as Batman on the trap located on the right side. Catwoman should climb to the ceiling and stand on a panel in the adjacent room. There will be a light on the board that reflects the movement. If the character stands on the correct panel, then the amount of light will increase. Move to the desired location. The dot on the question mark is the beginning of the path. Control one or the other character until you get to the panel equalizing opponents. Kill the red and blue opponents and get the key.
Ninth trial
The new cave will have the same race as before. You need to drive three circles with obstacles in the allotted time. You will need an immobilizer to remove obstacles. At normal difficulty, the key is in the second row of the fourth column. At the "New Game +" difficulty level, look for the key in the fourth line and in the last column.
Tenth trial
Go through the door of the Final Exam Shelter. Follow to the second room and inside you will see a platform of 5x5 cells. A generator is located at the end of each row of platforms. Use a device to fire an electric charge and hit the generator near an open area. This will pull the platforms in or out. You cannot stand on these platforms and must jump from the ceiling while controlling Catwoman. Standing on a platform will prevent Catwoman from moving other platforms behind her. The empty square should be where the red ray falls. This is the meaning of the riddle. When this happens, Catwoman must jump onto the ceiling to avoid the thorns.
A ray with an empty square must be lined up three times. When you do this, then go to the previous room to get the key, and then try to leave the shelter. When you try to leave, the Riddler will appear with his robots. This time, the robots randomly change color from red to blue. Batman has to attack the blue robots, and Catwoman has to attack the red ones.
Batman: Arkham Knight Walkthrough - Wanted Side Missions
The Mad Riddler, whose name is Edward Enigma.
Destroy all robots to end the first round of the Riddler battle. The mission has not yet been completed. Collect all the Riddler trophies and solve all the Riddler puzzles posted throughout Gotham. After that, return to the shelter to fight the Riddler a second time.
Access the question mark panel and deal with the Riddler and the robots. At first, the robots will be almost all blue, but in the end you will find several red enemies. A device for shooting an electric charge will help you scare the red robots. When Catwoman is near them, switch to her and defeat the red robots.
We finish the passage of side Batman missions Arkham Knight.
The Riddler will hit the ground using his mechanical arm. The color of the fist indicates who can attack the Riddler. As a reminder, red is Catwoman and blue is Batman. If the fist is green, then the Riddler can be attacked by any of your characters. Continue to attack the first fist of the Riddler until you have dealt with all your HP. Next, take the Riddler to the station and complete the mission.
It will be useful for both players and those who are just going to play
Target:
Meet with Commissioner Gordon at the Bat Signal
You are now playing as Batman. Your first task is to meet with Commissioner Gordon on the roof of the police station. Jump off the building and soar through the air to your destination. Use the bat claw periodically. At the top of the screen there is a kind of radar, on which your destination point, where the meeting will take place, is indicated by a green square.
After you reach your destination, Gordon will tell you about the current situation, about your main enemy - the Scarecrow, and also inform you of the following objectives.
Target:
Rescue the missing officer
Received the Oracle biography
It's time to get familiar with the basics of Batmobile driving. The training system will tell you about all this.
Target:
Interrogate the driver of the military vehicle for information about the Scarecrow
In pursuit of a war machine, you need to look at it for a certain period of time in order to lock onto the target. After that, press the key to release the rockets. You need to hit three times for the car to fail. Leave the Batmobile, go to the wrecked military vehicle and interrogate the driver crawling on the ground.
Target:
Explore the Scarecrow's hideout
When you drive the Batmobile, arrows will appear on the road, indicating the direction of travel. Climb onto the roof of a building in Chinatown, glide downward by breaking glass. Defeat all thugs. By pressing the indicated keys, you will carry out various combos and get more points for them. In addition, you can learn techniques that will help you in the future in battles with more serious opponents.
After talking to Poison Ivy, go into the gadgets and select the Batmobile remote control. Destroy several enemy vehicles, then place yourself on the indicated area, near Batman. Acquired Poison Ivy Biography
Target:
Run combat mode weapon energy system diagnostics
Move to the checkpoint, start the test. Destroy enemy vehicles with simple weapons, then launch a rocket at them. In the second stage of the test, continue to detonate the cars to fill both scales. After that, select targets and launch missiles at them. The desired key is indicated on the screen.
In the third stage, reload the energy weapon and shoot at four targets. By the way, if you get hit by enemies, then the charge of the weapon will subside and you will have to re-kill a certain number of cars. The simulation will be completed.
Waintech Screen
On the WayneTech screen, you can see a list of available moves or the WayneTech upgrade points earned. Complete missions from the "Especially Dangerous" category or gain experience points to upgrade your Batsuit, Batmobile and get additional skills. Tip: the most experience points are awarded for capturing the supervillains terrorizing Gotham.
You can open the skill tree and study it yourself. Choose for yourself which improvement will be better.
Target:
Destroy the group of unmanned tanks occupying Panessa Studios
Move to the indicated point, destroy a huge group of unmanned tanks using newly learned techniques. Use the jet engines of the Batmobile to avoid gunfire.
Target:
Deliver Poison ivy to the punishment cell
From now on, challenges are available to you.
Use the Tests section to set a marker for any available test. As soon as challenges become available, they will automatically be added to this section. You can also see the requirements for unlocking unavailable challenges here.
Go down to the lower levels of the police department and stop at the indicated place.
When Ivy is behind bars, you can examine the police station, listen to the conversations. Next, go to Commissioner Gordon and listen to information on the current state of affairs.
Once the cut-scene is over, you will have access to the mission selection screen. Explore the missions that are currently available to you:
Duty Calls / Riddler's Revenge / City of Fear
When choosing a mission, its marker will be set on the map. At any time, you can choose another mission, thereby changing the marker. We continue the story missions, and at the end of the passage we will return to the additional tasks.
Target:
Meet the Oracle at the Clock Tower
After choosing a mission, go through the gate, and then - past the prison cells through the door. You can talk to Jack Ryder in the interrogation room on the left side. This will allow you to get a biography of Jack Ryder.
Now your Batmobile moves even faster. Yes, the car is moving faster, but keep in mind that its handling has decreased. Move to the clock tower and climb to the roof. After you get to the marker on the map, you can enter the clock tower through the secret entrance on the roof. Once inside, go to detective mode, use the retinal scan on the statue that is on the shelf. This will help you get into the hideout. Go to the computer in the center of the room and watch the cut-scene.
Target:
Clarify the location of the Scarecrow using the Panessa Studios antenna
Power up the PanessaStudio antenna using the Batmobile's drive winch.
Exit back to the roof and move to the next marker on the map. Go to the door and attach the remote access device. After the next cutscene, drive to another point on the map and park the Batmobile at the indicated location. This will allow you to attach a drive winch to your vehicle.
Enter combat mode, fire the winch and hold the backward key. Thus, you will demolish the structure in front of you. Use acceleration to get to the other side, and then look to the right. Shoot the winch and pull the roof behind you to create a ladder.
Use acceleration again to jump forward. While moving on the roof, stay in combat mode. Be careful as you can fall off the roof if you move too slowly. If you do fall down, just follow the blue arrows back to where you first used the winch. The turns are quite difficult here, so there is no need to rush.
When you get to the platform on the opposite side of the roof, use the Batmobile's drive winch again. This time, you don't need to pull anything on yourself. Just remove the roof and you can drive up to the wall to get to the other side. Follow left, then turn right around the corner and reach the next location where you need to use a power winch. This time you need to move slowly, staying in the orange zone.
Target:
Locate the Scarecrow with Antenna at Falcone Shipping Warehouse
Make your way to the next marker on the map, enter detective mode to look inside the building and find out how many bandits you will face. Climb to the highest point, move to the other side to improve your view. Select the batarang from the gadgets inventory and hit the door. Two men will go out into the street.
After they leave the building, jump down and deal with the enemies. Do this carefully so they don't warn anyone. If it is problematic to kill two at once, then after you deal with the first, jump onto the roof and lure out the second. Jump down and deal with the second enemy. Next, go to the door. Batman will call Lucius to get a new costume.
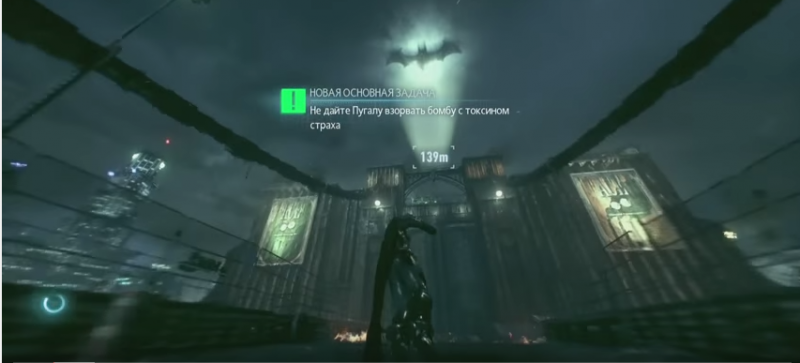
Target:
Get a new Batman costume
Move to the new marker on the map and pick up the suit. At this time, several stages of testing will begin. There are clues at the bottom of the screen that will help you complete the tutorial mission. For each mission you get a skill point. You can skip the mission - it's up to you.
Step 1. Call the Batmobile using the remote control, follow the blue arrows on the ground until you reach the first round sign with a bat inside. Get out of the Batmobile by pressing the indicated keys and fly to the next bat sign. You must follow the indicated route until you find yourself on the ground. Re-summon the Batmobile before landing down. Follow the path of the signs for as long as you can. Even if you skip a few, you will still complete the tutorial.
Stage 2. The new technique will allow you to sneak up to enemies and quickly deal with those. The first three rounds of this training are fairly straightforward. Just get close to the enemies from behind and press the indicated key several times when it appears on the screen. In order to deal with both enemies, they must be visible on the screen. Otherwise, the reception will not work.
Step 3. Repeat the keystrokes on the screen. Once grabbed, you will slip through the air. Maneuver to the first character of the bat, press the keys and get to the second character. Repeat the steps to maneuver to the third character. It makes no sense to list the keys, since they are shown at the bottom of the screen. You must stay in the air for 60 seconds. You may have to repeat the training several times in order to finally hold out in the air for one minute.
Stage 4. This is one of simple trainings... Just stand in the middle, between the enemies and wait for one of them to start blinking blue. When you see this, then attack the enemy by holding down the indicated keys. You will run up to it and throw it aside. Repeat the process with multiple enemies and the episode will end.
Stage 5. All you need is to ensure that all three enemies are on the ground at the same time. When you knock over one enemy, then he falls on the ground only for a few seconds and no more. Use a glancing blow, then quickly move to the second enemy. Batman's various gadgets can also be used.
Target:
Locate the Scarecrow with Antenna at FalconeShipping Warehouse (continued)
After completing the training missions, use the earned skill points. Follow on, but do not enter the building through the main door. Instead, turn around to the right side of the building and jump into the mine. Get into the building through the grate, use new techniques to quickly neutralize enemies. Go to the policeman sitting on the ground and free him. Go to the electronic panel on the wall and attach the remote access device to it.
Go through the door, throw the batarang into the air. Move the antenna quickly and point it towards the chemical plant on the right side of the map. After both points are at the chemical plant, you can continue the passage.
2. Prevent Ace Cami cals explosion Batman Arkham Knight. Passing
Target:
Will meet with Gordon at the Ace Cami cals
Target:
Rescue the missing Ace Cami cals for information on the Scarecrow
Target:
Scan the Ace Cemicals plant to find out the whereabouts of the missing workers
Climb to the roof of the factory, enter detective mode to scan the area for enemies. Use the vertical shaft from the roof to reach the bottom of the plant.
Use the lever, go to the terminal, and then use the new technique to neutralize enemies without raising an alarm. Go back to the mine, move around the territory and kill the remaining enemies. After all the guards are neutralized, gain access to the terminal.
You must find a point at a height for a good view. But do not forget about the opponents around. Go back the same way using the mine. You have to get to the top of the plant. Move even higher and find a vantage point. Move Batman's gaze to the direction from which the voices are heard. Then press the button shown on the screen to mark the location of the worker.
So, the locations of all five workers are shown on the map. First, go to the worker located farthest from everyone. Kill the enemies walk a little until Batman announces that he needs a Batmobile.
Target:
Open the main gate of the chemical plant to drive the Batmobile
Move to the next control point, break the roof to get inside the room. Deal with the opponents and approach the dead worker lying on the ground. Access the panel next to it to open the main gate. Enter the gadgets menu and select the Batmobile remote control. Use the drive winch to demolish the structure and form a springboard. Accelerate using acceleration to fly to the other side. There will be unmanned tanks inside. Deal with them, use the drive winch to pry out the doors in the corner. Go to the next level and find a springboard.
Use the Batmobile's cannons to neutralize opponents on the platform. You won't be able to destroy them all, but at least there should be fewer of them. Leave the Batmobile and deal with the remaining opponents on the platform. When they are defeated, another enemy group will come running. Deal with everyone, access the panel on the platform, and head downstairs.
Return to the batmobile and use the new springboard to get to the other side. Move to the right, deal with several tanks at the next location. Use the drive winch to break the pipe attached to the building.
Leave the Batmobile, make your way a little higher to climb through the windows. Deal with opponents inside the building. Go to the pipe in the corner of the room and select the explosive gel through the gadgets menu. Apply the gel to the damaged area on the right side of the pipe, run to the side and blow up the pipe.
Climb through the hole, move to the left. Explode the gel on the crack in the floor. Get access to the panel near the door, again use the explosive gel on the crack, which this time are located on the wall on the other side. Blow up the wall, switch to remote control the Batmobile and select the power winch to rip out the pipe.
Move down the corridor and crouch down to get under the partially open door... Go to the opposite side of the hall and access the switch panel. Open the gate with the panel, select the 60mm cannon on the Batmobile and destroy the cracked wall. You will see cables from the elevator. Use the Batmobile's drive winch and back up until you can see the elevator car.
Climb into the elevator with Batman, use the Batmobile's remote control and this time lower the elevator with the hero. To do this, move forward. Leave the elevator, go into the corridor ahead and climb the ledge just above. Sit down to get into the adjacent room. Remove the grate on the left side, then go to one of the two grates in front. Switch to detective mode if you cannot find them yourself.
Use new techniques to deal with enemies in the room, and then talk to the worker. Go back to the elevator, climb into it and use the Batmobile to lift your hero upstairs. Once you leave the elevator, you will need to deal with the helicopter. Use the Batmobile. Avoid rocket fire and shoot back. When the helicopter has less than 50% durability, you will be hit by a serious barrage of missiles. Destroy missiles before they get to you.
Target:
Take the Ace Cemics worker to Gordon on the bridge
Destroy the helicopter, approximately in the direction of the southeast there is a corner with a hole, the batmobile will not pass through it yet. Move the Batmobile to the platform right in front of the opening, as Batman, leave the car and press the button to raise the elevator. The Batmobile can now move on. Follow down and use the acceleration to jump over the gap and deliver the worker to Gordon on the other side. Jump back and climb to another level as you did earlier. Once you are at the top, you do not need to use the springboard that you ran into earlier. Instead, follow on and jump down to the last worker.
Go around the building in a circle to find the entrance. Use the Batmobile's drive winch to pry open the door. Ignore the pipes along the road, as the Batmobile passes quietly between them. Deal with the enemies inside, then look around to find a door. This door will lead you to the worker's room. After the cut-scene, switch to remote control of the Batmobile and deal with the opponents. Free the worker, then ride back to deliver him to Gordon.
Target:
Don't let the Scarecrow blow up the Ace Cams !!!
Use the trampoline to return and make your way to the factory grounds. Use a 60mm cannon to blast the hole in the wall mentioned above. Use the springboard with which you jumped earlier. Use acceleration to make the Batmobile fly down through the hole you just made. Deal with the two tanks in the corner, and then follow to the end of the tunnel. Leave the Batmobile, get to the very top and plan for the next checkpoint. After dismantling the enemies below, look to the left and make your way under the grate. You will find yourself behind two enemies. Wait for the red hour to pass, then use the trick and return under the bars.
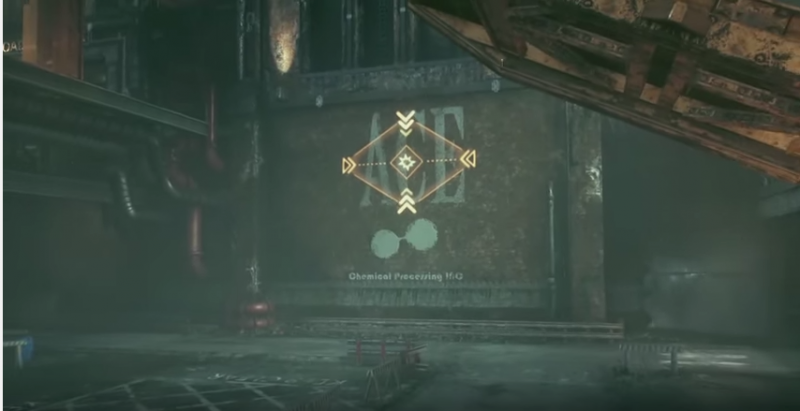
Wait for the sentry to pass you by again, jump out and deal with him. Access the panel on the wall to lower the gate through which the Batmobile can enter the grounds. Move further along the tunnel, get to the top and fall down. Sneak up to the enemies in front of you, deal with them all. Do not use the trick immediately as prompted. First sneak up - this way you will save unnecessary nerves.
Access the panel on the right side of the door so the Batmobile can drive further. You must deal with all the thugs before fighting the Scarecrow in the central room. There are the same grates on which you can move and kill enemies without raising the alarm.
After all the guards are finished, go to the room in the center. Go through the door. After the cutscene, access the panel in the center of the room to lift the four neutralizing barrels to the right. Now you have to pick them up one at a time and move them across the room. You need to move slowly. All barrels must be placed in containers. If the lights turn yellow or red, then the movement must be suspended. You have enough time to move the first three barrels. Therefore, it is better to move slowly and do not rush.
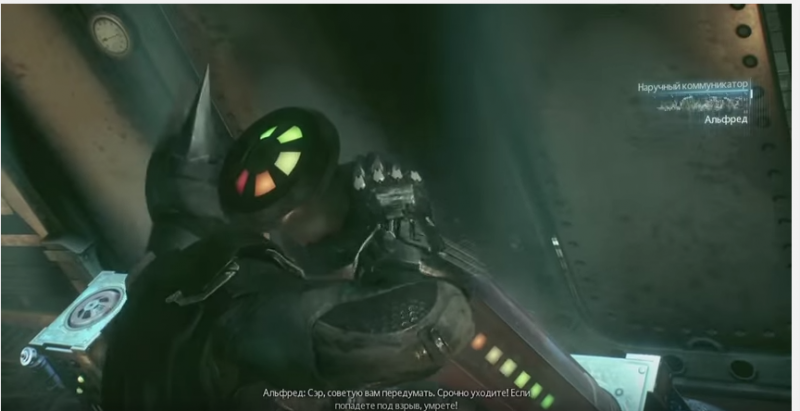
When you get to the last, fourth barrel, you will be interrupted by an old friend. After a short cutscene, take control of Commissioner Gordon. Follow the red carpet towards the VIP elevator. Open the door and go inside. Click on the button on the right side and take the elevator. Follow forward into the large room and talk to the prisoners on both sides (if you wish). Go to the computer at the back of the room and turn around to find Batman.
Target:
Leave the chemical plant
Switch to remote control of the Batmobile and smash the walls in front. Return to the top and use the trampoline to leave the chemical plant.
3. Save the Oracle
Target:
Meet Gordon outside the Police Department
Take the Batmobile and move to the next marker near the police station. On the way, you will come across several unmanned tanks. Destroy them. After you reach the police headquarters, drive inside through the garage door to meet Gordon downstairs. Leave the Batmobile and talk to Commissioner Gordon.
Target:
Escort Gordon to the Oracle Clock Tower
Follow Gordon. Several enemy vehicles will try to stop you. Deal with them. Almost every vehicle is destroyed with one missile. Sometimes you have to spend two missiles. Or you can shoot with one rocket, and finish off the enemy by ramming with your Batmobile. After you deal with everyone, move to the marker and park in the place where Gordon is waiting for you so that he can jump into the Batmobile.
Target:
Deal with the Arkham Knight militia occupying the Clock Tower
As you approach the clock tower, deal with unmanned tanks. After everyone is defeated, leave the Batmobile and deal with the thugs near the clock tower. If you can't find them all, climb to the top and look around.
Target:
Explore the Clock Tower looking for a clue of the Oracle's location
Deal with the enemies, climb onto the roof of the clock tower and use the same doors as before. You will find yourself in a memory where the Oracle is being shot. Try to leave them and you will start a dialogue with the Joker. After the Joker disappears, take the stroller in the middle of the room. Go to the middle of the room and get access to the computer.
It's time to check the video to find out who kidnapped the Oracle. Go to the screen in the upper right corner and rewind the footage at approximately 36:40. Select the square on the crosshairs of the second row and second column from the left. You will see a man in a white coat. Fast-forward the video to 43:04 and look at the crosshairs in the third row and second column from the left to see the vehicle.
Target:
Follow the trail of the Arkham Knight's car using the scanner in the Batmobile to find the Oracle
Leave the clock tower and jump down. Call the Batmobile. Enter combat mode and select the scanner. You will see the trail from the car of the Arkham Knight, in which the Oracle was taken away. Follow the route until the cut-scene begins.
Target:
Examine the device of the militia
Target:
Defuse a bomb with a controlled explosion
Leave the Batmobile and examine the device. Unmanned tanks are moving towards you, so go back to the Batmobile and deal with them. The catch is that you can't go too far away from the bomb or it will explode. Circle around it, dodge tank attacks and destroy them. After all the tanks are destroyed, use the drive winch and engine to control the explosives. Keep it in the orange zone until the bomb explodes. You will unlock the mission "Wanted: Disarmament Campaign"
Target:
Target:
Walk to the militia station at Grand Avenue Station and regain control of the Bridge of Mercy
Continue along the path to the bridge, move to the next point on the map. Deal with the enemies on the way and gain access to the computer in the central area.
Target:
(additional mission from the Riddler's Revenge series): Go to the Riddler's shelter to rescue Catwoman
Move to the next marker and deal with the thugs. When you immobilize the last enemy, then try to get information from that one. Go inside to find Catwoman in the room below. Walk around the perimeter of the room to avoid hitting the electric floor in the middle and rescue Catwoman at the far end of the room. Deal with the enemies and return outside. Now you can continue completing additional missions or return to the "City of Fear" storyline. Next, we will continue to go through the plot.
Target:
Return to the bridge of mercy to continue tracking vehicle Arkham Knight
Go back to the bridge and get into the Batmobile. Move closer to the bridge by car, a conversation with Alfred will begin. Deal with the tanks on the other side. You can destroy them with a 60mm cannon or use the Vulcan. Use the Vulcan system at least to destroy the guided missiles flying into the Batmobile. On the other hand, in the middle of the bridge there is a pillar behind which you can hide from homing missiles.
Target:
Follow the trail of the Arkham Knight's car using the scanner in the Batmobile to find the Oracle (continued)
Target:
Investigate the crash site to find out what happened to the Oracle and the Arkham Knight
After you deal with all the tanks, follow in the footsteps of the Arkham Knight. On your way you will meet several more tanks. Destroy them and get to the final goal. Leave the Batmobile and activate Detective Mode to find evidence of how the car crashed. Rewind the crash to find the driver's seat and examine his body. Next, check the passenger seat of the car and rewind the crash to determine which way the passenger door landed after the crash. Move to the right and find the door. Study it. Go to the place where the Oracle's body landed, trace the trajectory of the shot and inspect the point at which the projectile hit near the Oracle's body. Finally, rewind the memory again to see where the Oracle threw the memory. Scan boxes nearby to complete your research.
Now you can start a new side mission "Wanted: Masked Follower"
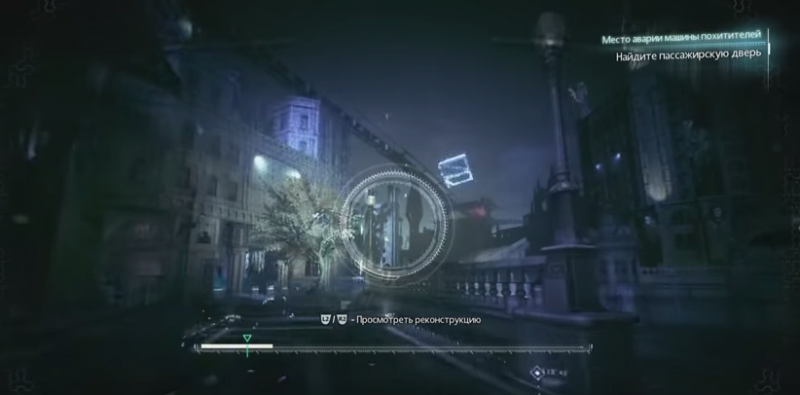
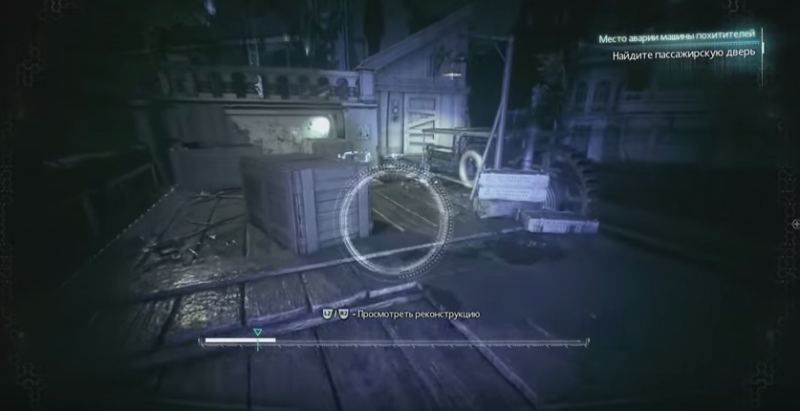
Target:
Reach Wayne's Tower and analyze the encrypted protocols of the Arkham Knight
Follow to Wayne's tower, which is currently indicated by a marker. When you get to the balcony, Batman will automatically open the door. Access the computer on the table to upgrade the Batmobile's weapons. Access the statue on the shelf for a new weapon.
Target:
Penetrate the tunnel under Miagani Island
Leave the building and use the Batmobile to reach the next checkpoint. Deal with the unmanned tanks, park in the highlighted area to open the entrance to the tunnel. When you are unable to travel further, go into combat mode until you are prompted to use the drive winch on the grate above. Leave the Batmobile, go further, apply the explosive gel to the boards in front. Next, you will need to move through the grate on the left, and then use the Line Launcher gadget to overcome the ventilation.
Select the Batarang remote control from the gadgets menu and look to the right (in detective mode). There is a switch behind the fence. You have to go around the fence with the Batarang using the remote control. Throw the batarang to the right of the fence, turn it to the left and maneuver so as not to hit anything. You need to hit the switch.
Select Line Launcher again and aim at the opened door behind you, through the fan. Follow forward and climb to a higher area. Use the Line Launcher to cross another ventilation system, then turn around and use the Batarang remote control to hit the next switch. There is a large hole to the right of the switch. Launch the batarang through this hole, then lower it slightly lower to the left and hit the third switch.
You should now be using the Dual Line Launcher. Shoot in the opposite direction where you came from, and launch the second into the newly opened door. Run down the corridor to the right, go around the corner to find the Riddler's trophy
To the left of the Riddler trophy, you can ambush the enemies below. Turn around and follow the corridor, moving above the ground, staying high above the enemies. On the right side there will be a grate, with its help you can be under the enemies. Move there and follow below, follow the circle to the right until you reach the back room. Leave the mine and watch the cutscene with the Arkham Knight. You are ambushed by enemies. Use new techniques to get rid of enemies as quickly as possible. Stay away from the door to avoid being hit by machine gun shots.
When all enemies are defeated, go through the doorway. Move to the corner of the room where the tunnel shutter control is located. Access the panel on the wall. Switch to remote control the Batmobile and blast the door ahead. When there is no door, unmanned tanks will attack you. Deal with them, including the tank that is blocking the door to Batman's room. Switch back to Batman and get into the Batmobile. Drive to the far end of the tunnel, jump out of the Batmobile and access the panel on the right side. Follow the convoy of cars, get to the front car and stop it. Intimidate and interrogate the driver.
Target:
Meet Beving to equip the Batmobile with a second weapon
Go to the meeting point on the map to find Batwing. Immediately after the update, you will be ambushed by several tanks. Deal with all the tanks, and then move to the next checkpoint to meet Nightwing. Select the disintegrator from the gadgets menu and shoot at the designated spot near the van. Zoom in and shoot the two men around the next point. Drop down and deal with the enemies below, then use the disintegrator to mark the van.
Target:
Follow the gun truck to find Penguin's secret hideout
Knock on the back door of the van, fight enemies and circle around the van. When the van stops, climb up and finish off the people guarding the roof.
Target:
Access the weapons cache and interrogate the Penguin
Go inside and get to the marker. Jump into the building, go to the left and find the ventilation shaft. Move through it under the surface of the floor until you find yourself near the Penguin, who should be interrogated. You must fend off enemy attacks. Ultimately, Nightwing will come to your aid. Deal with enemies and clear the location.
Objective: Destroy Penguin's weapons cache
Go to the vault and open the door. Use the explosive gel in the weapons depot, then close the door, step back 20 meters and blow up the warehouse. Additional mission "Especially Dangerous: Escape for Weapons" will become available
Return to the rooftop where the ambush awaits you. Use the remote control to move the Batmobile to the garage. Climb to the top floor of the garage and deal with the people on the balcony across the road. Switch to Batman and fall down. Exit to the balcony and watch a short cut-scene.
Target:
Target:
Target:
Move to the next marker and activate the roof door to get a remote hacking device. Fly down to the roof of the nearest airship, activate the detective mode near the hatch. Use the remote control from the hacking device to access the panel just below and to the right of the hatch. On the game console, you must first turn one analogue to the side, and then, as it starts to vibrate, you will need to turn the second analogue, but in the other direction. This will allow you to sync the security code and complete the jailbreak.
Secret. Follow this doorway to find the Riddler's trophy behind the gate. Use the Batarang remote control to press the button at the bottom of the question mark behind the gate. This will be easier if you are standing on the Riddler's question mark on the other side of the hallway. Collect another Riddler trophy
Target:
Target:
Continue your way into the adjacent room to find several barrels on top. Remove the magnetic locks to move the barrels using the airship control system. In the middle there will be a Riddler trophy, but again you cannot get it yet. Follow the right of the trophy and go up one level. Once at the top, make sure to remove the magnetic locks from all of the barrels, then tilt the airship to move all of the liberated barrels to the right (away from the stairs). Now lock all the canisters with magnetic locks and tilt the boat the other way to move the one barrel that is missing the magnetic lock. You now have access to a grate that will lead you to the Riddler's trophy room
Target:
4. Airship pursuit
Target:
Find a way to infiltrate the Stagg Enterprises airships
Target:
Disable the clock tower guarded by airships
Watch the helicopters while you get to the checkpoint. You must deal with the bandits guarding the tower. Use the detective mode for this, which will help you determine the location of all enemies. Move around the tower and deal with opponents, then use the explosive gel. Use it to destroy the equipment in the center. The additional mission "Wanted: Occupied Gotham" will now become available.
Target:
Assemble a remote hacking device at the top of Wayne International Plaza
Move to the next marker and activate the roof door to get a remote hacking device.
Fly down to the roof of the nearest airship, activate the detective mode near the hatch. Use the remote control from the hacking device to access the panel just below and to the right of the hatch. On the game console, you must first turn one analogue to the side, and then, as it starts to vibrate, you will need to turn the second analogue, but in the other direction. This will allow you to sync the security code and complete the jailbreak.
Go down through the hatch, jump onto the glass below. There will be a grate behind you. Open it, and then turn left and go down into the corridor below. There is a Riddler trophy here.
Secret. Use the remote control from the hacking device to gain access to the panel indoors. Open the gate with this panel. Collect the Riddler trophy and continue on your way to the other side.
Go to the window on the left and deal with the guard controlling the drone, then hack the unmanned device to deal with the remaining enemies. Follow through the gate and hack the control panel in the adjacent room, with which you can open the door. Go to the doorway, follow the left and access the airship control system.
Tilt the airship so that a large yellow container in an adjacent room falls through the window. Drop down through the hatch and tilt the airship to the left to get passengers out of the way. Use the remote control and then fall down onto the platform and hack the yellow barrel on the lower platform. This will allow you to deal with the magnetic lock.
Secret. Access the airship control system again and move the three barrels to the left, then to the right to find the grate behind them. Open this grate and you will find another Riddler trophy.
Reactivate the magnetic lock by breaking open the barrel. Access the airship control system, tilt the flying machine to the right to move the rightmost canister. There will be a door behind her.
Secret. Follow this doorway to find the Riddler's trophy behind the gate. Use the Batarang remote control to press the button at the bottom of the question mark behind the gate. This will be easier if you are standing on the Riddler's question mark on the other side of the hallway. Collect another Riddler trophy.
At the upper level, you will have to measure your strength against a serious opponent. Watch out for his daggers and use the Beatdown attack to end him as quickly as possible. Hack the panel on the right to open the door ahead. Move to the ledge, then slide down and take out the enemies. One of the enemies wields a dagger. So focus on it first. After winning the battle, talk to Stagg in the center of the room.
Attack enemies who are behind and continue to attack you. As a result, all opponents will suddenly turn into the Joker. After the cut-scene, hack the panel in the corner to open the door, then go through it.
Objective: Destroy machine guns on another airship
Hack the control system of the airship on the far side. There is a grill to the right of the control system. But you have to move the barrels down a level to clear a path for yourself. The two barrels have red panels indicating a magnetic lock. Access both barrels to remove this magnetic lock, then slide the ship to the left. Now activate all the magnetic locks except the second one from the end on the far side.
Throw through the gate near the control panel, and then move between the canisters to the far end of the room. When you are on the other side, then go up the stairs and hack the panel in the other part to open the door.
Get to the top level, turn left and hack the panel in the left corner. The door will open, but you are in no hurry to go through it. Instead, go in the opposite direction, get to the ventilation above. There are several enemies in the next room. Deal with them and access the computer terminal on the other side of the room (on the upper platform). Click on the screen in the upper left corner and rewind the video to the next time - 8:50. Scan the cell at the intersection of the second row and the third column from the left. / Go to the panel in the upper right corner and rewind the video to the time 22:31. Scan the third cell from the left in the bottom row. Go to the bottom left panel and rewind the video to the next time - 37:21. Scan the cell at the intersection of the right column and the third row from the top. Finally, go to the bottom right panel and rewind the video to 51:59. Scan the second cell from the left in the bottom row.
Target:
Recover Simon Stagg's right handprint to gain access to the weapon control system
Target:
Chase the Scarecrow in the second airship
Move to the left side, scan the four places where Simon Stagg's fingerprints were left. Re-access the computer terminal, then return to the cargo hold (you can go through the door that you hacked earlier, but never used it). There are bandits in the cargo hold. Some of the enemies are protected by an electric field. First, attack the enemies in white coats (medics), and then deal with everyone else.
After all the enemies are defeated, break open the panel in the corner and make your way through the window of the newly opened hangar door. Deal with the enemies in the adjacent room, then use the explosive gel to blast the cracked wall. Access the controls in the next room and tilt the ship first forward and then backward. The barrel must hit the glass and break it. Now you can sneak into the next room. Climb through the broken window and you will see the Riddler trophy, access to which is still closed for you. Follow the left and down the stairs and use the explosive gel on the cracked wall.
Continue your way into the adjacent room to find several barrels on top. Remove the magnetic locks to move the barrels using the airship control system. In the middle there will be a Riddler trophy, but again you cannot get it yet. Follow the right of the trophy and go up one level. Once at the top, make sure to remove the magnetic locks from all of the barrels, then tilt the airship to move all of the liberated barrels to the right (away from the stairs). Now lock all the canisters with magnetic locks and tilt the boat the other way to move the one barrel that is missing the magnetic lock. You now have access to the grate that will lead you to the Riddler's trophy room.
Take the trophy, go back the same way as you got here. Follow down the glass corridor on the left side, go to the end and open the computer terminals.
Secret. Use the farthest computer to open one of the doors and collect the Riddler's trophy.
Pick up the trophy, then turn to the door on the left side of the computer. Inside the room, outside the door, there are several thugs. Use the ventilation system on the left to get close to them from behind. Go to the back of the room and chat with Simon Stagg. Continue your way through the next door and try to get to one of the Scarecrows. Fight the remaining enemies.
5. Batman and Poison Ivy Batman Arkham Knight. Passing
Target:
Get the Oracle out of the Scarecrow's house
Climb onto the roof of the house to the next mark on the map, go through the door. Follow the glass prison and watch the next cutscene that will complete the mission.
Target:
Meet Poison Ivy in the police headquarters
Target:
Escort Poison Ivy to the Botanical Gardens
Target:
Scan the Arkham Knight Cobra tank to determine its weak points
Climb onto the roof, then glide to the police headquarters or drive there in the Batmobile. Make your way to the control point on the map, which will lead you to the Poison Ivy isolation ward. Talk to Ivy, return to your Batmobile and drive to the streets where a massive tank will stop you.
Leave the Batmobile and sit down to get through the garage door. You have to move between hanging objects and platforms, simultaneously scanning the Cobra drone for vulnerabilities. You should be relatively close and scan your back as well as the two sides. You can be further, but then you have to zoom in a little.
Target:
Destroy the Arkham Knight Cobra drone
Summon the Batmobile and look at the radar. You need to get close to the Cobra from behind. The radar indicates in which direction the front and rear of the drone are directed. Use as cover for buildings through which the Cobra scanner does not work. Combat mode will allow you to better maneuver around the city. After getting behind Cobra, you need to hold out long enough to block the drone as a result. After that, insert several clips of 60 mm machine guns into it and finally destroy it.
Target:
Install a new secondary weapon for the Batmobile inside the Clock Tower
Target:
Target:
Destroy Cobra tanks on Miagani Island
Move to the next checkpoint on the Batmobile to equip it with another upgrade. Then continue on your way towards the botanical garden. On the way, you will need to destroy three more Cobra tanks. Only after destroying them will it be possible to continue the path to the botanical garden. Look at your radar to determine the location of each Cobra tank. First, choose the tank that is farthest from the others to destroy. He will be your first target. Move in combat mode around the tank, hiding behind buildings, until you successfully get behind it and finally destroy it.
After all three tanks are destroyed, a new additional mission "Especially Dangerous: Masters of the Roads" will become available to you.
Target:
Escort Poison Ivy to the Botanical Gardens (continued)
Finally, you can complete your goal. Park the Batmobile at the indicated location, near the Botanical Gardens. After a short cutscene, a new side mission "Wanted: Two-Faced Bandit" will become available
Target:
Go to Wayne's Tower Garage and retrieve the Poison Ivy Tracker
When you get to Wayne's tower garage, several tanks will be waiting for you there. You must maneuver well to avoid being hit by missiles. Focus on a specific tank until another tank fires rockets at you. When you see a red warning, then turn around and destroy the rocket flying at you using the Vulcan system. Attack the previous target again. After all the tanks are neutralized, move the Batmobile to the indicated location to get an upgrade.
Target:
Use the Batmobile Locator to find and free the Poison Ivy plant on Miagani Island
Target:
Protect the Poison Ivy plant from the Arkham Knight soldiers while it ripens
The city is patrolled by tanks. As soon as they spot the Batmobile, they will immediately open a flurry of fire. Use the new locator to find the center of the roots on conventional radar. Once you find the area you want, scan the ground down and free the plant. There are militias on the nearest rooftop. Disarm them quickly by climbing there before they destroy the plant.
Target:
Get to Panessa Studios to analyze the powers of the Arkham Knight
Target:
Climb aboard the drone and study it to find a way to destroy the drone army
Move to the next point on the map, take the elevator inside the building to get to Batman's hideout. Access the Batcomputer, then head back outside and head towards the marker on the map where the drone is waiting for you. Since the drone is in constant motion, the task becomes much more difficult, especially when compared to landing on a stationary building. However, its speed is not that great.
Target:
Destroy the Arkham Knight's radar network
If you can hack drones, then use this to hack a drone patrolling the area. After hacking the drone, you have 60 seconds to destroy the first radar network. Hover over her and use the explosive gel to destroy the net.
The next radar network will be guarded by regular thugs, making it an easy target. Hover over the net and deal with the enemies on the roof, then access the yellow panel to open the doors below. Look through the roof grill and use the remote hacking device's remote to hack one of the patrolmen. Once you initiate a hack, you have 15 seconds. Go down to the roof quickly and run behind the sentry you just hacked. Destroy the patrolmen, and then use the explosive gel to destroy the computer terminal located here.
Target:
Deal with the Long Range Rocket Launcher
Target:
Lower the barriers protecting the rocket launcher
Move to next target on the map and use the grates under the roof to deal with the guards without any problems. Approach the rocket launcher to determine that its armor is too thick for conventional weapons. Climb the stairs to the control room and access the computer located here.
You will automatically switch to remote control of the Batmobile. Before you reach the next target, you will need to destroy five Cobra tanks. Since there are a lot of tanks, it will be quite difficult for you to be behind each of them for a sufficient amount of time. Use the lower area with the construction site as cover. Deal with one of the nearby tanks first. All other tanks will move to this location. You can attack them from above, or, as a last resort, get close from behind at the moment when they climb the rise of the construction site.
After you destroy all five tanks, move to the next mark on the map and use the drive winch to raise the springboard. Switch to Batman. Several enemies are located above you. Use special techniques to defeat most opponents. Deal with the enemy group that has arrived in time. Re-access the computer and switch to remote control of the Batmobile. Continue to raise the springboard to its maximum height, then use acceleration to jump over to the adjacent building.
As soon as you come across this building, a rocket launcher from another building will start attacking. Quickly go into combat mode, turn around so you can aim at the rocket launcher. Shoot it in the same way as a tank, dodging missiles. More precisely, do not dodge missiles, but use the Vulcan system to destroy them. The 60mm cannon is useful for destroying the rocket launcher itself.
6. Confrontation with Harley Quinn
Target:
Return to the Oracle Clock Tower to view scans of the Downpour device
Target:
Stop Harley Quinn from infecting the Joker
Return to the clock tower and access the computer. Go to Panessa Studios, to the next marker. When you are in place, deal with the security outside, and then try to open the door inward. Using your voice synthesizer, copy Harley Quinn's voice.
Use the voice synthesizer to open doors, and then reapply it to deal with enemies. The synthesizer will help you call them to you one at a time. When all enemies are defeated, reopen the door and use the elevator to go downstairs. While in the elevator, approach the Joker. When you get to the very bottom, use the voice synthesizer on the panel on the right side to open the gate in front. Deal with the enemies in the room. In this case, interrogate the last opponent.
Return the escaped Infected Joker to his cage
Target:
Detain Albert King at A Level
Target:
Detain Christina Bell at B
Target:
Delay Johnny Charisma at C
Follow the corridor straight ahead until you reach a huge statue. From here, you can go left, right, or straight ahead to reach the three pavilions, where three Joker-infected await you.
First go to level C. Go through the doors and deal with the first group of enemies inside the room. Go through the next door until you see a huge enemy ahead. Climb up the statue above, then go through the hall to reach the next statue. Go down and sneak up on the enemy from behind, then perform a special move.
Continue down the hallway and enter the next door. There will be two groups of bandits in the new room. The first group will have one powerful enemy, the second - two at once. You can stay on top and kill enemies one at a time. Jump behind the thugs and use a special move.
After you deal with all the opponents, go up the stairs to the north and go through the doors at the top. Quickly dodge Christina's attack as she dives towards Robin.
Secret. If you have Freeze Blast, you can climb up through the vent above to find the Riddler trophy.
Use Line Launcher to overcome high voltage floor.
Secret. There is an air vent on the other side. If you freeze it, you will receive another Riddler trophy.
Then follow to level A. To get there, you need to use the hole right in front of the statue. Use your voice synthesizer to order enemies outside the gates to open them for you. After this is done, use a special trick to clear the area. Keep moving forward and open the next gate, then try to rescue Robin.
Continue your way through the next doors, where a group of enemies led by Albert King awaits you. Focus on common opponents, dodge Albert's attacks until you see a double attack signal. Repeat this procedure until you can hit Albert again with a double attack. Press the attack key until you see a blue glow above Albert, which indicates his intention to attack you. Dodge attacks, then repeat all actions.
Before leaving the room, stop in front of the door and enter the second door on the right side. Step on the question mark on the floor, then use your batarang to hit the dot in the question mark on the wall. This action will change the color of the question mark. The color order of the question marks from left to right should be as follows - blue, green, yellow, yellow or blue, green, red, yellow.
Return to the main location and select the new Batmobile upgrade. Then move to level C. When you get to the desired place and will be in front of the gate, where the thug is, turn around to find a hole on top. Get there and go to the cell above the brute. There are cracks on the right side of the wall. Use the voice synthesizer to order the bully to move to the wall. Then quickly move through the hole to another room that also has this cracked wall. Apply the explosive gel to the cracked wall while the brute is standing near the wall, but on the other side. Blow up the gel to deal with the enemy without any problems.
Click on the button on the side of the thug's room to open the next gate. There is another wall with cracks in the right corner.
Secret. There is a locked room on the right. There are two Riddler trophies hidden there. To gain access to an enclosed area, you will need a device for remotely controlling the electrical charge.
Next, destroy the cracked wall by applying an explosive gel to it. There will be a Riddler trophy behind the wall.
You should be hit by two green question marks at the end of the ventilation shaft. After throwing the batarang into the ventilation shaft, you will find the first question mark around the corner on the right, then you will need to turn around the corner on the left. After hitting the first question mark, it will open access to another mine around the corner to the right. You will gain access through the mine to the room with the Riddler's trophy
Final goal(second question mark) is in the same direction as the trophy room. After you reach the room, hit the fuse box in the upper right corner to unlock the gate and access the Riddler trophy
Return to the main room and head forward through the following doors. Go to the hanging object in the center of the room and take out the sheet. After the cutscene, head back through the double door. Once you're inside, look to the left to visually find a hole in the floor. Access the ventilation and go through the main gate.
Access the panel on the right side of the door and rewind the video to 7:15. Move to the extreme cell on the right in the second row from the bottom and press the corresponding key to zoom in. You should be able to see the code. Your code is 0539. Use it. Go to Charisma, watch the cut-scene, then Robin will jump out of the ventilation system. The platform with Batman and Charisma revolves. Move Robin to each bomb around the room. They can only move when Charisma turns away.
You have a limited amount of time to defuse all the bombs and get to Johnny Charisma. Go to the first bomb immediately. You will not have much time to disarm them, since Johnny will not have many objects blocking his view on the way.
Secret. Between the third and fourth bombs there will be two Riddler trophies.
You must defuse all five bombs, and then go to the platform to Charisma and deal with him completely.
When Charisma is defeated, turn back to the door through which you came here and help Henry. Deal with the bandits, move under the floor and use the voice synthesizer to make enemies open the gates for you. Wait for Harley to put her back behind bars. Attack with a double hit. This will immediately neutralize Harley Quinn, and all you have to do is deal with ordinary bandits. Take Harley and go up the stairs through the doors to find yourself in the next room. After the cut-scene, go to the open chamber. Rotate around the cage and see Jason sitting in the center of the room. If you go around the circle a second time, then the Joker will sit in the center of the room.
Leave the cell and go to Jason, and after the cutscene, move to the door. When you are told that you need to return to the cell, go to Robin and press the appropriate key to close him in the cage.
Equip a new secondary weapon on the Batmobile
Return to the elevator and go upstairs. Drive the Batmobile to the next checkpoint to get the upgrade you chose earlier. After the upgrade, you will unlock a new side mission "Wanted: A Friend in Need".
7. Nature always wins Batman Arkham Knight. Passing
Target:
Research seismic activity Miagani Islands
Target:
Cooperate with Poison Ivy to destroy the army attacking the botanical garden
Target:
Arrest Poison Ivy and return her to police headquarters
Get into the Batmobile and move to the next marker. You will have to deal with regular tanks and then destroy 5 Cobra tanks. Look at your radar to see when the Cobra tanks are blinking. This means they scan enemies in all directions (360 degrees) and can easily spot the Batmobile if you get too close in an open area. Follow to the point where Poison Ivy is waiting for you.
Destroy the Arkham Knight Heavy Downpour Tank
Target:
Interview Simon Stagg to find a way to defeat the Heavy Downpour tank
Move to the next marker on the map, to the airship, where you can find Simon Stagg. Be careful not to end up in the toxic cloud below. To get inside the airship, use the nearby crane. A group of opponents is waiting for you inside the airship. Use the air attack to end the fight as quickly as possible. Deal with the rest of the thugs, then climb up to the control point.
When you try to open the door at the top of the stairs, you will have to set the voice synthesizer to Stagg's voice. Adjust all sliders. Use the voice synthesizer to open the door, and then deal with the enemies in the next room. As soon as you enter the room, you can see a ventilation shaft on the left side. You can use it to jump onto enemies. You can also use your voice synthesizer to give orders to bandits and move them around positions, which greatly increases your chances of success without drawing attention from other opponents.
Target:
Track Simon Stagg using his fingerprints
After defeating all opponents, return to the capsule that Stagg was in. You have to find out where he went. Switch to detective mode and examine Stagg's prints down the stairs, then go to the lower level on the right and turn left. When you reach the end of the path, open the panel on the floor to find Stagg.
Target:
Use the Nimbus power supply to repair the Batmobile
There will be an unmanned tank just outside the main door. Hack the drone to get past it, then make your way to the next point, hacking any other drones that come your way. After the cutscene, you will need to remove and reinstall the power supply. If you uninstall or install it too quickly, you can only do harm. So be careful. You also need to avoid enemy attacks during repairs, so you need to be on the lookout. After replacing the power supply, you will find yourself in the Batmobile again.
Target:
Use the Batmobile Locator to find and free the Poison Ivy plant on Founders Island
Target:
Access the Metro network by elevator in Port Adams to get deep enough underground to free the Poison Ivy plant
When you reach Founders' Island, enter combat mode and use the locator to locate the roots of the plant. Drive your car to the next point, deal with tanks and drones aircraft... After destroying them, drive forward until you see a slope on the left side. Use acceleration to get to the middle of the location, where a lot more tanks are waiting for you. Deal with those, then get to the freight elevator and use the drive winch to pry out the door. Move inward and apply the same winch, leaving the object in the orange area on the diagram.
Move down into the tunnel and ride the Batmobile to the side wall to destroy the first two obstacles. When you get close to the third, move to the side wall, then climb to the ceiling to destroy it as well. Move left to the end and fall onto the grate on the left.
Hack the tank, enter the detective mode to find other enemy vehicles. There is a tank around the corner to the right, and another is patrolling the corridor ahead. Wait for the tank patrolling the corridor to turn away, then quickly blind the tank around the corner on the right and make your way past it. Lift the lid and blind the patrol tank, then walk forward enough distance to climb higher.
As a result, you must make your way into the room through the glass. Access the panel on the wall to allow the Batmobile to force its way into the area with enemy tanks. The computer will automatically transfer you to the Batmobile. You will control it remotely. Deal with all the tanks around.
Secret. Behind the tank, which was around the corner on the right, there is the Riddler's trophy.
When you get to the new obstacle, use the panel on the left so that the Batmobile can move along the corridor. Leave the Batmobile and walk to the platform above. On the right side below the slope there will be new panel(if suddenly you cannot find this panel, then enter the detective mode). Return to the Batmobile and jump to the other side using the trampoline and acceleration. There will be another obstacle ahead. Just as before, move along the side wall. Next, go to the ceiling to get around the obstacle. Do not return to the ground after driving past the obstacle, because there is also a body of water ahead of you. Stay on the side wall to drive past the water.
When you get to the next large room, then leave the Batmobile and follow to the control room at the back of the hall. There is a Riddler trophy at the top
Access the panel inside to unlock the trampoline to the other side of the pond, but not lock it in place. Return to the Batmobile and move to the trampoline. Climb onto it and stop at the very top. The weight of the Batmobile will tip the springboard in the direction you want it to be. Leave the Batmobile at the top, return to the control room and re-access the panel to lock the ramp in place this time.
Return to the Batmobile and use your acceleration to jump over the water. Climb the stairs on the right (while in the Batmobile) and enter combat mode to use the locator to locate the center of the plant and activate it.
Tanks and drones attack you. Deal with them and move to the new marker, where about seven Cobra tanks await you in a relatively confined space. There is a channel system under the location. These channels can be used to hide from tanks, and then suddenly attack them. If you move to the edge of the channel, where it intersects with the main street, then on the radar you can see the tanks, and then determine in which direction they are moving. Stay close and attack them when they get close.
When you destroy all the tanks, then you will have a meeting with the main enemy - the Downpour tank (there is a huge dot on the radar). You will not be able to pose a real threat to this tank until you finally deal with all the Cobras. Therefore, ignore the boss and destroy other tanks for now.
Boss: Tank "Downpour"
When only Downpour remains on the battlefield, you will need to scan it at close range. Scanning will allow you to see the enemy's weak spots, of which there are only four. You must attack Downpour at all four vulnerabilities. This means that it will be impossible and ineffective to attack constantly from one side. To hit all four targets, you need to attack the Rain from all sides.
As soon as you attack the tank, "Rain" will begin to pursue you persistently. You will have to drive around the building until the Rainfall color on the radar changes from red to orange. Channel combat mechanics can also be useful. The fact is that Liven cannot enter these channels at all, so as soon as you enter there, the tank will stop chasing you.
Once you get to all four vulnerable points on the "Livna", then he will no longer be able to use the main weapon. Do not rush to conclude that this tank is now completely defenseless. He still has rockets at his disposal with which he will shoot at you. There is a boss health bar in the upper right corner of the screen. Each time you hit a luminous point, this scale will decrease. As before, after your attack, the tank will aggressively pursue the Batmobile.
Destroy the enemy and watch the cut-scene with the Arkham Knight. After Batman raises his fist, attack the enemy until the Arkham Knight transforms into the Joker and the cutscene ends.
Find out what happened to Poison Ivy
Objective: Talk to the officer in the police department
Move to the next point on the map and watch the Poison Ivy cut-scene. Next, go to the police department and go to the communication room. Talk to the officer to move on to the next objective.
8. Paralyzed by fear Batman Arkham Knight Walkthrough
Track down Gordon and defeat the Scarecrow
Target:
Collect the electric charge remote control device at the police station
Go to the police department room, break the glass and pick up the Remote Electrical Charge. When you leave the room, go forward to find another Riddler trophy. Break the glass to get to it.
When you find yourself at the next checkpoint, access the hatch. You will find yourself in a building. Turn left to find electrified water. Use a new gadget that will allow you to turn off the generator. Go through the water, then use the gadget again to activate the generator and remove the lock from the gate. Climb the ledge above to go through the grate. Move under the floor to the adjacent room, turn around to see the switch on the wall. Use the voice synthesizer to make the guard press the switch to open the main gate. Switch to the Batmobile, defeat all enemies, then take back control of Batman. Leave the ditch.
Move around the corner to the left towards Gordon. Access the panel on the wall and continue to the left. There is a wall with cracks on the left. Switch to remote control the Batmobile and shoot at the cracked wall. Play as Batman again and go through the created gap. In the next room, access the panel in the far left corner so the Batmobile can enter the building. Switch to remote control of the Batmobile and shoot the drive winch at the object hanging low over the abyss. Lower the Batmobile into the abyss and, hanging with its back to the center of the Earth, shoot at the cracks in the ceiling, which will create a hole. Play again as Batman and make your way through a new hole, then move to the corner to find the Riddler trophy
Go to the other side of the room and break open the panel near the door. Go through this door to find the Riddler puzzle. The time to complete it is limited, so be prepared to switch between gadgets as quickly as possible. First, use the electrical charge control gadget to start the engine on the left. Once you've done that, switch to your regular Batarang and shoot the question mark in front. You must use the batarang to get to the point to move the cable so that the electric current passes through a closed circuit to the destination. You must hit the point three times. Once the circuit is complete, use the Batclaw Gadget to receive the Riddler Trophy
Leave the room and use the Electric Charge Control Device to overload the generator to the right of the door (when facing the door). This will turn off the fan from the top. You can now walk through the fan from below, switch to remote control the Batmobile and fall into the gap. Follow down to see a cracked wall. Shoot this wall with the Batmobile to create a hole. Switch to Batman, glide to the hole and take out the enemies around him.
There is an alcove on the side of the room. Make your way past it, use the electric charge control device on the industrial motor twice to get to the next wall with cracks by elevator. In order to blow up the wall, use the Batman gel. In the room with two guards, after disabling them, get access to a panel that will help you open the door. Go through, climb the ledge to be in the next room and deal with the guards. You can fight them or use the electrical charge control device to activate the generator on the wall and execute them.
Access the panel on the far wall and then use the electric charge remote control to take the elevator down. When the elevator cannot move lower, climb to the top of the car, jump onto the adjacent ledge and use the same gadget as before. You can turn on the elevator again and go down even lower. There is a small niche at the bottom of the lift shaft. Go down there and lift the hatch. Move to another room, follow a little further. The battle will begin, and you will need to defuse the bomb in parallel. Focus on enemies in white coats, clear the room.
Secret. When the room is cleared, follow the sign and use the batclaw to grab the Riddler's trophy at the very top. There is another Riddler trophy in the corner of the room, below where you first came from.
Collect all the loot, access the panel in the far corner of the room to open a door nearby. Go through this door to the large room where the drilling is taking place. Go to the far room on the right and disarm the drone using a remote hacking device. You will have 15 seconds to run past a de-energized drone until it wakes up again.
Quickly go to the room on the right side, follow to the very top to find an industrial generator that drives a huge fan. Use a remote control to overload this generator. Look left at the Riddler panel. Hack this panel to open the doors and go to the next room, where the Riddler's trophy lies behind the gate in front.
Switch to remote control of the Batmobile and use the power winch to hoist the car over the abyss just like before. Blow up the cracked wall at the very bottom. Disengage the drive winch to fall down, then attach the drive winch to one of the portions of the root that is visible along the entire wall. Pull the batmobile down Drive the Batmobile to the drone room and blow it up to ensure Batman has a safe path.
Take back control of Batman, fall into the mine to get to where the Batmobile is waiting for you. Jump into it and shoot the drive winch into the wall again. This time, pull to the right to move the drill upward. The Batmobile will also be able to drive through the hole in the wall created by the explosion. Move to the end of the corridor, leave the Batmobile and access the panel on the left wall to open the gate. Return to the Batmobile, move down the corridor, dodge obstacles and take the trampoline on the left. As soon as you make the jump, a short cutscene will begin. Enter combat mode, quickly turn around and take out the Arkham Knight drill machine.
Objective: Destroy the Arkham Knight excavator
There is a small labyrinth with three paths that will lead you to a dead end. In fact, you have to lure the excavator in one of these three paths. At the end of all three corridors there are explosives that will cause serious damage to the excavator. There are various obstacles inside the tunnels, so it is best to drive along each of these paths before luring the excavator behind you. If the excavator touches the Batmobile at least once, the game will be over.
Lure the excavator at the end of all three tunnels to completely drain its health. At this moment, Alfred will open the main gate (green marker on the map). Follow there and use the drive winch to make a hole in the ceiling. An excavator will fall on you. Leave the Batmobile before it is crushed. When you reach the top, turn around and use the Batclaw to grab the Riddler's trophy on the cave wall.
Go around the corner, go up the tunnel. You will walk where Gordon walked. Use special techniques to neutralize enemies indoors. You will see another cut-scene with the participation of the Arkham Knight. After viewing it, get to one of the golden bird statues, then go through the ventilation hole in the corner. Move towards the escalators and wait for the enemies to pass. Run along the escalators to the location of the Arkham Knight.
Arkham Knight will be in the back of the room. Ordinary enemies will also appear here. There will also be a flying patrolman in the room. Use a remote hacking device to temporarily disable the flying patrolman. There is a Riddler trophy underneath a large covered area. After defeating all enemies, make sure that the patrolman is still not functioning. Go down to the ground and go to the Arkham Knight position. Wait for the beams to move, then run forward and pick up the Riddler trophy
Try to attack the Arkham Knight. He will hide from you. Now you have 30 seconds to get to another room before you die from the poisonous gas that is about to appear. You should look for the exit in the upper corner. If you cannot find it on your own, go through the gratings just below to the place where the Arkham Knight was, and then go to the back of the room and go up to the very top. This way you can easily find the hole you need.
Defeat enemies, avoid gas poisoning. Go to the Arkham Knight again. Use the remote control to electrify the big guy, then attack him.
9. The die is cast
Target:
Fight the Scarecrow and hold him back
Target:
Protect the Oracle
Target:
Take the Oracle to the Police Department
Go to the elevator and press the button to activate it. Leave the elevator car by going upstairs and watch the cut-scene. As a result, take the Oracle on the Batmobile to the police department.
Stop the Scarecrow army
Leave the police station, move to the clock tower. You must deal with the enemies surrounding the clock tower. The easiest way to do this is to climb into an air vent on the side of the building, then go to the laboratory and kill enemies one by one. Every time the enemy falls down, he will warn the next enemy to go to check the laboratory, and so on. Clear the area completely.
Climb the stairs to the lab to reach the computer on the upper level. Access the computer to complete the objective and unlock the Wanted: Sheep Counting side mission
Stop the attack on the police department
Return to the police station and talk to the Oracle. Then follow the street and get into the Batmobile to deal with the enemies without any problems. Some of them will hide around the corner. You can kill them by driving closer, or get out of the Batmobile and run up on foot. Then immediately return to the Batmobile.
Target:
Inspect the power generator to restore power to the police department.
Return to the Batmobile and use the drive winch to take down the fan from above. As Batman, make your way through the newly created hole. Go to the end of the small room and make your way through the hole. Go to the adjacent room, move along the long beam to the next ventilation shaft. Go to the end of the room to view a cut-scene. Go forward to find out that the generator has been destroyed.
Target:
Access the Police Department garage to enable backup generators
Climb down to the ledge and use the burglar remote to disable the patrolman. Go to the garage and deal with the soldiers. Use a remote electric charge control device to power three generators. Next, call the Batmobile and drive to the street, where enemy tanks are waiting for you.
Fortunately, you have an Oracle who is always ready to help Batman in everything. The girl will break into tanks, which will explode and release an EMP charge. When she says that everything is ready, shoot these tanks. During the battle, pause near the door to the garage, thereby making you a less accessible target for all enemy tanks. This will greatly simplify the battle.
Target:
Stop the militias trying to disable the police department's security system
Climb to the roof and deal with three waves of enemy attacks. Be prepared to use a remote electric charge control device in case of serious enemies. Take out the thugs first. If you are near a fence or panel on the ground, the Oracle can help you perform a special attack.
The main goals of the "City of Fear":
Target:
Investigate Gordon's appearance on Panessa Studios
Target:
Surrender to the Scarecrow. Save either Robin or Gordon
Move to the Panessa Studios building and take the elevator to the lower floor. Walk up to Robin's detention cell and wait for Batman to receive an incoming call from the Scarecrow. Return to the street and go to the next point under the bridge.
Move to the next room and look at the monitors. Go to the table and pass your things. Go to the door to surrender. After getting hit on the head, climb up and climb over the fence. Try to open the shop door on the right and then head back to the middle of the street. When the Joker appears, kill him. After the cutscene, use the new and improved Batmobile to deal with many enemy soldiers until you fully charge Death Joke. Attack the enemy with this move, leave the Batmobile and climb the stairs above. Go through the door, cross the building, killing all opponents.
After the screen turns black, wait a few more seconds, turn on the flashlight. Walk up to the image of Batman in front, then turn around and walk up to the Joker. After the Joker is in the furnace, go to the corridor. When you get to the Joker statue, turn around and go the other way. Turn left to the Scarecrow statue, then go around it and follow to the end of the corridor. The Batman statue will explode, move through the building and get to Harley Quinn.
Talk to Harley several times. Turn around and shoot the chairs on the other side to clear a passage for yourself. Shoot the radio in the adjacent room, walk in a circle until you see a doorway. Go to another room and shoot at the seemingly endless statues of Batman. Shoot at the legs to destroy them faster.
Eventually, one of the statues will come to life and knock you off your feet. Shoot the cracked wall to create an exit for yourself, and then go through it. Pull the exit lever at the end of the bridge. Shoot Batman who is coming towards you. Then move to the Joker's isolator and hit him several times until you find yourself inside.
After the final cutscene, the City of Fear main storyline will be complete!
Additional missions "Especially dangerous"
There are 14 missions in this section in total. But you must remember that most of these missions will become available only after passing a certain part of the main storyline "City of Fear". In the course of the passage above, we indicated the moments when new additional missions were opened. Below we will list the rewards and conditions for unlocking the mission.
Perfect crime Batman Arkham Knight. Passing
The mutilated bodies of murdered people will be found throughout Gotham. Our hero must find the killer and stop the crimes. In order to find the exact location of the bodies, you need to be very careful and pay attention to all the clues that pop up on your screen. Next to the body of the murdered person, you will hear music from the opera - this is one of the clues. However, there are only six bodies to find, and Gotham is a fairly large city.
For the final part of the mission, you will need a Batmobile! But in order to use it, you have to complete the main storyline.
Corpse # 1. Anthony Land
Location: Blake Island, Trade Bridge.
Evidence collection: left ear, right abdomen, left thigh.
Corpse # 2. Franklin Accardo
Location: Blake Island, Gotham Herald Building, Northwest Side.
Evidence collection: left shoulder, chest, left knee.
Corpse # 3. Robert Kinkade
Location: Miagani Island, Sky Hotel, East Roof
Evidence collection: right shoulder, chest, left toes.
Corpse # 4. Lisa Mendez
Location: Miagani Island, southeast side of the building behind the bridge of salvation.
Evidence gathering: left torso, right eye, upper right arm.
Corpse # 5. Ella Montgomery
Location: Founders Island, south of the Bridge of Doom.
Evidence Collecting: Right Thigh, Right Abdomen, Right Skull.
Corpse # 6. Alison Veers
Location: Founders Island, north of Riker Heights near the docks.
Evidence collection: left shoulder, left thigh, left little finger.
Capturing a criminal
After you find and examine the bodies of all six victims, it will be time to complete the work you have begun. Head to Founders Island and find Pretty Dolls in Riker Heights. Go inside and go through the back door. You will hear opera music. Go down the stairs to the circular surgery room. Professor Pig will be here.
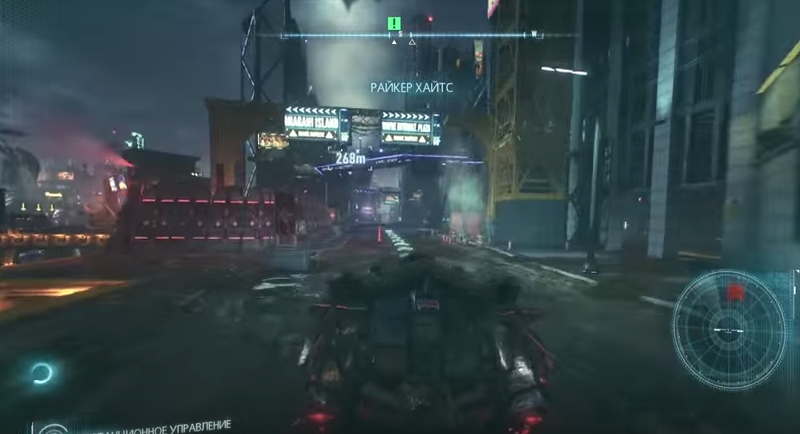
Expect him to attack and counterattack. When Pig is back on his feet, repeat the steps. When he is on the ground, use the move to finish him off.
Deal with the bandits, free the prisoners in the cells, and then detain Professor Pig. Follow the police department to turn it over to the authorities.
Armored and very dangerous Batman Arkham Knight. Passing
Will become available: in the third chapter after receiving the first upgrade for the Batmobile.
Target:
Find and neutralize everything battle tanks militia.
Location: undefined (three tanks on each island).
Reward: nine points of improvement - one for each disarmed tank.
These enemy vehicles will suddenly appear near the Batmobile, provided that you have taken this mission, and three such vehicles have not yet been destroyed on this island. It is worth noting that no matter in what order you destroy them, the mission will get more difficult - more firepower, additional convoys with militias, firing speed, number of missiles, etc.
When you are informed that you are near the transport, the health reserve of the enemy vehicle will appear on the screen, in the upper right corner. Below is the number of cars in the escort. Signal strength is indicated directly above the radar. A full green bar means that the car is somewhere very close to the Batmobile, and a blinking bar means that the vehicle is about to hide from the Batmobile.
After destroying one of the cars, go to it and take an improvement point. In addition, you earn experience points by dealing with enemy vehicles accompanying the main target.
Disarmament campaign Batman Arkham Knight Walkthrough
Will become available: in Chapter 3, when you track the vehicle of the Arkham Knight.
Target:
Find and defuse all explosive devices planted by the militia.
Location: Blake Island (4 pieces), Miagani Island (6 pieces), Founders Island (5 pieces).
Reward: 14 points of improvement (1 for each defused explosives); the last of the three missions you need to complete in order to fight Deathstroke.
In order to complete the entire mission at once, you need to tackle it only after completing the main storyline "City of Fear". The point is that some bombs will not be immediately available.
Each of these devices will be displayed on the radar when Batman is around. So use a game card. In the process of passing this mission, you will notice that the strength of enemy resistance with each bomb will be stronger and stronger. Upgrade your Batmobile more often to have more chances at higher difficulty levels.
Steps to defuse each bomb:
1. Download the virus: Shoot the drive winch at the bomb and start downloading the virus.
2. Defend: Use the battle mode of the Batmobile to take out opponents.
3. Detonate the bomb: use the drive winch to destroy the explosives.
After you deal with the "Rain" at the end of the seventh chapter, you will need to defeat Deathstroke. Before you can do that, you must deal with the bombs we mentioned above, as well as complete two other missions from the Most Dangerous series - Occupy Gotham and Own the Roads. Only then will you be able to fight the boss Deathstroke.
When the fight begins, focus on the Cobra drones first, using missile defense. When you destroy all five drones, you can deal directly with Deathstroke. Be at the required distance from the target, avoid homing missiles hitting the hero. The mission will only be completed after defeating Deathstroke.
Night flyer Batman Arkham Knight. Passing
Available: the third chapter.
Target:
Examine the winged creature in the sky.
Location: Blake Island, near a chemical plant.
Reward: 6 points of improvement (one per object); the last of the three missions that must be completed in order to fight Maine Bat.
Most Dangerous Villain: Maine Bat.
After the third chapter, an icon will appear on the map, which indicates the approximate location of the winged creature, which you need to find based on the additional mission. Find a good spot somewhere above, enter detective mode to determine the target. Go down to the target to knock the creature to the ground and collect a blood sample.
Move to Kirk Langstrom's laboratory in the northern part of Blake Island and find the entrance. Take the elevator down to the basement and follow the corridor until you reach the laboratory. If you can, use the computer in the corner of the room to create a clean DNA sample. Complete the mini-game to reach 100% of the result.
Again you need to find the winged creature. Glide over the city until you hear the screeching of the beast. Hunt down the beast and shoot it down again. Unfortunately, your target will hide again. Hunt down the winged creature again and complete your job. You will not be able to complete the quest until the beginning of the eighth chapter. You will have to play as Dr. Langstrom in the police department's isolation ward. This will allow you to complete the task.
Friend in need Batman Arkham Knight Walkthrough
Available: chapter 7.
Target:
Investigate lost connection with Lucius Fox
Location: Miagani Island, Wayne's Tower.
Most Dangerous Villain: Hash.
Reward: 3 points of improvement.
This mission will become available in the seventh chapter when the connection with Lucius Fox is lost. If you want to complete the quest, then you need to get to Wayne's Tower on Miagani Island. Go through the underground car park, which can be accessed by driving southeast of the Gotham Bank. Just follow the signs and then take the elevator upstairs.
Go to the office and try to access the computer using the retina scanner. It won't work. Approach Thomas Elliot, who is aiming a pistol at Lucius Fox. In the end, he will aim the gun at Batman, you must knock him down. If you try to shoot down Thomas too early, he will shoot Lucius. If you are too slow, then Thomas will shoot Bruce Wayne. Choose the right time and as a reward for completing the quest, you will receive 3 improvement points.
Gotham is on fire Batman Arkham Knight. Passing
Available: chapter 3.
Target:
Investigate the report on the arsonist in Gotham
Location: Bristol Fire Station, Cauldron Fire Station, Otisburg Fire Station.
Most dangerous villain: Firefly.
Reward: 7 points of improvement.
After you check the crashed vehicle of the Arkham Knight, Alfred will contact you and report the fire that has occurred at the Bristol fire station on Miagani Island. Follow the indicated route and find the electrical panel. Attach a drive winch here and rotate the engine a few times. This action will activate the fire extinguishing systems, at which point you will have to pursue Firefly across the island. Make sure you put out any fires it leaves, which is easy and simple enough. Also, you need to keep an eye on your enemy's fuel supply. When you run out of fuel, leave the Batmobile and land a few combo attacks on your enemy before they continue to hide.
Move to Blake Island and see smoke rising above Cauldron Fire Station. In order to activate the fire extinguishing system, you again need to use the drive winch and rotate the engine a few times. After that, the chase for Firefly will again begin. You need to act according to the same formula as last time. When the enemy runs out of all their fuel, hit him a few hits and watch him run away from you again.
Drive the Batmobile to Founders Island and then deal with the fire at the Otisburg Fire Station. Just as in the first two cases, use the drive winch and rotate the Batmobile engine a few times. Move behind the enemy again, wait for his fuel to run out, and deliver a few hits. This time the enemy will not hide and you will finally deal with him completely, for which you will receive improvement points. True, it will be necessary to deliver this villain to the police department.
Escape for weapons Batman Arkham Knight Walkthrough
Available: chapter 3.
Target:
Find and destroy all of the Penguin's weapons depots
Location: various locations.
Most dangerous villain: Penguin.
Reward: 11 improvement points (2 improvement points will be awarded for each cache destroyed).
Weapon storage # 1
Use the sunroof to get inside the building, then look for an air vent on the wall and jump down to the grate on the ground. Go to the Penguin and interrogate him, and then get ready to fight a couple of dozen Penguin thugs. You have to switch between Batman and Nightwing, use double attacks in certain situations. When the location is cleared, then enter the storage with weapons and apply the gel to the indicated box in the back row. Leave the storage and blow up the warehouse with weapons. You will be ambushed. But now you can call the Batmobile, with which you can easily deal with the militias and turrets.
Weapon storage # 2
Open the door at the southwest corner of the building and use the remote hacking device's remote to access the console and open the main gate. There are two turrets waiting for you inside, so be careful. To get through them, activate the remote control of the Batmobile and destroy the gun turrets with heavy weapons.
Move left and make your way through the hatch above. Use the switch on the wall to open the roof shutters, then go outside and head up the roof. You can fall through the open shutters into the room below and deal with the thugs. Nightwing will help when you use the disintegrator on bandits. When the location is cleared, then use the explosive gel and apply it to the weapon box. Move to a safe distance and detonate. Two out of five caches were discovered and blown up. You will have received 4 improvement points by this time.
Weapon storage # 3
Climb up to the small balcony and perform a silent attack on the sniper. Climb the stairs, go down the vent and find yourself below the seven bandits. Move past the wall to the other end of the room and then use the explosive gel and move towards the two thugs. Blow up the gel and deal with those who remain on their feet.
Remove the cover from the vent on the side wall, head up to the room with the weapon storage and several enemies. First, defeat the opponents, then use the explosive gel on the indicated box. Leave the vault, close the door and detonate the gel. You will receive two more upgrade points.
Storage No. 4
Use the Batmobile's remote control and crash into the wall on the right. You can shoot the drive winch at the pivot point and then pull it back with the Batmobile. Make your way through the resulting hole, the Penguin's thugs will be waiting for you inside. Nightwing won't help you this time. Deal with the villains, place the explosive gel on the highlighted box. Leave the vault before detonating the weapon.
Storage number 5
Find your way forward and step onto the beam at the back of the room. Next, a turret awaits you. Use a remote hacking device to disable it. Approach the turret and destroy it completely. Remove the roof from the ventilation shaft on the far wall and walk along it under the floor. Move past Nightwing, then jump out behind a weak wall and rescue a buddy.
Defeat all the bandits with Nightwing, and then use the explosive gel on the crate inside the last weapon storage. Leave the vault and watch what happens. The penguin threatens to kill Nightwing. Use a double attack, and then blow up the last storage with weapons. Take the Penguin to the police headquarters and lock him up for the last three upgrade points. The mission is fully completed.
Masked follower Batman Arkham Knight. Passing
Available: chapter 3.
Target:
Investigate masked follower message
Location: various locations.
Reward: 8 points of improvement.
Move to the first control point indicated on the map to find the symbol with the burning bat. Azrael will be on his knees. Talk to him, then take control of the would-be Batman and deal with the bandits that will appear in this place.
In the second trial, you need to move on the island of the Founders to one of the rooftops in the southeast of Otisburg. Take another look at the burning bat symbol. As soon as you notice it, then the key point of the mission will appear on your map. This time, there will be a thug among the usual enemies. Opponents will throw containers at you. Focus on killing the thug first, and then finish off the rest of the bandits.
The third trial is located on Blake Island, east of Chinatown and just west of the roundabout. When you get to the roof, then talk to Azrael again. In the new battle, there will be enemies with electrified armor. Use the Batclaw when you see an electrical charge on them. You should not attack them in any other way. Although you can use the remote control from the electric charge remote control, this method is more tedious and time-consuming.
Finish the battle, follow to the small island between the other three islands to find there the next symbol with a burning bat, located at the top of the statue.
Among the enemies there will be ninjas and opponents with daggers. Deal with them, move to the top of the clock tower and go inside through the passage on the roof. Access the computer in the center of the room. You need to find clues on video frames and scan them. The first frame will be at the very beginning, so to speak, the training part of the mission. Next, rewind the video to the time 5:51 and scan the cell on the crosshair of the third column from left to right and the second row from bottom to top. The next cell is at 16:25 on the crosshair of the second column from left to right and the third from bottom to top of the row. The fourth cell at 28:54 on the crosshair of the third column from left to right and the second row from bottom to top. The fifth cell is at 41:35 at the bottom.
When you control Azrael after a short cutscene, pick up the blade to the right of the elevator. Follow Batman and make your choice. You can either kill Batman, who is leading Azrael to police headquarters, or you can break the sword and stay free. If you want to break the sword, then go to the elevator and try to leave it there. The mission will be completed.
Counting sheep Batman Arkham Knight 2015 Walkthrough
Available: Chapter 9.
Target:
Explore Lady Gotham and keep Jack Ryder safe
Location: Lady Gotham Island
Most Dangerous Villain: The Accidental Preacher.
Reward: 3 points of improvement.
Move towards the statue of Lady Gotham in the city center (on a small island between the three main islands). Go to the place where the men are for the cut-scene to start. You will have to defeat all people in three minutes. Approximately after you have killed half of the enemies, people will appear with weapons in their hands. After winning, use the Electric Charge Remote Control Device to turn off the generators in the large cage. Jump onto the cage to get inside it and deal with the enemy.
Two-faced bandit Batman Arkham Knight. Walkthrough on PC
Available: chapter 5.
Target:
Stop Two-Face and his men from robbing the banks of Gotham
Location: various locations.
Most Dangerous Villain: Two-Face.
Reward: 7 points of improvement.
Little Bank: Chinatown
Location: Blake Island, Chinatown.
Number of robbers: 8 people.
Thugs that will appear after the alarm: 5 people.
Cash: $ 100 million.
To start this mission, deal with eight armed enemies located between the building and the truck. You can also act in the open. Try to deal with enemies with a multi-strike of fear.
Middle bank: Drescher
Location: Founders Island, Drescher.
Number of robbers: 10.
Cash: $ 200 million.
Bandits take money from offices on different floors of the bank. With the help of the detective mode, you can determine their location. Use special tricks to end everyone. When you have dealt with everyone, you can go to the final stage missions.
Big Bank: Kingston
Location: Miagani Island, Kingston.
Number of robbers: 15.
Thugs that will appear after the alarm: 8 people.
Cash: $ 300 million.
This bank is much larger than the previous ones. The money will again be on several floors, in different vaults. Deal with the bandits of Two-Face, try not to be seen. When everyone is finished, Two-Face himself will enter the bank along with his people and will try to kill Batman. Finally, take Two-Face to the police headquarters to complete the mission and receive a few upgrade points as a reward.
Road owners Batman Arkham Knight. Passing
After you start Chapter 7, Batman will be informed of several militia checkpoints across the three islands of Gotham. Such points will usually be located on the ground and surrounded by several enemies, unmanned robots, turrets, etc.
There are a total of 20 such items, you need to destroy each of them. For each point you will receive 1 improvement point as a reward. After you destroy all the soldiers and equipment, you will need to go to detective mode and find the body of the commander, and then destroy the point.
Watchtower 1
Location: Blake Island, Chinatown, south of the Scarecrow's house.
The first watchtower will have three turrets. First, use the remote hacking device to blind the enemy on the outer perimeter. Next, destroy the turret in the center. After that, it remains to deal with the remaining turrets and perform a special technique to defeat the commander. Finally, destroy the item itself.
Watchtower 2
Location: Blake Island, Chinatown, behind the Cursed Bridge.
Deal with the soldiers first. Then use a remote hacking device to disable the security panel. Enter the newly opened area on the right side of the building. Deal with common enemies and the commander. Destroy the Watchtower.
Watchtower 3
Location: Blake Island, Chinatown, near the tattoo parlor.
North of the clock tower. The watchtower has two turrets along the wall. Use the Batmobile to destroy the turrets, then go inside and deal with several thugs. In addition to the usual enemies, there will be medics and combat experts. Destroy the controller and move on.
Watchtower 4
Location: Blake Island, Chinatown, northeast of the hospital. Dealing with this watchtower is quite simple. The security here is not strong. Just attack a group of enemies and that's it. Find the Controller and destroy the Watchtower.
Watchtower 5
Location: Miagani Island, Kingston, west of the Bridge of Mercy. The point is guarded by ordinary soldiers and one brute. Use a multi-hit, and then finish off the remaining opponents, including the commander. Find the controller and destroy the watchtower.
Watchtower 6
Location: Miagani Island, Kingston, Ranela Ferry Terminal.
This watchtower is heavily defended. There are five armed soldiers and two drones here. Use the Batmobile's heavy weapons to destroy the drones, and then deal with the soldiers as well. Some enemies hide in containers. Use detective mode to find the commander and destroy the watchtower.
Watchtower 7
Location: Miagani Island, Bristol, Elliot Hospital.
Use a multi-hit or a silent attack to start dealing with eight unarmed soldiers and a brute. Get rid of the commander and destroy the watchtower.
Watchtower 8
Location: Miagani Island, Bristol, UrbarailStation.
Infiltrate the area in the Batmobile from the Southwest or Northeast. There are mines around the watchtower area. Be careful when killing soldiers. After you have dealt with everyone, focus your attention on the commander and destroy the controller.
Watchtower 9
Location: Miagani Island, Bristol, Botanical Garden.
The point is guarded by eight armed bandits and two drones. On low levels dealing with it is quite problematic. Use the Batmobile's heavy cannon to destroy the drones first. Use multi-hit to destroy soldiers.
Watchtower 10
Location: Miagani Island, Kingston, Grand Avenue Junction.
There are 5 soldiers and two medics in the guard of the watchtower. First, deal with the medics to eliminate the possibility of reviving opponents, and then get rid of ordinary soldiers. Destroy the puntk.
Watchtower 11
Location: Miagani Island, Bristol, west of the south bridge.
The point is guarded by six armed bandits and a drone. The easiest way to deal with the enemies is to go to the southern side of the location, use a silent attack on two lone guards. Then move to the west of the location and deal with four patrolmen using a multi-hit.
Watchtower 12
Location: Founders Island, Riker Heights, CityVisionConstruction base.
Move to the northern part of the location and glide to the far wall. There is a safety bar here that you must use to disable the drone. Next, deal with five armed soldiers and destroy the watchtower itself.
Watchtower 13
Location: Founders Island, Drescher, east of CityVisionConstruction.
Use a flying strike to strike a lone bandit outside the watchtower. Be careful as the watchtower is guarded by four soldiers and four combat experts inside. Use the electric charge remote control to take out enemies. Find the commander and destroy the watchtower.
Watchtower 14
Location: Founders Island, Drescher
Use the drive winch to destroy the weak wall on the northwest side of the watchtower. Deal with the turrets and bandits. When everyone falls, then find the commander and destroy the controller.
Watchtower 15
Location: Founders Island, Drescher, southeast of the Cursed Bridge.
Deal with seven soldiers, two brutes and two armored bandits inside. It is best to start with armed soldiers, then move on to the thugs, and only after that destroy the unarmed opponents. Next, find the controller and destroy it.
Watchtower 16
Location: Founders Island, Riker Heights, south of Wayne International Plaza.
There are six drones and several armed soldiers inside. Take the Batmobile, head north and deal with the power cables. Use the remote hack to change the position of the switch to open the location for the Batmobile. Use heavy weapons against drones.
Watchtower 17
Location: Founders Island, Otisburg, northeast of the T-junction.
First, deal with the three turrets guarding the north wall. Use multi-strike against five armed bandits. Destroy the controller and complete the operations with the watchtower.
Watchtower 18
Location: Founders Island, Otisburg, next to the Amertek building.
The point is guarded by nine soldiers and one bully. Use multi-hit first to thin the enemy ranks. Finish off the rest and destroy the watchtower.
Watchtower 19
Location: Founders Island, Otisburg, south of the Bridge of Repentance.
Difficult place. There are several armed soldiers and other, more powerful enemies. Kill the stronger ones first, as usual.
Watchtower 20
Location: Blake Island, Chinatown, southwest of the clock tower.
You need to cross the water and deal with the turrets and soldiers on the other side. When all are destroyed, finally deal with the last watchtower.
Batman arkham knight batgirl.
Passage of the plot
After the introductory video, Barbara and Robin will find themselves at the beginning of the amusement park. Defeat 10-15 thugs using team moves.
Target:
Infiltrate the amusement park
Walk forward to the gate. A terminal is located between the two grates on the wall. You need to use a remote hacking device (hold down the "down" button on the joystick) to hack the panel. In the English version of the game, the password to the terminal will be CHILDHOOD
Move forward on the funiculars. You will be stopped by Robin, who will report that a sniper has sat down in front. Hide behind the obstacle on the right side of Robin and enter detective mode (hold the "up" button on the joystick). There is a terminal above the sniper that you can hack to disarm the enemy. Then move on.
Target:
Rescue the hostage
There will be a second sniper on the tower, two common enemies and the first captured police officer. There is a terminal on the left side of the tower. Hack it to start the generator and thus distract the sniper.
Target:
Climb to the top of the oil rig
Look up and use the Batclaw to climb up. Sneak up to the enemy ahead and silently deal with him. Use a remote hacking device on the terminal located behind the bars. Thus, you can move the platform on which you are standing to the left side. Raise your head up and you will see a passage that can be approached with the help of a batclaw.
Climb into the ventilation shaft by pulling out the grate and go to the other end. Look down and see a group of bandits. There is a device on the far wall behind them. Hack it to scare all opponents. Next, you will need to hack a new terminal to open the gate. V English version game password WEALTH
Follow the corridor and climb onto the ledge. Move up the stairs. When you find yourself in a dead end, lift your head up again and see a hole in the ceiling. Climb there, with the help of the batclaw break the grate on the top of the wall on your left side. Climb inside the ventilation shaft, move along it to the very end. You will see three thugs threatening the police officer. There is a terminal on the wall behind them. Hack it to turn off the light. Deal with all enemies and save the policeman.
Climb onto the balcony and climb higher up the fire escape. Look up and on two different tiers you will find a hole in the ceiling. Use the last fire escape to get out.
Target:
Scan an area looking for hostages
When you get to the top of the tower, Barbara will launch the gadget. You need to find three points on the location where there are hostages: "Ferris wheel", "Merry-go-round" and a building near the crane.
A global challenge. Rescue the hostages
Target:
Rescue hostages on the Ferris Wheel
Land on one of the two nearby towers. Deal with the sniper. There are four such towers around the "Ferris Wheel" and on each of them there is an enemy. Two bandits will walk between the towers (separately from each other). There are two more people standing at the base of the Ferris Wheel. Thus, first deal with the enemies on the towers, then with two bandits moving between the towers, and then with two enemies near the Ferris Wheel.
On the left side of the "Ferris wheel", if you look towards it, and stand with your back to the park, there is a control panel with a button. Click on this button. The wheel will start spinning even faster, and new enemies will appear on the location. Use ditches, terminals and various traps to defeat all of the Joker's thugs. Finally, go back to the control panel. On its left side, you will need to open the door, and then hack the terminal. When the terminal is hacked, turn the Ferris wheel until the first hostage gets off it. Continue spinning the carousel and rescue the second hostage. You can enter detective mode to see a booth in which a police officer is taken hostage.
Target:
Defuse the bomb inside the Great White Whale
Robin will contact you immediately after rescuing the hostages. Follow the indicated route, straight to the marker. The target is inside the White Whale. Deal with all opponents. The countdown will start the moment you arrive. You will have one and a half minutes to defeat the enemies, and then crack the bomb. The password for the terminal with the bomb (Russian version of the game) - CHARLATAN
Target:
Rescue hostages on the carousel
Move to new point... You need to climb the carousel. The monitors will turn on, and the Joker will contact you. When you go down the carousel, enemies will appear. You need to destroy all the bandits, of whom there will be about two or three dozen. When you defeat everyone, apply an explosive gel to the flask with the hostages hidden inside. Mission accomplished.
Target:
Defuse the bomb at the beginning of the park
After rescuing the hostages, Robin will contact you again. Move to the very beginning of the park. When you are in place, hack the bomb terminal - FRAUD (Deception). Once you do this, enemies will appear. Deal with all the bandits together with Robin.
Target:
Rescue the hostages on the Ghost Ship
Move to a new location. There is a building here, but the marker points to a huge pallet below, near the building. You need to break this pallet and go down. There is a crane on the right side of the building. Climb this crane and hack the terminal. Turn the crane boom clockwise until the screen appears. According to this inscription, you need to press a button to drop the load and break the pallet.
First, climb into the building on the second floor. This can be done through the roof. Sneak up to the sniper and neutralize him. Further, another enemy will rise to the floor - kill him too. Use the crane to smash the pallet. Go downstairs and defeat all the bandits. Listen to the Joker. Hack the terminal near the gate - MERCHANTS
Go forward, climb onto the wooden boards and below you will see the bandits surrounded by the hostage. There is a terminal on the wall behind them. Hack it to scare enemies. Deal with everyone. There will be a panel with a lever on the wall. Lower the lever to move the large fish. Move along the new corridor and find yourself in a spacious hall where the Ghost Ship is.
Follow the perimeter, neutralizing enemies. Almost all of them will patrol the area alone. When you defeat everyone, enter the detective mode and move to the hostages. The two hostages will be released automatically. In order for you to be able to rescue the third hostage, you need to hack the terminal and move the hook on which the police officer is hanging to the right side.
Move to the indicated point, lower the lever inside the control panel. Move forward, climb onto the ledge, go to another similar panel and lower the second lever.
This will update the task: the global task of rescuing all police officers will be completed.
Global challenge: save Commissioner Gordon Batman Arkham Knight Batgirl Walkthrough
Go upstairs, leaving this place. Follow to the indicated point. You will return to the beginning of the park.
Target:
Follow Robin's Signal
Here, a little to the left of the place where you defused the second bomb earlier, there is a door. Go through this door. Go left along the ledges. Break the glass in the floor to go downstairs and open the door in front. Use the rope launcher to move forward. At a certain moment, on the left side, you will see a passage. You need to switch to another cable launcher and climb into the corridor. At the end there will be a room with a terminal. Hack this terminal and move the lifeboat. Return the same way using the ziplines. Go up the ledge around the bend and meet Robin. Climb the stairs up, where Joker and Harley Quinn are waiting for you.
Target:
Defeat Joker and Harley Quinn
So, the final fight will begin. In battle, you will face the Joker and Harley Quinn. The main villains will be helped by ordinary opponents. Defeat them.
There will be nothing special in the battle. The only thing you'll see are scenes where the Joker tries to stab Robin or Batgirl (depending on who you control). You need to press the indicated button in time to push the enemy away. Next, the Joker will try to fire the pistol. A hint will appear on the screen - click on this button in order to knock the weapon out of the enemy's hands by another character. Watch the final cut-scene.
All secrets in Batman Arkham Knight Batgirl
Audio diaries Edward Burke Walkthrough Batman Arkham Knight Batgirl
In addition to three types of collectibles (teeth, balls and Harley Quinn boxes), you can find five audio diaries of Edward Burke. In order to find the first four, you will need to take part in mini-games.
1 audio diary by Edward Burke
Climb up the oil rig in the center of the location. Look at the end of the park. On the right side you can see the carousel where the second group of hostages was rescued. There is a platform slightly to the left of it. Go down to this area and activate the terminal to trigger a huge red hammer. Please note that there is a kind of round platform near the hammer white, with a blue star. You need to hit this platform, falling from above. Climb the oil rig again and jump down to hit with all your might. If the hammer hits the maximum score, then the audio recording will start.
2 Edward Burke's audio diary
There are tents around the center of the location. Opening one of these tents using the terminal on the right, you will find 12 targets. You need to fire batarang at each target. With an accurate hit, the target will turn, and you will see a certain picture. There are 6 such pictures in total. As you guessed, two identical pictures for two targets. You need to open them in pairs. If you open two different pictures, then your first life will burn out. There are three such lives in total. Even if you fail, you can still start over. The sequence of pictures is as follows:
3 Edward Burke's audio diary
Find another similar tent in the middle of the amusement park. Open it the same way by hacking the terminal on the right. Here you will need to use the betarang again. This time, you need to knock out the green fish. At the beginning of the mini-game for everything about everything, you will be given 10-15 seconds. If you hit the green fish accurately, the time will increase by 3 seconds. When hitting a red fish (which should not be done), the time will decrease by 2 seconds. After hitting a few fish accurately, the mini-game will be completed. Listen to the audio recording of Edward Burke.
4 Edward Burke's audio diary
The fourth audio diary is perhaps the hardest to get your hands on. Move to the location shown in the screenshot below:
Stand with your back to the crane, facing towards the entrance to the amusement park, and turn into the building on the left. The floor in this building is in the form of a lattice. There will be a terminal on the wall to the right. Hack this terminal and you will be able to move the cars located below. You need to move the car in the middle in a straight line to the end. The difficulty is that this machine is barricaded by others. Here's a step-by-step guide:
At the very beginning, you can move two cars across the room. Move both cars to the left. The third car will become available at the right wall. It also needs to be moved to the left side.
Next, move the fourth car along the room, which will become active. From the corner all the way to the side of the entrance.
Now the machine will become active, blocking the path of the one on the center line. Move this car to the wall on the right, across the room.
Pull the car you need slightly forward (along the room, towards the entrance).
Another car will become available in the corner of the room, moving across. Move it to the left until it stops.
Move the typewriter you need back (along the room, from the entrance) again.
Replace the car that previously blocked her passage.
Return to the corner the car that moves along the right wall (the one to which the terminal is attached).
Finally, push all three cars blocking the path of the main car to the right wall, and move the last car to the aisle.
Listen to the audio recording.
5 Edward Burke's audio diary
Climb the oil rig, face the Ferris Wheel. There is a huge cistern on the left. Follow the cistern, but go down the building on which it is located. Find the front door and go inside. In the office, listen to the latest audio recording of Edward Burke.
Air balloons Batman Arkham Knight Batgirl Walkthrough
1. Stand on the tower in the center of the location and blow up the balloons (1/10).
2. Look down towards the Ferris Wheel. A little to the left there will be a tower on which there are one more balloons (2/10).
3. Next, move to the very tower (in the form of a huge cistern), where the previous balls burst. Look down again towards the Ferris Wheel. There will be balloons on the other tower (which is just below). Burst them (3/10).
Move to the position shown below:
4. You will see a huge tent, which usually houses the circus. Balloons hover above him (4/10).
5. On the right side of this tent there is a tower (in the form of a pillar with a mast). Climb to the very top and you will see a few more balloons there (5/10).
6. Remember where you looked for the audio diary by hitting the platform next to the hammer? If not, see the section above. So, stand with your back to the hammer and you will see two towers. Climb to the right tower and burst the balloons at the top (6/10).
Take a look at the screenshot below:
7. Move to this place, go to the right of the huge fish (counterclockwise of the ring road) and you will see balloons above the building (7/10).
8. Turn towards the oil rig in the center of the location. On the left side of it, approximately in the middle of the height, balloons are hovering in the air (8/10).
9. Remember the huge white whale, inside which the bomb was planted? There are several more balloons near its tail (9/10).
10. Finally, move to the half ship building where you used the crane. There are the last balloons between this building and the crane (10/10).
Joker False Jaws(teeth) Walkthrough Batman Arkham Knight Batgirl
1. Climb the oil rig in the center of the location, find the hole in the roof and go down inside the building. Use the Batarang to destroy the Joker's Jaws (1/15).
2. From the tower, look towards the Ferris wheel. There is a huge cistern to the left. At the bottom of this tank (closer to the oil rig) there is the Joker's jaws (2/15).
3. On the bridge leading to the Ferris Wheel, there are the third jaws of the Joker (3/15).
4. Stand with your back to the fish with jaws, which leads to the room where the second bomb was defused (together with Robin in the story). Climb up the tower in front on the right (in the form of a round cistern, not very high). Look at the small building on the right with a fenced roof. There are Joker's jaws on the roof (4/15).
Stand where shown in the screenshot below:
5. Climb over the fence and on the left side on the ground you will see the Joker's jaws (5/15).
6. Remember the place where there is a huge tent for the circus (you cannot get inside it). To the right of the tent there is a tower in the form of a pillar with a mast. There is a cistern to the right. Here on this cistern are the Joker's jaws (6/15).
7. Look for the next jaws at the entrance to the park. You need to go into the mouth of the fish and in the corridor after the first steps you will see the jaws of the Joker (7/15). There is no need to go to the place where the bomb was defused.
8. On the left side of the mouth of a large white whale. You need to climb over the fence and find the Joker's jaws (8/15) on the podium. The catwalk is very similar to the one used for fashion shows.
9. To the right of the large white whale is a circular arena. It will have Joker's jaws (9/15).
10. Climb onto the Ghost Ship (on the surface), near which there is a crane. Look at the beginning of the park and move to the rope slightly ahead and to the right (you can find it in the detective mode). Downstairs there will be a store labeled "5 C" (5 cents). You need to fall to the ground to the right of him and find the Joker's jaws (10/15).
11. Stand facing the building in the form of a ship. Go to the very end to the left of this building and find the Joker's jaws (11/15) on the wooden floor near the tent.
12. Approach the Ghost Ship and near the main entrance from the bottom find the Joker's jaws (12/15). This means that you should not be on the ship, but at the bottom of it.
13. Climb onto the ship, go past the hole through which you went down earlier (smashed the pallet with a crane). Enter through the window into the building and at the very beginning, find the Joker's jaws (13/15), behind the counter.
14. There is a crane on the right side of the ship. Near the crane, if you stand facing it and with your back to the beginning of the park, there are Joker's jaws (14/15) on the wooden deck.
15. Stand on the tower as shown on the map. Go down (the square on the map indicates the approximate location of the jaws). On the wooden floor near the red and white umbrella will be the last jaws of the Joker (15/15).
Harley Quinn Jewelry Boxes Batman Arkham Knight Batgirl Walkthrough
1. Climb to the top of the oil rig and open the first Harley Quinn box (1/5).
2. From the oil rig, look towards the Ferris Wheel. If you read the previous sections, then remember about another tower in the form of a huge cistern. Go down to the bottom of this cistern and find Harley Quinn's casket (2/5) between the details of the structure of its support.
3. Walk forward from the Ferris Wheel, go behind the metal fence and turn left. Move between the fence and the buildings and take the last turn to the right, between the buildings. At the tent on the right, there will be a Harley Quinn casket on a wooden barrel (3/5).
4. Right at the left fin of the whale (if we look at the fish from the tail towards the head), closer to the end of the map lies the Harley Quinn box (4/5). It is located on a ledge to which steps lead.
5. And again you will need to go to the left of the Ghost ship. Climb onto the deck of the ship and go down to the left. There will be a building with a roof in the form of a stage. There is a drum kit on the stage. Behind the drum set lies the last Harley Quinn box (5/5).
Batman Arkham Knight walkthrough is written based on materials
Developer: Rocksteady Studios. Publisher: Warner Bros. Games.
The Batman Arkham Knight release date is June 23, 2015.
System requirements
| Characteristic | Minimum Requirements | Recommended Requirements |
| CPU | Intel Core i5-750 2.7 GHz AMD Phenom II X4 3.4 GHz |
Intel Core i7 3.4 GHz AMD FX-8350 4.0 GHz |
| RAM | 4 GB RAM | 8 GB RAM |
| Video card | Nvidia GeForce GTX 660 AMD Radeon HD 7870 DirectX 10 |
Nvidia GeForce GTX 760 AMD Radeon HD 7970 DirectX 11 |
| 45 GB | 55 GB | |
| Operating system | Windows 64-bit: 7 / 8.1 | Windows 64-bit: 7 / 8.1 |
City of Fear storyline
1. Long night
Batman Arkham Knight. Passing

Introduction
You play as Officer Owen. When a concerned person contacts you, go to the end of the room and start a dialogue with the smoking visitor. Strange smoke spread throughout the hall, and all visitors went mad from it and began to see zombies.
The Scarecrow appears on the streets of the city, reports that the incident in the cafe was only a warning, now he is threatening the entire city with reprisals.
Objective: Meet with Commissioner Gordon near the Bat-Signal
You are now playing as Batman. Your first task is to meet with Commissioner Gordon on the roof of the police station. Jump off the building and soar through the air to your destination. Use the bat claw periodically. At the top of the screen there is a kind of radar, on which your destination point, where the meeting will take place, is indicated by a green square.
After you reach your destination, Gordon will tell you about the current situation, about your main enemy - the Scarecrow, and also inform you of the following objectives.
Objective: Rescue the missing officer
Get to the square and deal with the thugs who surrounded the car. After the last enemy is destroyed, get the police officer to his feet. We call the Batmobile.
It's time to get familiar with the basics of Batmobile driving. The training system will tell you about all this.
Objective: Interrogate the driver of a military vehicle for information about the Scarecrow
In pursuit of a war machine, you need to look at it for a certain period of time in order to lock onto the target. After that, press the key to release the rockets. You need to hit three times for the car to fail. Leave the Batmobile, go to the wrecked military vehicle and interrogate the driver crawling on the ground.
Objective: Explore the Scarecrow's hideout
When you drive the Batmobile, arrows will appear on the road, indicating the direction of travel. Climb onto the roof of a building in Chinatown, glide downward by breaking the glass roof. Defeat all thugs. By pressing the indicated keys, you will carry out various combos and get more points for them. In addition, you can learn techniques that will help you in the future in battles with more serious opponents.
After talking to Poison Ivy, go into the gadgets and select the Batmobile remote control. Destroy several enemy vehicles, then place yourself on the indicated area, near Batman.
Objective: Run the diagnostics of the energy system of the combat mode weapons
Move to the checkpoint, start the test. Destroy enemy vehicles with simple weapons, then launch a rocket at them. In the second stage of the test, continue to detonate the cars to fill both scales. After that, select targets and launch missiles at them. The desired key is indicated on the screen.
In the third stage, reload the energy weapon and shoot at four targets. By the way, if you get hit by enemies, then the charge of the weapon will subside and you will have to re-kill a certain number of cars. The simulation will be completed.
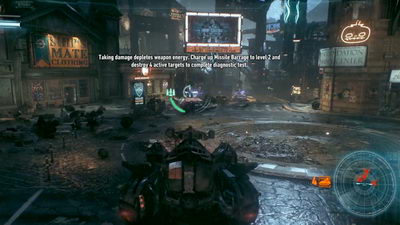
Waintech Screen
On the WayneTech screen, you can see a list of available moves or the WayneTech upgrade points earned. Complete missions from the "Especially Dangerous" category or gain experience points to upgrade your Batsuit, Batmobile and get additional skills. Tip: the most experience points are awarded for capturing the supervillains terrorizing Gotham.
You can open the skill tree and study it yourself. Choose for yourself which improvement will be better.
Objective: Destroy a group of unmanned tanks that have occupied Panessa Studios
Move to the indicated point, destroy a huge group of unmanned tanks using newly learned techniques. Use the jet engines of the Batmobile to avoid gunfire.
Objective: Deliver Poison Ivy to the punishment cell
From this point on, AR challenges are available to you.
Use the Tests section to set a marker for any available test. You can also see the requirements for unlocking unavailable challenges here.
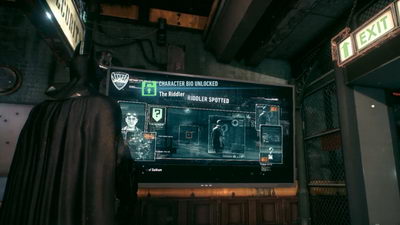
Go down to the lower levels of the police department and stop at the indicated place.
When Ivy is behind bars, you can examine the police station, listen to the conversations. Next, go to Commissioner Gordon and listen to information on the current state of affairs.
Once the cut-scene is over, you will have access to the mission selection screen. Explore the missions that are currently available to you:
Debt Calls(in this side mission you will need to rescue the firemen of the 17th station),
The Riddler's Revenge(inquire about the last location of the Riddler)
City of Fear(plot mission).
When choosing a mission, its marker will be set on the map. At any time, you can choose another mission, thereby changing the marker. We continue the story missions, and at the end of the passage we will return to the additional tasks.
Objective: Meet the Oracle in the clock tower
After choosing a mission, go through the gate, and then - past the prison cells through the door. You can talk to Jack Ryder in the interrogation room on the left side. Continue down the hallway past the isolators and exit into the parking lot. Jump into the Batmobile.
Move to the clock tower and climb to the roof. After you get to the marker on the map, you can enter the clock tower through the secret entrance on the roof.
Once inside, go to detective mode, use the retinal scan on the statue that is on the shelf. This will help you get into the hideout. Go to the computer in the center of the room and watch the cut-scene.
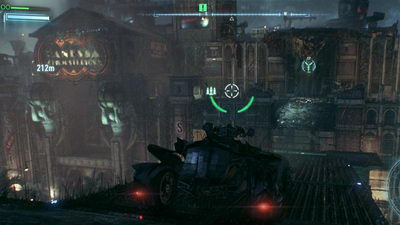
Objective: To clarify the location of the Scarecrow using the Panessa Studios antenna
Power up the PanessaStudio antenna using the Batmobile's drive winch.
Exit back to the roof and move to the next marker on the map. Go to the door and attach the remote access device. After the next cutscene, drive to another point on the map and park the Batmobile at the indicated location. This will allow you to attach a drive winch to your vehicle.
Enter vehicle combat mode, fire the winch and hold the backward key. Thus, you will demolish the structure in front of you. Use acceleration to get to the other side, and then look to the right. Shoot the winch and pull the roof behind you to create a springboard.
Use acceleration again to jump forward. While moving on the roof, stay in combat mode, it is more convenient to control the car. Be careful as you may fall off the roof. (If you do fall down, just follow the blue arrows back to where you first used the winch).
When you get to the platform on the opposite side of the roof, use the Batmobile's drive winch again. This time, you don't need to pull anything on yourself. We just drive forward and then reel in the winch so that the car climbs up the sheer wall.
Follow left, then turn right. Here you need to use a drive winch for burglary. We follow the sensor in the lower right corner of the screen, and press the button so that the arrow remains in the orange zone.
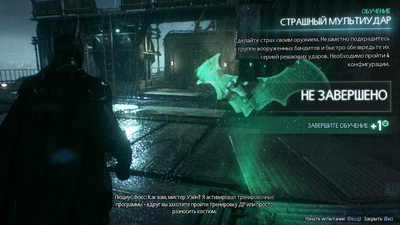
Objective: Find a scarecrow with an antenna at Falcone Shipping warehouse
Enter detective mode to look inside the building and find out how many bandits you will face. Climb to the highest point, move to the other side to improve your view. Select the batarang from the gadgets inventory and hit the door. Two men will go out into the street.
After they leave the building, jump down and deal with the enemies. Do this carefully so they don't warn anyone. If it is problematic to kill two at once, then after you deal with the first, jump onto the roof and lure out the second. Next, go to the door. Batman will call Lucius to get a new costume.
Objective: Get a new Batman costume
We put on the discarded suit. At this time, several stages of testing will begin. For each mission you get a skill point. (You can also skip the mission - it's up to you).
|
W. Scary Multi-Strike... A new technique will allow you to sneak up on enemies and quickly deal with those. The first three rounds of this training are fairly straightforward. Just get close to the enemies from behind and press the indicated key several times when it appears on the screen. In order to deal with both enemies, they must be visible on the screen. Otherwise, the reception will not work. |
|
W. Predator Basics... All you need is to ensure that all three enemies are on the ground at the same time. When you knock over one enemy, then he falls on the ground only for a few seconds and no more. Use a glancing blow, then quickly move to the second enemy. Batman's various gadgets can also be used. |
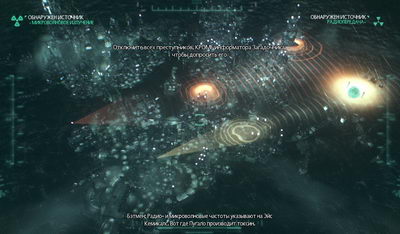
Objective: Find the scarecrow with the antenna at Falcone Shipping warehouse (continued)
After completing the training missions, use the earned skill points. Go to the right side of the building and jump into the ventilation shaft (Ctrl + middle mouse button). Get into the building through the grate, use new techniques to quickly neutralize three enemies. Go to the policeman sitting on the ground and free him.
Go to the electronic panel on the wall and attach the remote access device to it. Go through the door, throw the batarang into the air. On the global map screen, rotate two types of signals to find the Scarecrow. Both signals coincide in the right corner of the island - at the Ace Cemicals chemical plant.
Several more missions appeared on the roof - tests.
|
W. Bailout and flight... Call the Batmobile, follow the blue arrows on the ground until you reach the first round sign with a bat inside. Get out of the Batmobile and fly to the next bat sign. You must follow the indicated route until you find yourself on the ground. Before landing, we call the Batmobile again. |
|
W. Hook Reinforcement Mk II... Using the grappling hook, press the space bar several times to take off into the air by inertia. In flight, control the direction so as to fly into the rings. After that, you need to stay in the air for 60 seconds, for this we use the acceleration of the hook. Also, there is one more trick for a long flight: by diving down a little (Ctrl), we can direct the Batman up, and he will fly much higher than the initial height. |
|
W. Return throw... Stand between the enemies and wait for one of them to want to hit (blue lines appear above your head). At this moment, press the counterstrike (right mouse button) and the arrow in the direction of any other enemy. Repeat the procedure 5 times. |
2. Prevent Ace Cami cals explosion
Batman Arkham Knight. Passing
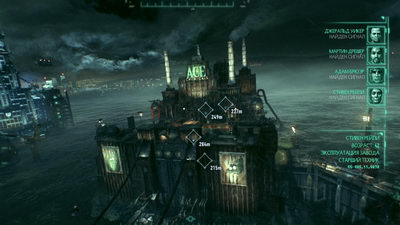
Objective: Meet with Gordon at the Ace Cami cals
Objective: Rescue the missing Ace Cami cals to obtain information about the Scarecrow
Climb to the roof of the factory, enter detective mode to scan the area for enemies. Use the vertical shaft from the roof to reach the bottom of the plant.
Use the lever, go to the terminal, and then use the new technique to neutralize enemies without raising an alarm. Go back to the mine, move around the territory and kill the remaining enemies. After all the guards are neutralized, gain access to the terminal.
You need to get to the top of the plant for a good view. On the scanning screen, move the target, turn on the scanner, find the location of 5 workers one by one.
First, go to the worker located farthest from everyone. We fly through the roof into the control room, neutralize the enemies. But the path to the captive worker is blocked by a poisonous gas. To go further, you need a Batmobile.
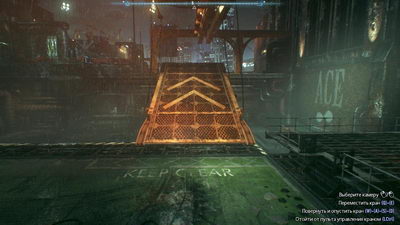
Objective: Open the main gate of the chemical plant so that you can drive the Batmobile
We return to the gate, through the roof we fly into the building with the guards. Here the captive worker has already been killed. Access the panel next to it to open the main gate.
We turn on the remote control of the Batmobile (key "="), use the drive winch to destroy the structure and form a springboard. Accelerate using acceleration to fly to the other side. There will be unmanned tanks inside, deal with them. Use a winch to pull out the doors in the corner. Go to the next level and find a springboard.
Use the Batmobile's cannons to neutralize opponents on the platform. Leave the Batmobile and deal with the remaining opponents on the platform. When they are defeated, another enemy group will come running. Access the panel on the platform and slide the platform to the right and down. Return to the Batmobile and use the new ramp to get to the other side.
Move to the right, deal with several tanks in the second half of the plant. Use the drive winch to break the pipe attached to the building.
Leave the Batmobile, make your way a little higher to climb through the windows. Deal with opponents inside the building. Approach the pipe in the corner of the room and select the explosive gel (key "3"). Apply the gel to the damaged area on the right side of the pipe, run to the side and blow up the pipe. Here the worker is also dead.
Climb through the hole, move to the left. Explode the gel on the crack in the floor. Get access to the panel near the door, again use the explosive gel on the crack, which this time are located on the wall on the other side. Blow up the wall, switch to remote control the Batmobile and select the power winch to rip out the pipe.
Move down the corridor and sit down to make your way under the partially open door. Go to the opposite side of the hall and access the switch panel. Open the gate with the panel. On the Batmobile, select a 60mm cannon and destroy the cracked wall. You will see cables from the elevator. Use the Batmobile's drive winch and back up to raise the elevator car.
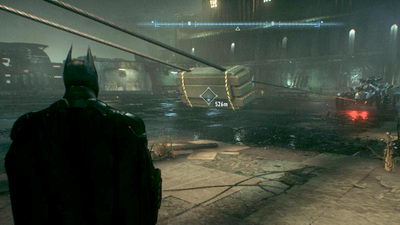
Climb the elevator with Batman. Use the Batmobile to lower the elevator together with the hero, for this move forward. Leave the elevator with Batman, climb the ledge in the corridor a little higher. Sit down to get into the adjacent room. Remove the grate on the left side, then go to one of the two grates in front. Switch to detective mode if you cannot find them yourself.
Use new techniques to deal with enemies in the room, and then talk to the worker. Go back to the elevator, climb into it and use the Batmobile to lift your hero upstairs.
Once you leave the elevator, you will need to deal with the helicopter. Use the Batmobile. First, we destroy all self-propelled guns on the ground. We dodge the mines of the helicopter, leaving the red zones. We shoot down enemy homing missiles with machine gun shots.
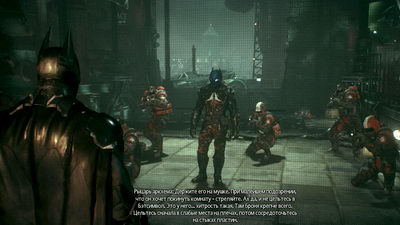
Objective: Take the Ace Camikals worker to Gordon on the bridge
You need to leave the factory. There is a tunnel in the corner of the site. We put the Batmobile on the platform in front of the tunnel, exit, press the button to raise the platform, and drive on. Use the acceleration to jump over the gap and get the worker to Gordon on the other side.
Jump back to the factory, go up to the upper platform, but now you need to go to the small side building, where the last worker was left. Go around the building in a circle to find the entrance. Use the Batmobile's drive winch to pry open the door. Deal with the enemies inside, then look around to find a door. This door will lead you to the worker's room.
We fall into an ambush, and we see the one who calls himself the Arkham Knight. After the cut-scene, switch to remote control of the Batmobile and deal with the opponents. Free the worker, then ride back to deliver him to Gordon.
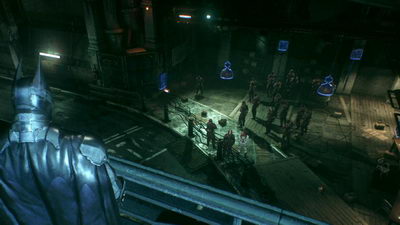
Objective: Don't let the Scarecrow blow up the Ace Cami.
Use the trampoline to return to the factory. Use the cannon to blast the marked brick wall. Batman climb to the crane control panel, move the springboard to the left, turn it and lower it down. We drive along the springboard inside the hole in the brick wall.
Inside the building, deal with two tanks. Leave the Batmobile, climb onto the upper beam. After dismantling the enemies below, look to the left and make your way under the grate. You will find yourself behind two enemies. Wait for the red hour to pass, then use the trick and return under the bars. Access the panel on the wall to lower the gate through which the Batmobile can enter the grounds.
Move further along the tunnel, climb through the gate above. From under the lattice we attack two enemies, and then we immediately hide back. We are waiting for the machine gun turret to turn away, we approach it from behind and break it. We open the 2nd gate.
You must deal with all the thugs before fighting the Scarecrow in the central room. While the enemies are talking, you can discreetly jump down and open the gate in order to enter the Batmobile and quickly eliminate some of the enemies. The rest will have time to hide, you need to finish them off manually.
Go to the center room. We meet the Scarecrow. He threatens to kill our oracle if we don't let him go. So he manages to escape.
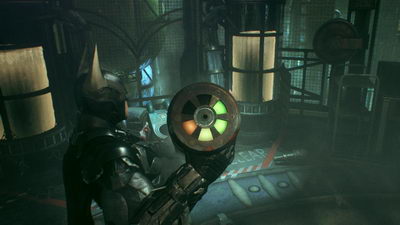
Batman remains in a locked room. We approach the control panel in the center of the room. Now you need to move the four neutralization barrels to the open slots. You need to move slowly, if the motion sensor starts to go off scale, the substance will explode. Seeing red colors on the sensor, you need to stop for a while.
When you grab the last fourth barrel, the Joker will stop you ...
We play for Commissioner Gordon. Follow the red carpet towards the elevator. Open the door and go inside. Examine the prisoners who look like the Joker. We meet Batman, we learn that people infected with the Joker's blood begin to behave just like him. All infected were caught except one. (It was just a memory from the past. Let's go back to our days).
Objective: Leave the chemical plant
Switch to remote control the Batmobile and smash the walls ahead. We go to the surface by car, take off from the factory along the springboard.
The plant exploded, but we reduced the power of the explosion to 25%, and only a small section of the city was contaminated. Batman himself also became infected, and now often sees hallucinations with the Joker.
3. Save the Oracle
Batman Arkham Knight Walkthrough
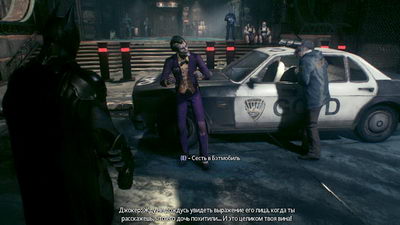
Objective: Meet with Gordon outside the police department
We return to the police. On the way, you will come across several unmanned tanks. Destroy them. Leave the Batmobile and talk to Commissioner Gordon by the car.
Objective: Escort Gordon to the Oracle Clock Tower
Follow Gordon's car. Several enemy vehicles will try to stop you. Deal with them. Almost every vehicle is destroyed with one missile, but launching requires not a combat mode (this is how we lose speed), but a long auto-aiming. Having repulsed the attack, we transfer Gordon to our car.
Objective: Deal with the Arkham Knight militia who have occupied Clock tower
Deal with unmanned tanks near the tower. Leave the Batmobile and take out the thugs on the low roof.

Objective: Explore the clock tower in search of a clue to the location of the Oracle
Climb onto the roof of the tower and use the hidden entrance. You will find yourself in a memory where the Oracle is being shot. After the Joker disappears, lift the stroller in the middle of the room. Go to the statue, call the hidden computer.
Gordon, who came, is outraged that we did not save his daughter, and goes to look for her alone.
It's time to check the video to find out who kidnapped the Oracle. Go to the screen in the upper right corner and rewind the footage to approximately 36:00. Select the square of the video in which the Arkham Knight carries the oracle (2nd row, 2nd column). Fast forward the video to 48:00 and look at the square with the jeep in which the oracle was taken away (3rd row, 2nd column). Using the video, we determine the tire tread mark. Leave the clock tower.
Objective: Track the Arkham Knight's car
Call the Batmobile. Enter combat mode and select the scanner ("X" key). Scanning waves will show the found tire track of the Arkham Knight's car.
Objective: To study the device of militants
Objective: Defuse a bomb with a controlled explosion
An enemy helicopter threw an unknown device into the ground. Leave the Batmobile and examine the device. This is a bomb, we begin to crack it.
Unmanned tanks are moving towards you, so go back to the Batmobile and deal with them. The catch is, you can't go too far while picking up the bomb. Circle around the bomb, dodge tank attacks and destroy them.
Then use the drive winch and the engine to arrange a controlled bomb explosion. Keep the arrow in the orange area in the lower right corner until the bomb explodes.
Especially Dangerous: Disarmament).
Objective: Seize the access point at the Grand Avenue station to lower the Mercy bridge
Continue following the tire tracks to the bridge, move to the next point on the map. Deal with the enemies on the way and gain access to the computer in the central area.

Objective: Go to the Riddler's shelter to rescue Catwoman
The Riddler gets in touch. He took Catwoman prisoner for us to pass his tests. We go to the marked gang of thugs. We stun all enemies, except for the one marked with a green silhouette - this is the Riddler's informant, we interrogate him.
We go into the building "Pinckney Shelter". Jump down, walk around the perimeter of the room to avoid hitting the electric floor in the middle, and rescue Catwoman in the center. Deal with robots. But to save the cat you need to remove the bomb collar, and for this you first need to solve all the riddles of Enigma.
(You have unlocked additional missions Especially Dangerous: The Riddler's Revenge). We leave that for later, but now we return to the "City of Fear" storyline.
Returning to the bridge, on one of the roofs we stumble upon a meeting with a mutant bat. (We open additional missions Especially Dangerous: Night Flyer).
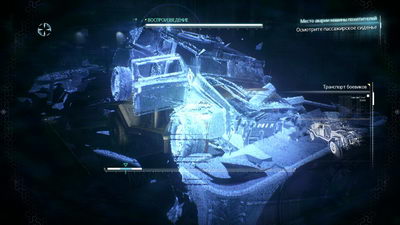
Objective: Return to the Bridge of Mercy to continue tracking Arkham Knight's vehicle
Go back to the bridge and get into the Batmobile. Move closer to the bridge by car, a conversation with Alfred will begin. Deal with the tanks on the other side. In small self-propelled guns, the vulnerable spot was marked with a purple dot, if we get there with an ordinary machine gun, the self-propelled gun will immediately explode.
Objective: Investigate the crash site to find out what happened to the Oracle
The trail leads to a crashed jeep on the side of the road. Leave the Batmobile and activate Detective Mode to find the details of how the car crashed.
2. Rewinding the reconstruction of the accident backward, inspecting the right front seat, we see that the door flew off before landing. We examine the real door where it landed.
3. Rewind the crash back, see how the Oracle jumped out on the fly. She tried to crawl away, but she was stopped by the Knight's shot. We examine the place of the bullet hit.
4. Rewind the accident back, and carefully watch how the Oracle crawled. At one point, she quickly waves her hand to the side. In this place we examine the box, find a discarded USB flash drive under it.
We communicate with Alfred. (Additional missions open Especially Dangerous: Heir to a Knight and Especially Dangerous: Duty Calls). We will continue the plot for now.
Objective: Go to Wayne's Tower and analyze the encryption protocols of the Arkham Knight
Follow to Wayne's tower, which is currently indicated by a marker. When you get to the balcony, Batman will automatically open the door. Inside, on the computer at the table, we improve the Batmobile's weapons. We activate the statue on the shelf to get a new weapon.
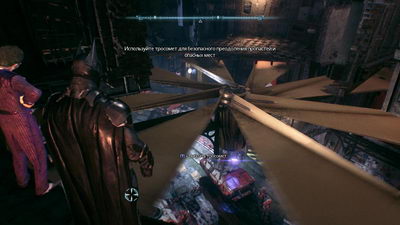
Objective: Penetrate the tunnel under the island of Miagani
We figured out the Arkham Knight's hideout in the underground tunnels of the city, we are going there. Deal with unmanned tanks. The inner gates in the tunnel are closed. We drive away from them a little further, we see a large fan from above, we catch it with a winch and pull it out.
Use Batman to climb into the ventilation. Apply explosive gel to the planks in front. Next, you need to move through the grate on the left, and then use the Line Launcher gadget to drive along the cable above the fan.
Look to the right side (in detective mode), there is a switch behind the fence. You have to select "controlled betarang" (key "9"), launch it and fly around the fence using the remote control. You need to hit the switch. Select the rope launcher again and aim at the opened door behind you, through the fan.
Follow forward and climb to a higher area. Use the zipline launcher to traverse another ventilation system, then turn and use a controlled betarang to hit the next switch. There is a large hole in the wall to the right of the switch. Launch the batarang through this hole, then lower it slightly lower to the left and hit the third switch.
We leave on the balcony, from which you can jump to the military Knight.
We move through the pipes above the enemies, through the ventilation we go down under the ground, we pass into the side room. Arkham Knight catches us here. He leaves us as an ordinary military man.
Thugs appear among the enemies. Normal hits do not take them, you must first stun them (middle mouse button), and then beat them. Stay in the room to avoid being hit by machine gun shots.
After the victory, go to the corner of the room where the remote control is located, open the gate in the tunnel. Switch to the Batmobile, blast the door ahead and destroy the tanks. Drive to the far end of the tunnel, jump out of the Batmobile and hack the control panel to open the doors.
Follow the convoy of cars, get to the front vehicle of the APC and stop it. Intimidate and interrogate the driver. We leave on the trail of the Penguin, which supplies the Knight with weapons.
Having contacted Alfred, we find out the location of other armored personnel carriers with officers for interrogation. (Additional missions open Especially Dangerous: Armored and very dangerous).
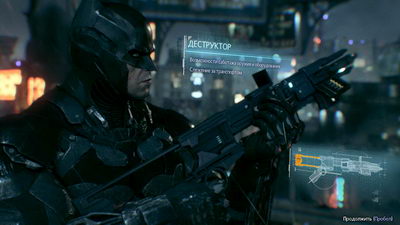
Objective: Meet with Beving to equip the Batmobile with a second weapon
Go to the meeting point on the map to find Batwing. Immediately after the update, you will be ambushed by several tanks. Deal with all enemies.
On the roof we meet the superhero Nightwing. He gives us a new weapon "Destructor" (key "7"). We increase the sight (key "Z"), shoot the destructor into the box with the weapon and into two machine guns in the hands of the bandits. Go down and deal with the enemies below. Use the destructor to leave the beacon on the van.
Objective: Follow the gun truck to find Penguin's secret hideout
Knock on the back door of the van, and stealthily chase fleeing enemies across the rooftops. When the van stops, climb up and finish off the people guarding the roof.
Objective: Get to the weapons cache and interrogate the Penguin
Go inside, jump into the building, go to the left side and find the ventilation shaft. Move through it under the surface of the floor until you find yourself near the Penguin, who should be interrogated. During interrogation, you must fend off enemy attacks.
Ultimately, the Penguin will flee, and Nightwing will come to your aid. Deal with enemies and clear the location.
Objective: Destroy the stash of the Penguin with weapons
Go to the vault and open the door. Use the explosive gel in the weapons depot, then close the massive round door, step back 20 meters and blow up the warehouse.
(Additional mission will become available " Especially Dangerous: Weapon smuggling").
Return to the roof, where an ambush of people and turrets awaits you. No devices will help here. Switch to the Batmobile, go to the top floor of the parking lot and deal with the people on the balcony.
The penguin told us that the Knight will attack the airships, we fly in their direction.
Today we'll talk about the game Batmen arkham Knight, the passage of which will be discussed in detail in this material. We launch the application and see the first splash screen.
Batman save
In Batmen Arkham Knight, the walkthrough begins at a bar. We are heading towards the smoking man. We speak to him. He turns out to be a monster wreaking havoc. We are trying to protect ourselves from monsters, but we are defeated and watch a video about the toxin. The city is in ruin. But suddenly Batmen comes into play. It is this character that we have to control. We fly forward to the point indicated in the distance. We talk with the officer about the evacuation. We receive a message about a new attack on a patrol car, specify its coordinates and follow to the place. We engage in a fight with the bandits and repel the attack. We are talking with the saved person. We get at our disposal a special car and follow to a new point. We start pursuing the enemy car and destroy it with missiles. We are attacked by the surviving criminals, we defeat them in hand-to-hand combat. We get a sample of a new toxin from one of the bandits, which must be sent for chemical analysis. We return to the car and follow to Chinatown. We rise to the roof of a high-rise building. We break the glass ceiling and get inside, where we have to repel the attack of the guards. We are saving a very unusual girl. We get out of the building. Enemy tanks are attacking us. We repel the attack using our transforming car. We are testing the damage that opponents managed to inflict on our car. We receive information about new enemy tanks and follow to the place. We destroy a group of unmanned enemy vehicles. We deliver our companion to the isolation ward.
Lost fire brigade
 In the Batmen Arkham Knight game, the passage continues by choosing a new task. We go to the rescue of the firefighters. We leave the police station. We get into the car and follow to the point. We again fall into the building through the roof. Passage of the game Batman Arkham Knight continues hand-to-hand combat with the bandit group. We save the captured firefighter and talk to him.
Further adventures
![]() The passage of the Batman Arkham Knight game continues by choosing the next task. We have to investigate mysterious death On Bridge. We follow to the place. On the way, we jump into the car and repel the attacks. We find a mutilated corpse. We are trying to establish the cause of death. We establish that the person died due to an overdose of painkillers. We conduct a search in the missing persons database. We set the name of the killed. In the Batmen Arkham Knight game, the passage continues by choosing a new mission. We pass to the Riddler. We follow to a new point. On the spot we meet not the enemy himself, but his image on the monitor. He tells us about his villainous designs. We go downstairs on a special elevator. Next, we need to overcome 3 laps in our car in the allotted time. We pass to the choice of the next task in turn and go to the Clock Tower. We rise to the top of the structure and enter it in a rather unusual way. We turn on the detective mode and confirm our identity. We use a computer. Next, we need to clarify the location of our sworn enemy by setting up a special antenna. We return to the car and follow to the destination. Having reached the generator, we understand that it is damaged. You need to connect the antenna directly to the power supply. Next, we need to use a special car winch. She is at a new destination. Then we return to the car and make a dizzying jump to the roof of the building. Using a special cable in the car, we lift a fragment of the structure. We jump to the next roof. During the overcoming of each obstacle, it is necessary to use acceleration.
The passage of the Batman Arkham Knight game continues by choosing the next task. We have to investigate mysterious death On Bridge. We follow to the place. On the way, we jump into the car and repel the attacks. We find a mutilated corpse. We are trying to establish the cause of death. We establish that the person died due to an overdose of painkillers. We conduct a search in the missing persons database. We set the name of the killed. In the Batmen Arkham Knight game, the passage continues by choosing a new mission. We pass to the Riddler. We follow to a new point. On the spot we meet not the enemy himself, but his image on the monitor. He tells us about his villainous designs. We go downstairs on a special elevator. Next, we need to overcome 3 laps in our car in the allotted time. We pass to the choice of the next task in turn and go to the Clock Tower. We rise to the top of the structure and enter it in a rather unusual way. We turn on the detective mode and confirm our identity. We use a computer. Next, we need to clarify the location of our sworn enemy by setting up a special antenna. We return to the car and follow to the destination. Having reached the generator, we understand that it is damaged. You need to connect the antenna directly to the power supply. Next, we need to use a special car winch. She is at a new destination. Then we return to the car and make a dizzying jump to the roof of the building. Using a special cable in the car, we lift a fragment of the structure. We jump to the next roof. During the overcoming of each obstacle, it is necessary to use acceleration.
Batman Arkham Knight: Riddler Walkthrough
 In addition to the main plot, there are additional missions in the game. For example, there are about 240 puzzles scattered throughout the city. In Batman Arkham Knight, the passage of riddles consists in a phased search for various trophies, rescuing victims, solving problems that resemble puzzles, and destroying various objects. To complete the game, we need to pass at least 10 of these 240 tests. All of them are displayed on the main map. Passing ten riddles will allow you to fight with the villain, however, once and for all, you can hide him behind bars only after solving all the tasks distributed throughout the city.
- Weapon sounds cs go for 1
- Festival "times and eras"
- Festival of avant-garde music Fields and "Masters of Music"
- Vdnkh: description, history, excursions, exact address Moscow Butterfly House
- After the overhaul, the Kurakina Dacha park was opened with the excavated Kozlov stream
- Library of Foreign Literature named after
- Governing Senate - Constitutional Court of the Russian Federation