Passage of cala duty ghost. Call of Duty Gameplay Walkthrough
 Live Journal
 Facebook
 Twitter
Hey go monkeys! Or do you want to live forever?
Unknown platoon commander, 1918
After the release of the demo version of this game, it belongs to the category of "what is it?" immediately moved into "the most anticipated action in the Second World War." It was prophesied that she would remove from the throne "the most Hollywood game" - Medal of Honor: Allied Assault. The most daring ones even threatened to revolutionize the genre. The developers echoed the players, posting game videos on the site and shouting bright slogans: "Victory is not a matter of one person, but of many thousands." They promised to make us just a small cog in the big mechanism of war. Just a lucky man who managed to get out alive from the monstrous meat grinder of World War II. Unfortunately, the promises were only partially fulfilled.
Call of Duty was never able to master its main thesis: war is not a matter of one thing. There are enough misses. Here we are single-handedly sabotaging the dam, destroying a dozen anti-aircraft guns and a company of Germans on the way. After a couple of missions, we make a daring act of terrorism on the battleship Tirpitz and, after interrupting half the command, we calmly leave in a fragile little boat. By the end of the game, exploits accumulate for at least an entire division. Raising supermen is your destiny.
Throughout the game, the feeling that you are the only living person on the planet does not leave. All the others are just puppets trying to entertain you. Until you deign to move, nothing will happen. The Germans will sit stubbornly, waiting for the fired script to kick them. In general, without you "the crocodile is not caught, the coconut does not grow." Tight control also applies to cards. The way of passing the mission is predetermined. If you have to destroy the mortar crew, then there is only one way to do it. This situation looks especially stupid during street fights. There are a bunch of destroyed buildings in the city, and you can only enter those that are provided for by the scenario. The road has been built, the tickets have been sold, the train is leaving. Citizens, passengers, stay in your seats until the final stop.
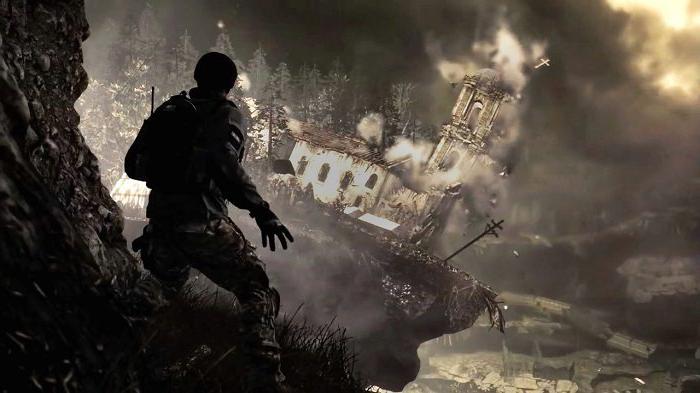
But all the shortcomings lose all significance, one has only to take part in the storming of a night town with American paratroopers or in the crossing of the Volga. Incessant fire from all sides, explosions, the noise of flying planes, the screams of dying soldiers ... New detachments again and again rush into battle, trying to get to the hated bunker. The sight is mesmerizing and does not let go until the very end of the mission. Remember the shock that the beach caused in Medal of Honor: Allied Assault? Everything is much stronger here. Let us know that this is just an illusion - but how good it is!
Interface
In this picture, I tried to collect basic information about the game interface.
1 - The compass shows the location of allies (green triangles) and the current target (gold star).
2 - Your current state. The image changes depending on what position you are in: standing, sitting or lying down.
3 - Health indicator. If you are hurt, the bar will shrink and change color.
4 - Ammunition quantity. The first number shows how much ammo is in the clip, the second shows the total number of cartridges.
Kill me beautifully
In this chapter, we will cover the basics gameplay.
Character can move in three ways.
Running- this is how you can strive for the goal only if everything is clean around and no one is trying to shoot your person. Having decided to rush beautifully in front of a crowd of angry Germans, you will quickly turn into a sieve.
Crouching- the most successful method of movement: both the speed is decent, and it is difficult to get into you. I recommend that you always move in this way, unless, of course, the situation requires otherwise.
Crawling- the character makes his way to the desired place on his bellies with a snail's speed. Usually, players begin to crawl when they come under intense fire, and there is no cover nearby. Which I advise you too.
Call of Duty has a fashionable feature from the recent action "and Vietcong. You are free to shoot in two modes: simple and accurate. In the first case, you fire from the hip, and the spread of bullets leaves much to be desired. It is best used when clearing rooms and in small rooms. The second mode - from the shoulder. The accuracy of shooting increases almost to 100%, but the speed of movement is noticeably reduced. Maneuvering is almost impossible. It is best to use this mode at medium and long distances, when there is time to aim. Switching between modes is carried out by pressing. right click.
Also, any weapon can be fought hand-to-hand. If you suddenly run out of cartridges, and the enemy is nearby, it makes sense to hit him with the butt. One or two blows are enough. However, do not relax - the Germans also love to pound the player over the head. By default, the hit button is Shift... Another feature unique to automatic weapons is that you can change the firing mode from single to automatic. This ability has hardly found any practical application. Only with the FG42, when shooting with optics, it makes sense to put a single shot.
Due to the fact that most of the time you will have to spend with the squad, the tactics of the battle have changed somewhat compared to similar actions. First and foremost, you cannot command fighters. We'll have to completely and completely trust the silicon idiot. Although it may not be so bad. The soldiers shoot quite accurately, hide in favorable positions, and in case of danger they do not hesitate to flee. By the way, carefully look where the comrades will run - usually it is there that the most reliable shelter is located.
But your computer warriors do not really know how to throw grenades. They'll guess someone else, but they can't get their own. They are also not able to use the first aid kit, so they die out quickly enough. But do not be sad - if your squad is completely laid down, after a while new reinforcements will come running from the rear. It is constantly reviving, but it cannot exceed the original number of soldiers.
When a squad rushes to attack, try to be in the forefront. This way you will avoid a large number of casualties among your soldiers. Although heroism is also not worth it. If at the first levels you can withstand a couple of bursts, then at higher levels several bullets will send you to the next world. Moreover, the high level of difficulty seriously increases the accuracy of enemies, and also reduces the number of first-aid kits and weapons. The second thing you need to know by heart: grenades - best remedy against the infantry. Don't save them! Ammo bags are common, and you still can't carry more than ten grenades. That is, the bag restores up to ten ammunition. The rest is wasted. And then, the Germans often do not notice the grenade that has flown in. This is not a Medal of Honor for you, where the Fritzes had an eagle eye and were equally well seen day and night.
Third and last, you always have to take the decisive action. A striking example... Capture of "Pavlov's house". Having cleared the passage, you need to be the first to rush into the attack and run to the house. Only then will the rest of the soldiers rush after you and help you in battle.
The weapon of retaliation
American weapons
M1A1 Carbine
Range: Average
Rate of fire: Average
Damage: Moderate
The M1A1 is a semi-automatic rifle with a folding stock. It was usually used by paratroopers because of its light weight, compactness and good accuracy. The disadvantages include only a small breakdown force. This is offset by a solid 15-round clip. In my opinion, the Americans have the best rifle.
M1 Garand
Range: High
Rate of fire: Average
Damage: High
A powerful and accurate semi-automatic rifle, excellent for long range combat. Due to the small clip and the inability to insert a new one until the old one is completely shot, it is of little use for close combat.
Thompson
Range: Low
Rate of fire: High
Damage: High
With great penetration and rate of fire, Thompson is the king of close range combat. Although, when shooting in short bursts, it can be used at medium distances. Especially in "precise" mode.
Browning Automatic Rifle
Range: High
Rate of fire: High
Damage: High
Browning during the war was used as a support weapon in suppressing enemy firing positions. A very powerful rifle. It knocks down anyone with one shot, but a small clip makes it wise to spend ammunition so that you don't end up with an empty magazine in the midst of a battle. It has proven itself to be excellent at short and long distances.
Springfield
Range: Very high
Rate of fire: Low
Damage: High
The sniper rifle, equipped with a 4x optical sight, allows you to shoot confidently from a long distance. Unfortunately, it has a low rate of fire and a long reload time.
Colt .45
Range: Low
Rate of fire: Average
Damage: Short
Standard pistol for American paratroopers. Has good power, but too wide spread. Even when shooting at short distances. In general, like all pistols, it is absolutely unnecessary.
Range: Low
Rate of fire: High
Damage: High
The legendary assault rifle of the Second World War. Has the largest clip in the game - 71 rounds, which practically excludes the possibility of being left without ammunition during the battle. Like other assault rifles, it has a high rate of fire and a large spread of bullets.
Mosin-Nagant
Range: High
Rate of fire: Low
Damage: High
Due to its low reload speed, it can only be used as a ranged weapon. But the accuracy and penetrating power are at the highest level.
Scoped mosin-nagant
Range: Very high
Rate of fire: Low
Damage: High
The Mosin rifle is equipped with an optical sight, which significantly increased the accuracy and range of fire.
British weapons
Lee-enfield
Range: High
Rate of fire: Low
Damage: High
The standard infantry rifle, adopted during the First World War. Practically no different from the Mosin rifle. The same problems with reload speed.
Sten
Range: Average
Rate of fire: High
Damage: Average
Unlike PCA and Thompson, Sten has less penetrating power, but higher accuracy, which allows it to be used not only at short, but also at medium distances.
Bren LMG
Range: High
Rate of fire: High
Damage: High
Despite the excellent characteristics of the machine gun, it will take a very long time to get used to it. It's all about its appearance. Due to the non-standardly located clip, it is rather difficult to fire: it blocks part of the view. This is especially noticeable in the "accurate" shooting mode.
German weapons
MP40
Range: Average
Rate of fire: High
Damage: Average
The famous German machine gun. It is very often used in the game, since ammunition for weapons issued at the beginning of a mission is usually not enough for its successful completion. In terms of characteristics, it does not differ from Sten.
MP44
Range: High
Rate of fire: High
Damage: High
The assault rifle performed equally well at both long and close ranges. The only problem is finding the bullets. The Germans usually use the MP40. The paratroopers prefer this one.
Kar98k
Range: High
Rate of fire: Low
Damage: High
The standard rifle of the Wehrmacht infantry units. Possesses great penetrating power and firing range. It is rarely used in close combat due to its low rate of fire.
Scoped Kar98k
Range: Very high
Rate of fire: Low
Damage: High
The same Kar98k, only with a telescopic sight. No different from other sniper rifles.
FG42
Range: Very high
Rate of fire: High
Damage: High
The only automatic weapon in the game with optics. Perfect for any situation. At long distances, with the help of optics, you can shoot a lot of people in just a couple of seconds. In close combat, it is not inferior to the MP40. Naturally, this is a very rare weapon. You will only meet him a couple of times in the entire game.
Luger
Range: Low
Rate of fire: Average
Damage: Average
A pistol is like a pistol. Lousy in all respects. For some reason, "by default" it is considered a pistol of the Soviet army, as if we never had our own TTs.
Panzerfaust
Range: Low
Rate of fire: One shot
Damage: Very tall
Grenade launcher. Designed to destroy equipment. Possesses monstrous power, but is very inconvenient in aiming. It is often difficult to know exactly where the grenade will fly. You have to aim at the peephole. In addition, you cannot carry more than one charge with you. Most often, panzerfaust is issued when it is required by the plot. For example, if a tank is coming to you, it means that the grenade launcher is hidden somewhere nearby (folk omen).
Stielhandgranate, RGD-33 Stick Grenade, M2 Fragmentation Grenade, MK1 Fragmentation Grenade
Range: Average
Rate of fire: Average
Damage: High
Grenades differ from each other only appearance... According to their characteristics, they are absolutely the same. Use them to destroy the infantry. Useless against armored vehicles.
Passing
The walkthrough is split into three campaigns. First you have to be an American paratrooper. Then take part in daring operations of the British commandos, and at the end play as a native Soviet soldier.
American campaign
First mission
Once on the ground, take out your weapon and run forward. Not far from the German, peeing small need, you will find the corpse of a paratrooper, hanging on the lines of the parachute. Grab his walkie-talkie and go to the bunker. There are two Germans sitting in it and talking about something with enthusiasm. Interrupt the conversation with a burst from the machine and install the antenna on the field. Now get ready - soon after the landing, hell will reign around.
Run up to the fence and shoot the Germans firing from the windows. Then, together with the arriving reinforcements, clear the houses. There are several of them, they are located one after another - you will not pass by. Proceed with caution. The Germans sit very well, so it costs nothing to get a couple of bullets. The Fritzes on the upper floors are especially troublesome. It is better to smoke them with pomegranates. Once you reach the trench, you will be taken to the next level.
Second mission
Get out of the trench and move along its right edge. Be careful not to accidentally enter the minefield. Hide behind the dead cow's carcass and remove the machine gunner from the fence. Then, during a pause between queues, run up to the house and throw a grenade at the first floor window. Without letting the enemy come to his senses, immediately after the explosion, go up to the second floor and shoot the stunned Germans.
After collecting grenades and first-aid kits, return to the street and briskly head to the next house. In it, through a gap in the wall, shoot a run-up detachment of Germans and join your soldiers. Shoot the machine gunner on the armored vehicle from behind the window. Now take up defense at the dilapidated wall. A large crowd of people has accumulated in the house opposite, so do not rush to climb forward. Throw a couple of grenades at the windows, and then, under the cover of the fire of your comrades, burst into the house and clean the premises.
After getting out of the house to the street, shoot the Germans at the fence and run to a small house. Throw a grenade into the window (so that life does not seem like honey to the Fritz) and go around it to the left. Now carefully, from around the corner, remove the machine gunner and, not paying attention to the shooting, quickly move to the breach. You need to shoot another German - the bastard really needs a machine gun. If he succeeds, he will create plenty of problems.
Now run into the house and throw a grenade at two machine gunners through the gap in the wall. Finish those who inadvertently survived the explosion with a machine gun. Get out of the house and join your mates. The captain will give you a new task - to destroy all anti-aircraft guns - and solemnly hand over explosives. Install it on the car and do your feet.
The next anti-aircraft gun is not far away, but getting close to it is not easy: the guards are too strong. Run forward and, as soon as they open fire, hide on the destroyed veranda on the right. The crowd in the trench is huge, so first thoroughly thin it out with grenades, and then take it by storm.
Having reached the house, climb inside, not paying attention to the shooting, and take up defense at the window. From there it will be most convenient to fire at the Germans in the trench. Having knocked out the Fritzes from the position, go out into the street and run, hugging the walls of the houses. There will be a fence on the right. After going around it, you will go to the machine gunner in the rear. Take his place and shoot the guards at the anti-aircraft gun. It remains to plant the explosives and listen to the captain's speech.
Third mission
The coming morning did not bring the desired calm. On the contrary, the Germans, having recovered from the blow, launched a counterattack. The battle for the town continues. The morning began with a bombing ...
Hide in the house (in it you can replenish your ammunition) and wait until the shells stop exploding. When everything calms down, get out into the street and run to the car. Suddenly the Germans will jump out from behind the wall. Repulse their attack and climb into the house for the panzerfaust through the gap in the wall. Go back and, hiding behind houses and sandbags, get close to the tank. There is no need to specifically destroy the Fritzes. They are constantly being reborn. Release a charge into the tank and run back. Now you need to reflect the attack from the other side. In the house, at the breach, take up defensive positions and start shooting the Germans.
When the attack is repulsed, follow the captain. After knocking the Germans out of the veranda, go forward until you come under fire. Now, amicably, with the whole crowd, run back until you meet a tank. After that, complete chaos will begin. It is almost impossible to understand who is running where and who is shooting from where. You need to sneak back into the house and take the panzerfaust. Hit the tank with them and grab one more charge. It will come in handy in the future.
Collect first aid kits and stomp along the road. At the corner you will meet another "Tiger". Use up the carefully stored charge on it and continue driving. Along the way, you will be fired upon from a mortar, so it is better to go, hugging the houses. This is less likely to get hurt.
Having reached the end of the wall, lie down on the ground, grab a sniper rifle (it stands nearby) and start methodically shooting numerous machine gunners. When they are gone, go downstairs and help your comrades. Don't forget the mortar crew behind the house. After completing all the tasks, get into the car and get ready for a difficult trip.
Fourth mission
Driving through the German-infested terrain promises to be fun. I recommend reading the dialogues that your partners have while driving. Enjoy an unforgettable experience.
Lean out the window immediately (key F) and start shooting at the Fritz. Although you shouldn't try too hard. Firstly, the speed is too high to fire aimingly. Secondly, the car seems to be indestructible - the main thing is not to get killed.
At first, crowds of infantry will pester you. These problems will not constitute - they still cannot really get in. Then a couple of cars with the Germans will sit on the tail. It is advisable to finish them off as early as possible - they shoot painfully accurately. In the end, the trip will end with a meeting with a tank that will drive you into a dead end. When this happens, get out of the car and quickly run into the house. Inside you will find first aid kits and a couple of Fritzes. Heal up and get your sniper rifle. Go out into the street and eliminate the nearest infantrymen.
Do you see a garage with a car at the end of the street? Burst into it - and run for the machine gun. While the would-be partners are fiddling with ignition, you need to repel the attacks of the infantry that have pulled up. When the car starts, climb inside. Now it remains to drive quite a bit. Except for the infantry, no one will interfere with you anymore.
SECOND PAGE
Fifth mission
After a short briefing, follow the squad. Having reached the positions of the Germans, the detachment will be divided into two parts. Follow those who go to the right. So you go out to the Fritz in the flank, bypassing the fire of machine guns. Having dealt with the guards at the gun, wait for the sergeant to set the explosives, and follow on. Through the trenches you will reach the bunker. Clean it up with grenades. You can not feel sorry for them: at this level, they are found in abundance. Take the documents and FG42 inside. You will need it later. Going outside, you will meet with another squad. They have a problem - they need to get the wounded soldier out of the fire. While the sergeant is walking after the wounded, you need to cover him. Stand at the side of the trench and pour quick fire on the impatient Fritzes. Do not let the Germans hit the wounded, otherwise the mission will be considered lost.
Now you need to destroy the remaining guns. They are scattered all over the map and are almost always covered by machine guns. Trying to break into the forehead is useless, so shoot the Germans from afar with the FG42. They won't even be able to answer plainly. When you get to the village, go to the mansion and take the documents from the table. After that, stand up to the machine gun on the second floor and shoot a detachment of Fritzes trying to break through the gate. After them, there will be a bunch of trophy weapons - if you want, you can change the barrel.
Get out of the house and get ready for a serious showdown. A bunch of Fritzes will come running to the right. Throw them a grenade, and then finish off with a machine gun. It remains to break through to the last weapon. I don’t think you will have any difficulties. Although the terrain is teeming with Germans, the allies will help you a lot.
Sixth mission
The American command threw a special detachment into the Alps to rescue captured British soldiers. The Germans are not expecting an attack, so surprise is your trump card.
Climb up the road and deal with the guards in a small camp. There are only a couple of people there, so there will be no serious resistance. Run to the mansion. When you reach the gate, a truck will block the road. As soon as you notice him, throw a grenade. So you put all the soldiers in the back.
Go to the patio. There are already two cars waiting for you. True, they become so unsuccessful that you can shoot the Krauts who come out almost point-blank. Having reached the back door, two of your soldiers will remain guarding the exit while you and your partner search the house. There are not many Germans inside, no more than two people per corridor. I brazenly ran ahead, shooting everyone point-blank. Go up to the second floor and take the documents. Now down again - in search of a secret room.
One of the previously closed doors will suddenly open and you will find yourself head to head with three Germans. Having dealt with them, go into the room. A couple of Fritzes are sitting upstairs, eight more people will come running to help them from the side. Don't go to the center of the room - shoot back against the wall.
The stairs lead to the balcony. Quickly deal with the two types at the railing and try to shoot the arrived help. They will try to get behind your lines, so it's worth setting up an ambush if they missed someone.
Having reached the room with the fireplace, pull the eagle figurine - a secret room will open. In it, destroy the radio equipment and wait until the rest of the squad members come running. The commander will again push some speech and kick open the door. When he does, throw a grenade inside. There in the middle of the room lies a machine gunner, with whom it is more expensive to contact. Go downstairs to the cameras and free the captured Briton.
All tasks are completed, it's time to roll off, until the main forces of the enemy arrive. Your way back will be blocked by numerous ambushes, but all of them are easy to overcome and do not require a detailed description. It is worth mentioning only a group of Germans in the central hall. Four Fritz will be waiting for you there, and you will have to climb a narrow staircase. Reception "jumped out and filled up" does not always work. First, ricochet off the wall, throw a grenade, and then lean out yourself and open fire. When you reach a room with an open window, wait for the evacuation of the Briton.
Seventh mission
A very interesting operation. You need to save another prisoner. The whole "highlight" is that you have to have time to do it in the allotted time. As soon as the first shots are fired, the countdown will begin. You will need to run to the cameras, free your comrade and go back. It seems nothing complicated, but how everything is implemented! The Germans, asleep, cannot understand what is happening: noise, din, panic ... Emotions are in full swing.
Having received the order from the commander, uncover the sniper rifle and go up the hill to the left. You need to remove the security at the central entrance. First of all, bang the machine gunner, and then the rest.
When everyone is dead, hurry up to help your comrades. They should already be in the truck. By the way, don't get hit by the wheels - the driver crushes everyone at the wheel indiscriminately. There is nothing special to describe further. Run to the cameras, shooting the Germans along the way. Some jump out of houses, some sit on the street. Having freed the prisoner, quickly lead him back, repeating the described actions. There shouldn't be any problems. When you reach the truck, wait for the Briton to be loaded into it.
This is the last mission in an American company. Now you have to play as a British commando. Let's go back a little. So - June 5, 1944 ...
British campaign
First mission
After waking up after landing the glider, join your squad. You need to take the bunker. Trying to storm it head-on is useless. There is little you can do against three machine guns. Go to the right edge of the map, remove the extreme sentry and, taking advantage of the rising hype, run into the bunker. After destroying all the Germans, go to the bridge. After knocking out the enemy from him, go to the other side.
Everything is much more complicated here. The enemy drove up the tank, and as luck would have it, you have no heavy weapons. Seek advice from the commander (he sits behind the house). The commander will order to find an engineer to fix the weapon. The engineer is at the fence, where he very successfully holds back the attacks of the Germans. Help him with defense and pass the order (button F).
Now run in zigzags back over the bridge to the cannon. When it is ready, climb into it and hit the tank with a projectile. It remains only to finish off the remnants of the enemy's infantry. Congratulations, the bridge is taken.
Second mission
Until the main forces arrive, you need to hold the bridge at all costs. The conversation that has begun will be interrupted by the bombing (this is already a tradition). Hide in cover and wait until a message arrives about the enemy infantry spotted. Follow everyone and take the defense behind the sandbags. Enemies will attack from three sides, so run across to different positions to help your comrades. If you want to change weapons or heal, go to the boxes near the bridge.
After some time, the commander will give an order to retreat. Run to the booth next to the bridge and get up to the machine gun. With its help, you need to restrain the attackers, preventing them from crossing the bridge.
When the countdown timer starts, throw the machine gun and hurry into the trench near the house. In it you will find panzerfaust. With its help, you need to destroy the tanks. They will leave from different directions, so you will have to run pretty much - you cannot carry more than one charge. The infantry will also greatly interfere. There is no time to specifically hunt for her, and comrades in arms do not always cope, which constantly leads to sad consequences. You have to rush all over the map, undermining tanks and simultaneously managing to shoot the Fritzes. When the time runs out, you will only have to clear the area from the remnants of the enemy's forces.
Third mission
The first half of the mission takes place outside. You need to destroy six anti-aircraft guns located on the dam. The guards near them are not numerous, shoot them from afar with a sniper rifle. Then you have to go down inside the dam. It is rather pointless to describe long walks through numerous tunnels. There are no forks, and the enemies act according to the standard scheme. It is enough to tell the passage in general terms.
Enemy tactics boil down to the following: the Fritzes either jump out sharply from the corner when you get close enough, or fire from afar, hiding behind cover. With the first, everything is simple - throw grenades in corners, rooms, etc., in general, all the places where the enemy can hide. There are enough pomegranates on the level, so you can not save them. The second is more difficult. First, sometimes they hide in unexpected places, from where you least expect an attack. Secondly, they are difficult to notice - after each shot the Germans hide back and wait a couple of seconds. It is best, after you hear a shot, to immediately run back to a safe place, and then with a sniper rifle in hand, hiding in shelters, carefully examine each column and corner.
When you reach the exit, mine the necessary equipment and the remaining anti-aircraft guns. Completed? Now gather your patience into a fist. You have to hike back along the same corridors. After getting upstairs, climb into the truck - your comrades are already tired of waiting.
Fourth mission
Now you have a bumpy truck ride. Change the machine gun to a panzerfaust (it is at your partner's) and use it to shoot the trucks with the Germans. The charges are not infinite, but you will have enough of them almost until the very end of the mission. Especially if you shoot accurately and do not waste them on every little thing like motorcyclists. If you have been wounded, the first-aid kits are next to you, in the back.
Having reached the bridge, your partner will hand you a sniper rifle, and he will run to set the charge. While he is fiddling with explosives, you need to shoot the Germans trying to cross the bridge. A decent crowd will run through him, but everyone shoots very badly. It is unlikely that you will even be hurt.
After the bridge, you will have to drive quite a bit. Just be careful with jeeps. At some point, three cars will pull up behind them at once. If you miss this moment, you will be riddled in a couple of seconds.
Fifth mission
The crazy ride continues. Having driven into the camp, shoot the infantry and try to destroy the trucks lining up behind. When the car stops, eliminate the soldiers on the roof and get up to the anti-aircraft gun. First, you need to prevent planes from taking off by destroying them on the runway. Then you will be attacked from the air. This is harder. If at first it is possible to shoot down the enemy even on the approaches, then towards the end of the mission the planes fly practically one after the other. In between attacks, try to have time to shoot the infantry. Although the shield protects you from bullets, if there are too many Germans, it will not help. When the flow of planes runs out, get off the anti-aircraft gun and jump back into the car. She will take you to the plane waiting on the runway.
Sixth mission
As soon as the developers do not mock the story! Now the fate of the sacrificial lamb fell to "Tirpitz". You need to sabotage something on it and steal valuable documents. In fact, "Tirpitz" was damaged as a result of an attack by a K-21 submarine under the command of Nikolai Lunin, after which it remained in port until the end of the war, where it was sunk as a result of a British air raid. Never had a British commando set foot on him.
Having reached the ship, wait for the captain to talk to the guards (and everyone is talking in English language!) and follow him to the weapon room. There they will figure out the deception, and the shooting will begin. Grab weapons, explosives and run into the corridor. The captain will remain guarding the entrance.
Having installed four charges, hurry to the right to the stairs. Be careful - a grenade will fly from above. Once on deck, do not engage in long battles - the Germans are constantly reborn - but break into the radio room. The entrance to it is in the center of the ship. Upstairs destroy the radio equipment and grab the document. That's it, it's time to run back to the boat. Unfortunately, two of us will have to leave. The captain was captured, but, as we know from the previous campaign, everything will be fine with him.
Wait. I am sure that you have been expecting this as much as I have. Finally, Western developers remembered who actually won the Second world war... Get ready for the most fun and exciting campaign in the game.
In the boat, you can relax and not listen to the commissar's chatter. Having almost reached the coast, the ship will come under fire from the Messerschmitts. When you hear them approaching, lie down on the bottom of the boat, otherwise you will be hit by a line. Once on land, queue up for weapons. However, instead of a rifle, you only get a clip. Well, okay, you won't have to shoot anyway.
Now you need to break through to the sergeant. Run upstairs, hiding behind the debris of the walls. It is best to run on the right edge. This way you will be exposed to fire as little as possible. A couple of times you will be covered with an explosion. Don't worry - it can't be avoided. This is what the script intended. After breaking through to the top, talk to the commander. When he starts yelling: "Go, go, go!" - run to the indicated cover. Together with him you will reach the radio operator, and he, after a short conversation, will call the artillery. The machine guns above fell silent, but the attack must continue. The Germans will not wait.
Second mission
After listening to the NKVD commissar and looking at what happens to the deserters, rush to the attack with everyone. You have no weapons, so do not forget to pick up the rifle from the ground. After reaching the wall where the commander took refuge, talk to him and run to the right house. On the way, you will come under fire, as a result of which the wall will collapse.
Climb inside through the resulting gap and climb the stairs to the upper floor. Do not pay special attention to those shooting from the opposite house. The partner can handle them too. In one of the rooms you will find a sniper rifle. Take it and look out the window. To stop the flow of Germans, you need to destroy the enemy officers. Two are standing by the columns of the house, two are in the trench. After their death, go downstairs and wait until the artillery will destroy the tanks and fortifications.
Go to the trench. Coming out of it, deal with the snipers entrenched in the destroyed floors. Further, you have a long way to the side of the station, where the major's detachment is holding the defense. Along the way, you will meet a decent number of Fritzes, but they are easily eliminated. Just shoot them from afar with a sniper rifle. The machine gunner may be the only problem. You need to crawl to him quietly from the side so that he does not notice you, and then send you to the forefathers with a single shot.
Third mission
The run to the station continues. Go into the house and clean the premises. Above, at the destroyed wall, stand up to the machine gun and repulse the attack. Now take a sniper rifle and, holding the right side at gunpoint, go out to the site. A detachment of Germans will come running from there. Going down the collapsed grate, find a gap in the wall and go upstairs again.
After moving to the other side, jump down and grab the machine gun. An obscene crowd of Fritzes will come running from the side of the trenches. Having dealt with them, move on. A little further there will be an enemy machine-gun crew. Shoot enemies with a sniper rifle and go forward. Behind the break there will be the very station. Help your comrades repel the attack (fortunately, the Germans practically do not pay attention to you) and run inside, to the authorities.
Fourth mission
The mission is a twin of the fourth mission for the British. The scenery is different, but the meaning is the same. Walk through the tunnels and shoot numerous Germans trying to end you with a sniper rifle. There are no tricks - only "bloody meat". After going almost to the end, you will meet a detachment of fighters trying to knock out the Fritzes from behind the barricades. Help them. So you have received reinforcements. Now, in general, everything is simple - your comrades will deal with those whom you did not have time to kill. At the end, you will receive a pleasant surprise. Which one - read on.
Fifth mission
To be honest, I didn't think that Western developers even knew about "Pavlov's house". Yes, yes, you have to take part in the defense of the legendary house, which has never been taken in all the time Battle of Stalingrad.
After talking with the legendary person, run to the soldiers and grab a sniper rifle. Now you need to shoot six snipers in the house opposite, while your friend distracts them. They go out through one of the different doors, so it is not difficult to figure them out. When the snipers are dead, run to storm the house together with everyone. When you reach the wall, start methodically shooting the Germans until you have a chance to run to the house. Once inside, start cleaning the floors. There are six of them. I advise you to throw grenades into every suspicious room. There are a bunch of Germans in the house - they will hurt someone.
When the floors are cleared, talk to the sergeant and run to the anti-tank rifles. They are located on different floors. Use them to knock out two tanks. Do you think it's over? This is just the beginning. Now you need to hold out for three minutes until reinforcements arrive. It is best to keep your defenses on the stairs. It is unrealistic to shoot back on the approaches to the house - the crowd is too large. Which staircase? Look at the circumstances. Where comrades cannot cope, there and help. Tanks will drive up to the house a couple of times. Hearing the characteristic clatter of caterpillars, immediately rush to the guns. After the reinforcements arrive, you will only have to finish off the remnants of the enemy.
Sixth mission
Without any briefing, you are immediately thrown into the heat of battle. Make your way to the factory through the German barriers. At the gate, wait for the engineer to plant the explosives. As soon as an explosion thunders, throw a grenade inside. Clear the room and go left. Stop by the window and help your comrades repel the attack.
When you reach the hall, do not rush to go inside. First, throw grenades at him thoroughly, and then shoot the survivors from afar. Now further into the corridors. There are outrageously many Fritzes in them, so you first need to throw a grenade into every room, around every corner, and then go yourself. When you reach the second hall, proceed in exactly the same way as before. First, a bunch of pomegranates. Then, especially without protruding forward, fire from a sniper rifle. After running a couple more corridors, you will reach the end of the level.
Seventh mission
Continuation of stripping - tank factory. The first battle will take place among the railway cars, so you have to be very careful. The Germans can easily run around you from behind. It is best to find a more comfortable place from which most of the terrain will be viewed, and keep the defense. When you are sure that everything is clear around, run to the next convenient place. After passing the station, turn into the gateway. Looking around the corner, estimate the number of Germans at the gate. It will be difficult to cope with small arms, so grab the panzerfaust lying next to the wall and release a charge at the machine gunner on the right. The charges in the box are endless, so use it sparingly. The main thing is to destroy the tanks and all the soldiers nearby.
Get rid of the guards inside with a sniper rifle. Go inside the hangar and fix your health with first aid kits. Go out the door, throw a couple of grenades and take aim at the passage. A crowd of Fritzes will run to you from the street. The main thing is to hold out the first
time, then the arrived help will help you.
Eighth mission
You have to make a march with a group of T-34 relatives to the city. Controlling the tank is simple - use the keyboard to set the direction of movement, use the mouse to rotate the tower. To center the turret on the hull, press and hold "space"... The main problem will be enemy tanks. You can even ignore the infantry, they will destroy it without your participation. You will meet the first group of armored vehicles on the hill to the left. There will be a couple of cars, so you don't even have to suffer losses. The second - from the right edge, on the slope of the river. They are far from you, so there will be no special problems either. Shoot them from afar, on the way.
Around the next corner, you will face a crowd of tanks almost nose to nose. They walk in a semicircle, so they can't all shoot at once. For some, you are in a blind spot. First, interrupt those who go head-on, and then go around from the flanks. Try to get ahead from the very beginning, otherwise you will lose too many tanks. Your comrades are distinguished by a rare squint. After driving a little more, you will find yourself in the city.
Ninth mission
Having entered the city, carefully inspect the buildings for the presence of grenade launchers. If you notice the slightest movement, shoot without hesitation. Everything will be simple at first. Tanks will come across one by one, and it will be possible to deal with them without any problems. When you reach the square, stop. First, knock out tanks trying to attack head-on. Then, turning the cannon to the side, drive into the square sharply and shoot at the tanks from the side. If the maneuver was done correctly, then you should not be hit.
Enter another square. There is also enough equipment here, but it is stupidly clustered in different places and cannot really aim. It is enough to constantly move and shoot more precisely. On the outskirts of the city you will find anti-aircraft guns. Destroy them and turn the trunk towards the hills. A group of tanks will arrive from there. The distance is long, so you can knock them out even before they begin to pose a real threat.
The final
In the finale, you will learn how each of the heroes of this long story ended the war. Three completely different people from different countries united by one - war.
American paratrooper
Follow the squad, trying to avoid explosions if possible. After reaching the bridge, climb the hill and shoot the machine gunner in the bunker. Now run inside, neutralize the guards and take the documents from the table.
We need to get another bundle of documents. Run to the second bunker. For some reason, there are no machine gunners in it, so it will not be difficult to break through. After taking the necessary papers, talk to the captain. He will report on the approach of technology. Climb the hill and take a place behind the FLAK. With its help you need to destroy the tanks and the accompanying infantry. Shoot aimingly. You have only one shot for each tank. native hamburgers and Coca-Cola.
British commando
First, you need to destroy two anti-aircraft guns. Run to them using the compass. On the way, you will meet small detachments of Germans. Put your partner forward (he is still immortal), and remove them from a rifle from a safe distance. There are almost no guards near the first anti-aircraft gun. But the second is covered by a bunker. Moreover, the window behind which the machine gunner sits is small, to get into it - you have to try. After removing the machine gunner, go into the bunker and kill the remaining guards.
Next, you need to meet with the rest of the fighters. They sit by the side of the road and wait for two supply trucks. Join them and help with the ambush. The next goal there will be rockets. As long as you get to them, you pretty much suffer with the Fritzes: almost the entire path is dotted with pillboxes. But the real hell will begin at the very rocket base. The network of bunkers is located in such a way that almost all approaches can be shot through.
After calming the machine gunners, run into the bunker. Having found the lever, turn on the fuel supply - and back to the rockets. Charges can now be set. After the explosion, all that remains is to clear the last bunker. Enjoy. The war is over for you.
You are entrusted with the honorable duty of hoisting the flag on the Reichstag. Run along the ruined street, knocking out the hidden Germans from the ruins. This is best done from a safe distance with a sniper rifle. When you reach the square, stop. You need to destroy three artillery pieces and one rooted tank.
First you need to neutralize the guards at the nearest gun. Do not rush to run and set the charge. First, from a safe distance, destroy the Germans in the house and at the guns. Be careful - the fire is very dense. It is worth opening for a second - and you are a corpse. When it becomes calmer around, zigzagging, trying not to get under fire, run to the tank and install explosives. It is difficult to do this, but it is necessary - there is no other way. When all the guns are destroyed, wait until the tanks punch a hole in the wall.
Having run up to the Reichstag, take a position near some wall and, little by little protruding from the corner, start shooting the Germans in the windows. After some time, the T-34s will arrive, and the infantry in the Reichstag will quickly become silent.
Go to the building. Fierce battles await you there. It is difficult to advise anything. It all depends on the experience gained in the battles. Climbing to the roof, watch with pride and indignation how the Soviet flag is being erected on the roof, attached to the pole upside down. Finita la comedy. Not otherwise.
Jumping off the side, follow your brother, go up to the balcony with him and jump behind the massive weapon - you need to shoot the enemy infantrymen and helicopters until they rush to retreat. But then you have to leave the weapon, but the battle does not end there - we continue to fight with the means at hand in the form of firearms. The best way to avoid helicopter fire is to use the Ctrl key. Soon we will be instructed to launch an air strike - switch over and try to inflict as much damage on the enemies as possible. For obvious reasons, it will be maximum if you aim first of all at the technique.
A couple of air strikes - and there was no fortification, we follow our brother, shoot opponents near the rise. After running forward, direct another air strike, and then make your way through the trenches, remembering to use air strikes to clear the area from enemies, and most importantly, their equipment. Unfortunately, the drones providing air cover will defeat the enemies, and they will give us a signal to retreat - turn around and run to the allies, trying not to get hurt by enemy mortars. After running into the building, go up, we will engage in battle in the QTE-scene - just press what is displayed on the monitor.
Task 5 - Legends Live Forever
Another hot reception - before we had time to land, the enemy was already meeting with dense fire. Reinforcements will arrive shortly, then make your way to the aisle behind your colleagues, take positions - an air strike will be delivered. Then we begin the usual cleaning of the area from opponents. Going down, you will soon see an enemy armored personnel carrier, it will be highlighted - we are treating the enemy's armored vehicle crew with a grenade. After destroying the armored car, make your way further, while it is best to turn to the right so that the enemies do not attack from all sides.
Having cleared your way, find the rocket launcher, it is located at the end of the street, from there we will run further with colleagues until you get to the roof. There you will have to take another battle, after which a little later you will fall back into the water. Armed with a knife, swim forward and wait for the command from Roark - when he says to attack your opponent, do it, then follow your partner. Once in the garage, filled with water, pass on the left side, you will soon get out into the street. There go on passing Call of Duty: Ghosts, smashing the surviving enemies, and then run to the roof. A helicopter is already waiting at the top - jump on it and shoot enemies, after the QTE scene the mission will end.
Task 6 - Federation Day
The first step is to start the inspection mode, which is done by pressing the "N" key, then capture an opponent in glasses, dressed in a white suit. Our next action will be a shot with a harpoon at the building - this will allow you to fly down the cable. Despite the speed of descent, it will be necessary to get rid of opponents along the way, and it is desirable to do this unnoticed. Once on the control floor, follow your partners, after opening the glass. Near the computer panel, find a bar highlighted by the game - you need to open it by clicking the button with which we shoot. Having opened, immediately hide in the opening a little further on the left side, from where it is convenient to attack walking opponents.
Now run back to cling to the cables - we will go down on them, there jump on the soldier standing on the balcony, and we will beat his colleague with a knife throw. Listen to your partner's commands, move carefully. Soon you will find yourself in a room teeming with opponents - you will have to fight there. The passage of Call of Duty: Ghosts will continue with the fact that we cut down the elevators located in the control room. After interrupting a handful of enemies again, grab the cable and slide down with it. The descent will not be cloudless - all sorts of objects fall from above, from which you need to dodge, swinging on the cable. At the same time, you should not forget the enemies attacking you through the window.
Once on the floor, follow the left to take cover - it's better to do it quickly, there are a lot of enemies again. But nearby is an ownerless sniper rifle, take it and use it to destroy the opponents sitting on the balcony. Do not rush to leave the shelter, no one will easily let you out of here, therefore shoot the enemies threatening you, throw guarantors until you break into the office. There, after listening to the dialogues, we continue to run after the allies, after which it remains only to open the parachute - the mission is successfully completed.
Quest 7 - Birds of Prey
At the first stage of this mission, we will circle on a turntable, at our disposal are rockets and a powerful machine gun, which are convenient to get rid of enemies both on the surface and in the sky. You need to escape from enemy missiles by pressing the "Q" key - it activates heat traps. Use them in a timely manner so as not to be hit, fly forward, trying to get rid of enemies at a distance. Soon the passage of Call of Duty: Ghosts will continue already on the ground - having landed, we storm the enemy forces, the first enemy is best bypassed by entering the window on the right side.
Further progress will be difficult due to the high concentration of enemies, but the game kindly provides opportunities to bypass them - here you can go into the corridor on the left side. Almost everywhere there are such workarounds, but you still have to shoot enemies. Once at the top, they will transfer the camera to a helicopter - we need to get rid of the enemy cover. Once you've finished, start the assault and clear the last room to meet Roark.
The Call of Duty shooter series began back in 2003, when the first game was born and gained immense popularity. The first part told about the events of World War II, which at that time was very popular in computer games. Realism, versatility, an abundance of weapons, equipment, and other aspects allowed CoD to rise to the very top. In fact, this series has been there for several years. At first there were three parts dedicated exclusively to World War II, then a fourth episode appeared, called Modern Warfare. Already from this it can be understood that we will talk about something completely different - in this branch, which already includes three games, events are taking place at the present time. It is also worth noting two projects called Black Ops - the theme of the Cold War is touched upon here. In each of the games in the series, gamers can find something new and interesting. Naturally, over the years, the gaming industry has evolved, which has allowed the creation of more advanced projects. This is how the CoD games World at War appeared, where the action returned again during the Second World War, but now with improved graphics, physics, realism and other aspects. But now we will talk about the newest of the projects in this series - Ghosts. Here actions take place not in the past, not in the present, but in the future, in 2023, that is, there is no need to look for connections with reality in these events. Which, in a way, makes the game even more intriguing. Now it's worth taking a closer look at Call of Duty: Ghosts. It will take you approximately thirteen or fourteen hours to complete.
CoD: Ghosts - what is this game?
If you are a fan of the series, then you may already be used to these games, so you can find familiar elements for yourself. It's worth starting with the fact that the passage is completely linear. In some of the previous games in the series, the developers added choice, the branching of the plot, but now they decided to simplify everything and just tell a story that is really worth listening to.
In Call of Duty: Ghosts, most of the time the passage will be conducted on behalf of Logan Walker, a member of the Ghost squad. In addition to him, you should know about Hash, your older brother, who will also be with you in this unit, as well as Elias - your boss, and also your father. It is he who will give you tasks and provide the necessary data. Thus, in Call of Duty: Ghosts, the passage will revolve around these characters, as well as around other members of the Ghost unit and, of course, your opponents - the Federation, which is trying to establish world domination. Here it is important for you to know the name of Gabriel Roarke - this is the main antagonist of the game, who was once in the place of Elias, that is, he led the Ghosts, but then went over to the side of the Federation and is now making every effort to destroy this group, which personifies resistance.
How it all began
Where will you start in Call of Duty: Ghosts? Part 1 will tell you the backstory of how ten years ago Logan, the main character, together with his brother, listened to his father's story about the legendary Ghost unit. They were able to evacuate an entire hospital, which was stormed by more than half a thousand people, while the Ghosts were only sixty. As a result, there were only fourteen of them left, but they coped with their task. When the story ends, a surprise awaits you - the bombardment begins. At the same time, it is not simple, but special - the shells fly directly from space, from the orbital station. You need to cover a certain distance before the camera switches to this very orbital station, where you witness an attack by terrorists who will take control of a secret project and start bombing the Earth. You can save the planet at the cost of your life by redirecting the projectiles to safe coordinates, but this very moment symbolizes the beginning of the Federation's dominance.
Then the game will give you control of Logan again so that you can get to your father's pickup and drive away from the crash site. From this moment, the passage begins in Call of Duty: Ghosts. Part 1, which is the prologue, ends and you find yourself in 2023. You are no longer a little boy, but an adult boy. And not yet a member of the Ghosts, the resistance movement. Full walkthrough Call games of Duty: Ghosts begins from this very moment. However, it is worth noting that the mission, called Brave New World, is a kind of tutorial - here for the first time you will have to use the various functions that you have to use in the game - you shoot, run, climb and jump, you will even be allowed to fire a rocket launcher with manual guidance to shoot down a helicopter. And only after that, having contacted your father via a laptop, you will receive your first full-fledged task.
"Neutral Zone" and "Fallen"

The passage of the game Call of Duty: Ghosts, part 1, is left behind - now you are faced with serious tasks. Elias sends you, your brother and a specially trained dog to scout the territory in the neutral zone. This is the name given to the land that was attacked from the orbital station ten years ago. Get nostalgic about where your home was, and then take action. Periodically, you will need to switch to the dog in order to perform some actions that are inaccessible to humans. Thus, the passage of the game Call of Duty: Ghost turns out to be much more interesting than you might think at first glance.
Having eliminated all opponents, you will finally be able with the help of special binoculars to notice and overhear how the same Roarke, the main villain, interrogates one of the Ghosts. Naturally, you will need to save him, only now you will have a more serious problem - the attack of wolves. First, your dog will help you fight off, and then you will save his life. Also, two fighters of the Ghosts will come to the rescue, with whom you will go to save Ajax - this is the name of their captive comrade. In the mission "Fallen" you will have to work with a sniper rifle, silently cleaning the territory, and then methodically storm the premises, throwing them with special grenades, while you yourself are in a gas mask. As you can see, the passage of the game Call of Duty: Ghosts, Part 1 is already the past. Now you need to act carefully and purposefully, you have no room for error. Finally, you get to the place where the interrogation was going, but too late. Ajax is dead. And then an even more serious problem arises - photographs of all the Ghost fighters are found, and you understand that a real hunt is underway for them.
Return and Legends Live Forever
The passage of the game Call of Duty: Ghosts, part 4, the mission "Legends Live Forever" will once again throw you back in time. But for this you first need to go through the third task, called "Return". You need to do exactly what the title says - to return to the base to your father. And then an unpleasant surprise awaits you - the base is all on fire, a fierce battle is being waged on its territory. You immediately need to join this battle and try to destroy as many of the enemy as possible, although this number will not affect the passage of the Call of Duty: Ghosts game. The ending of this battle is already predetermined by the plot, but you can get enough adrenaline in the process. In addition, there are several moments where you will have to decide both your own fate and the fate of the entire confrontation, so be prepared for any development of events. As a result, you will need to get under heavy fire to the place of your father's deployment, and from there call the "ghosts" who will arrive for you by helicopter.
And here the passage of the game Call of Duty: Ghosts (2013 release) will take an unexpected turn - Elias will tell you that he is the leader of that very legendary Ghost unit, and also inform you about who Roarke is and why he is hunting the unit, the leader of which was earlier. This is where the game takes you 12 years ago - to the "Legends Live Forever" mission. You play the role of young Elias, who, along with Roarke, is sent on a mission to assassinate one of the important members of the Federation. You will need to synchronously eliminate opponents, during which it will be demonstrated that Roarke and Elias were good friends... But the final battle will not go as we would like, and as a result, Elias will find himself in a difficult situation - he holds the falling Roarke by the hand, but if everything remains so, then all the Ghosts will die. He decides to let go, and Roarke falls, but his body is not found, and as a result it turns out that after that he went over to the side of the Federation and to the depths of his soul hated the Ghosts, with the goal of exterminating them.
"Federation Day" and "Birds of Prey"
The passage of the game Call of Duty: Ghosts has now taken quite an interesting turn. "Part 2 is what you will now have to remember, since you will need a lot of dexterity and the use of vital skills. You go to the base of Roark's right hand, Ramos, to find out the location of the main villain. The assault on the base is a fairly typical scene, but it still requires quite a lot of skill from you. Moreover, this attack will be an ambush, and you will have to deal with a superior number of opponents. But if you act carefully and quickly , then deal with them, and also finish off Ramos himself. But the most important thing here is to take with you a suitcase containing encrypted data. After that, the mission "Birds of Prey" will begin, from which you will learn that the suitcase turned out to be very useful - after decryption it became Roarke's whereabouts are known.You will go wherever you are directed and take Roarke's hideout in a centralized assault.
At this point in Call of Duty: Ghosts, the passage cannot be left without comment, because Roark surrenders to you without much resistance. Looks pretty suspicious, but the Ghosts don't want to miss this chance. Remember how the passage developed in Call of Duty: Ghosts. Part 3 has already shown you that both Roark and the Federation are not opponents to underestimate. After all, this whole situation turns out to be another ambush in which the resistance fighters fell.
"Victims" and "Dial"
The Federation strikes at the helicopters carrying Roarke. No wonder he did not resist - he had everything calculated a few steps ahead, and now the helicopters of the Ghosts are shot down, Roarke is lost, and the fighters themselves are in the jungle. What in this case will require you to complete Call of Duty: Ghosts? 3 steps you need to take very carefully. First, get to the crash site. Second, help bring all the Ghosts together. Thirdly, run so that your comrades can find you. But here a very unpleasant surprise awaits you - your rocket was noticed not only by the Ghosts, but also by the Federation, so you have to run a little and hide before they can help you out. After that, you can continue the passage in Call of Duty: Ghosts.
Part 5 taught you that the Federation is a powerful force, and even then it became clear that everything will not end well. Mission "Dial" tells that a serious missile strike was carried out at an undefined point outside the United States of America, and you need to find out exactly where the missile flew. To do this, you will again need to storm the base, but at the same time the Ghosts remember what the passage of Call of Duty: Ghosts taught them, part 4 - if you forgot, it was there that Elias talked about how Roarke became who he is now. Therefore, you need to act quickly, efficiently and swiftly. As a result, you will receive the information that you need, which will transfer you to another mission.
"Atlas fell" and "Into the Abyss"
![]()
From the information received, you can learn that the Federation has a water platform called Atlant, which you now have to blow up. This will not be the moment when Call of Duty: Ghosts is over - the ending is still far away. But it will be very important point... After detonating the charges, you will need to fight opponents right on the water, as well as on the wreckage of the platform itself, and then successfully leave the operation site. But it doesn't end there - you need to completely deprive the Federation of water influence in this region, so you need to destroy the destroyer in the mission "Into the Abyss". As the name implies, you will not be able to do this from the air - the ship is equipped with the most powerful air defense. Therefore, you need to sneak under water to the destroyer and attack its most vulnerable part so that it sinks. All this time you will need to deal with enemy scuba divers, as well as with sea predators who are not averse to having lunch with you. When the destroyer is flooded, you will be able to get ashore to continue the passage, gradually approaching its logical conclusion.
"Ultimate" and "Sin City"
Remember the passage of the game Call of Duty Ghosts, part 3? It was then that you smelled gunpowder for the first time, for the first time entered into a real fight and learned how to interact with your dog, as well as with partners. But now the game is already nearing its end, so you will have to gather your strength and use all the skills that you have acquired. In the mission "Ultimate" you need to storm the next enemy base in order to find out what exactly is being done there under the heading "Top Secret". Making your way through the crowds of enemies, you will still achieve your goal. Then you will find out that the Federation at this base produces incredibly powerful weapons, so the best solution is to destroy the base, which the Ghosts are doing, crowning this task with another success. But the next one will turn out to be a real failure. So, the Federation began implementing a plan to revive the very orbital station that first established chaos on the planet, and then a new order. Now the Federation plans to complete what it started, and the Ghosts have already prevented it, destroying one of the missiles. As a result of the operation, a large number of soldiers, including you and your brother and father, were captured. Roarke tries to find out everything about the Ghosts from Elias, but he refuses to cooperate. As a result of a short confrontation, Roarke kills Elias, but thanks to this, the rest of the Ghosts have a chance to escape. Naturally, you manage to use it, albeit not without loss. Also, your faithful dog gets wounded, which you now need to bring to the point of evacuation, periodically laying him in cover and helping his comrades.
All or Nothing and Broken Links
Once on the ship, you can pick up the Ghost mask - your father is dead, but you don't want his business to die with him. Now it's time for you to become a full-fledged fighter. But to do this, you first need to survive - reunite with your brother, with whom you have to defend against crowds of opponents trying to storm your ship. At the first opportunity, you need to seize control of the onboard weapon system to make it easier to fight the enemy. Naturally, the ship will not withstand such an assault, but you have already managed to significantly knock down the enemy's forces, and the Ghosts have arrived to pick you up. Now you are a full-fledged Ghost, and on the mission "Broken ties" already go out in a mask, as a member of one of the units. As you recall, your goal is to prevent the Federation from repeating what happened ten years ago. But destroying each of the twenty-four missiles is an overwhelming task, so it is better to focus on the control center, because if you destroy it, you will deprive the Federation of the ability to launch existing missiles. Therefore, go to the main base, storm it, breaking through the huge enemy forces, and then give a signal to your bombers. Naturally, try to leave the building as soon as possible so as not to perish under the rubble.
"Loki" and "Ghost Slayer"
So this amazingly addictive game is coming to an end. You have only two missions left to go through, one of which will not even be for the main character Logan, since it will take place in space. In "Loki" you will need to act as one of the fighters of the Ghosts at the Federation orbital station. You need to destroy it in order to deprive the enemy of the opportunity to further plan the application of a crushing blow to the Earth. Naturally, it succeeds, but what is happening at the same time on the planet is much more interesting.
And the following happens - Logan, Hash, as well as other Ghosts chase Roark and get on the train with him, where a serious fight takes place. Having seized control of the train, you immediately find yourself in captivity at Roark, but then Hash comes to the rescue, who has already designated the train as a target for the bombing, and in a matter of seconds the bridge over which the rails pass collapses and the train goes to the bottom. In parallel, the final fight with Roark takes place, in which you manage to release a bullet at him. After swimming to the surface, you need to grab Hash and drag him to the shore. It would seem that everything ended well - Roarke is defeated, the Federation forces sank to the bottom with the train, destroyed, the missile control center is in ruins - humanity is saved, like Logan and Hash. But not everything is so rosy. As soon as you turn around, you will see a miraculously surviving Roark, who will knock you out with one blow. He will not touch Hash, but he will drag the main character deeper. The game ends with the fact that you will be shown a buried hole. Naturally, no one specifies specifically what is inside, but based on previous events, one can guess that a happy ending still did not happen, and it was Logan who was buried there.
You have completed Call of Duty: Ghosts. It could not help but leave a pleasant mark on your soul for several reasons at once - beautiful graphics, excellent implementation, deep and fascinating plot, elaborate characters. All this instantly allows you to fall in love with the game and may well put it among your preferred ones if you are fond of this genre of games. But even if shooters are not your thing, you should still try this project, as in many ways it has become a little easier, as well as more fun. QTE appeared in it, there is maximum linearity, that is, you do not have to make difficult choices or travel around the game world to find where to go next.
It is also recommended to try your hand at other games in the series, since each of them has a unique setting - your impressions are unlikely to repeat itself at least once, so every time you will experience a full-fledged delight at how competently and incredibly high-quality this or that game is implemented series. In some of them, a happy ending, in some - not very, but the plot has always been and remains one of the strongest features of the projects related to this series.
Call of duty
Mission 1: Discoverer - Pathfinder
After the briefing, you find yourself on board a plane flying to France, to the shores of Normandy. You and Sergeant Heath will be thrown under cover of night into the very lair of the enemy, in the town of Saint-Eglis. From there, you must send a signal that will serve as the beginning of a large-scale Allied offensive on the lands occupied by the Germans. The landing will take place inside a large estate, surrounded on all sides by a small fence. Look around, the sergeant's parachute is not visible, probably, it was carried by the wind some distance from the planned landing point. Wait until the noise of a passing nearby truck dies down, and then run to the house, towering on a hillock. Fritz will run out of the open door to meet you. Kill him before he can raise the alarm. Inside the brightly lit room, a receiver sits on a table, filling the room with German tunes. There is a first aid kit on the table next to the receiver, which I hope you don't need yet. Exit the room and head west towards the small line. A sergeant's parachute is caught in the branches of one tree, and his dead body hangs motionless on the parachute lines. Pick up his bag from the ground and then slowly approach the bunker, from where the German speech is heard. Defeat the two time-killing Fritz with a game of chess. Step out of the bunker into a wide field - ideal for a drop of troops. Install the radio beacon in the designated place. After a while, the roar of approaching planes will be heard, from which white balloons will fall - parachutes with paratroopers. When the landing is over, along with the rest of the soldiers head towards the group of compactly located houses. Aimed fire from all types of weapons will be conducted at you from the open windows. Go to the door of the most extreme house. Inside, clear all the rooms from the Fritzes, then go through the emergency exit into the courtyard. Entering the next house, go through it and turn right at the exit. Walk forward a little and then jump into the trench using the gap in the brick fence.
Mission 2: Sep. Mer Eglis - Ste. Mere Eglise
The trench leads your group to a minefield, but, nevertheless, there is a small passage. Crawl forward in the center of the field, there are large craters from exploding mines here. In the craters, you can wait out the most intense shelling of the Fritzes, and in the rare seconds of calm, move on. When the houses in front have increased so much that it will be possible to see the Fritzes through the sight, bend down to the ground and, having cocked the hammer, begin to methodically shoot all the soldiers. When the buildings adjacent to the railway line are cleared of the Germans, it will be possible to begin to seize the station. Cross the rails and run to the dilapidated brick wall. After taking a few steps to the right, run to the side entrance leading into the train station. After destroying all the Fritz, go to the window and, aiming accurately, remove the Fritz sitting behind the machine gun of the armored vehicle. Exit the building and approach the dilapidated wall. A row of houses can be seen across the road, from which the Germans built a kind of fortress. After a tiring battle, cross the road and go inside the outermost house. Find the exit to the courtyard from it. From there, head towards the local cemetery. In the chapel, the blasphemous Germans set up something like an ambush, and God sent them punishment in the form of your squad. You go into the broken passage in the wall of the building, from there turn to the right and start making your way to the self-propelled anti-aircraft gun. Destroy the machine gun nest and then take care of the self-propelled gunners. After the destruction of the entire crew, install the explosives on the self-propelled gun body and then quickly run back to a safe distance. After a powerful explosion, leave the shelter and, together with the rest of the soldiers, begin to approach the area. There is another anti-aircraft gun in the center, do the same operation with it as with the previous self-propelled gun. Then go into the narrow passage between the hotel (judging by the inscription on the wall) and some dilapidated building. At the exit, turn right and run to the entrance to another building. From it you will come out to another street, where in the middle of the road there is a padded car. The last anti-aircraft gun stands at the crossroads, on the right side it is covered by a machine gunner. Run across the road and, pressing against the wall of the house, slowly move towards the sound of machine gun shots. Thus, you can go to the rear of the machine-gun nest, and not go stupidly ahead, exposing yourself to mortal danger. After neutralizing the shooter, take care of the self-propelled gun crew. Then approach the anti-aircraft gun and set explosives on its body. A thundered explosion will mark the end of this mission.
Mission 3: Sep. Mer Eglis. Day - Ste. Mere Eglise Day
With the appearance of the first rays of the sun, the German forces began to regroup. German planes appeared in the sky, loitering in the sky over the captured town. Together with the rest of the fighters, run across the road and go inside a small room that once served as a bank. There will be a small briefing with all the fighters. Leaving the room, you will see a group of Fritzes appear on the left side, and a German tank will appear right in the center of the intersection. While the rest of the soldiers are busy with the Fritzes, you walk to the destroyed church (before reaching the brick fence, turn left). Take the loaded grenade launcher inside the church. Approach the tank so that you can see it through the sight of the grenade launcher and make a shot at it. Then return to the church, where one of the two machine guns stands against the far wall. In his sight, you can see the old cemetery, where the Fritzes scurry between the tombstones. Start shooting the Germans until the last enemy groups begin to retreat. Exit the church and head into the building opposite. After leaving the square, head towards its northern part. After entering the building, get ready for a battle with another group of Fritzes. In a couple of minutes a German tank will appear on the square. Your task is to return to the church, take a grenade launcher and turn a German tank into a pile of iron. During your dashes, the rest of the fighters will cover you. Then head to the crossroads, where another tank took the road leading to the left. Its crew is destined for the same fate as the previous tank you knocked out with a grenade launcher. Move along a deserted city street until you run into hedgehogs along the road. Two decent-sized holes gape in the fence, through which the fortified area of the Germans is visible. Take a sniper rifle and shoot all shooters. After the area is cleared of the Fritzes, go downstairs. Jump over the trench, behind which there is a building with miraculously preserved walls. Go around it in search of two Krauts. As soon as they are destroyed, your comrades from the garage, which is behind the tower, will roll out a car. Sit in the front seat next to the driver. After talking with the rest of the soldiers, the car will start on the road. Destination route - regiment headquarters.
Mission 4: Normandy Route # 13 - Normandy Route # 13
Basically, this mission consists of a deadly car ride. In this area, the front line passes, so everything is literally packed with equipment, enemy manpower, bombs are constantly being dropped from the air from fighters flying over your heads. During the trip, lean out of the car window (key F) and shoot the Fritz, and those striving to shoot your wheels. In the middle of the way, you will reach some kind of provincial town, where you will fall into a trap. After the explosion, you will have to leave the car and look for some kind of vehicle. Behind you lies the fallen slab of the house, climb along it inside the dwelling. After passing through the corridor, you will come out to another street. Pass by the wrecked car, which obviously will not suit you and, having run ahead a few meters, turn around the corner. A few dozen meters away from you at the turn there is a house with an open garage, in which there is a serviceable car - an army jeep. Remove the arrow from the top window and rush to the car as fast as you can. While your comrades are trying to start it, cover them by standing behind the machine gun installed in the garage. As soon as the engine shows signs of life, jump into the car, which will immediately take off. After a short journey, you will stop at the regiment headquarters.
Mission 5: Brecourt Manor - Вrecourt Manor
Follow Captain Moody, who will lead your group to a large boulder, overlooking the enemy positions. Turning to the left, start going behind enemy lines. Destroy all personnel serving the anti-aircraft battery. After that, the sergeant will detonate the anti-aircraft gun with explosives. Jump down into the trench and, bending your head, crawl along it to the next battery. Having destroyed the anti-aircraft gun, crawl along the trench to the headquarters dugout. After passing through the rest room, in the next room, take a package with documents from the table. After leaving the premises, move to the next anti-aircraft gun. Now you yourself have to work as a blaster. Find a sergeant who will give you explosives. Place the explosives at the base of the battery. After the explosion, get out of the trench and run south to the rural buildings. Through the open gate, go inside the hay storage, fenced on all sides. After passing through the vault, run along the wall to a two-story house. In the back room of the second floor, take the package with documents from the table next to the bed. Get down and get out through open door opposite the stairs. After leaving the gate, head towards the arch through which you will enter the square. Another anti-aircraft gun was installed on the square. After destroying it, this part of the operation will be completed.
Mission 6: Castle in the Alps - Alps Chateau
The main goal in this mission is to rescue Captain Price from captivity, whom the Germans are holding in the basement of a castle located in the Alpine mountains. The first obstacle on the way to the castle is the guard post. Only by removing the shooter from the machine-gun socket installed near the barrier, you can approach the guarded room. Meet the guards who ran out to meet with friendly fire from machine guns. Approaching the castle gates, give several bursts on the gas tank of the truck. An explosion will thunder, which will take the lives of several Fritzes and free the way to the castle. Since it is impossible to get inside the castle from the front entrance, we will look for an emergency entrance. Run along the alley to the Fritz garage and arrange a grandiose fireworks display. Then go out to another alley, along which you can reach the door, which you forgot to bolt. Inside the castle, run along the corridor, he will lead you to the stairs, along which you can climb to the second floor. In one of the rooms, find a package with documents and plans. Return to the first floor, when moving along the corridor, one of the locked doors will open, and an armed fritz will appear in the opening. Pull the trigger before it. Then enter the richly furnished hall. Having removed all the Germans from the stalls, go out into the corridor leading to another hall. After clearing the room from annoying Fritz, go up the spiral staircase, then into the corridor to the left. From it you will get to the terrace, run along it to the other wing of the castle. After running a little along the corridor, go down to the dining room. Approach the fireplace, where there are statuettes of eagles on both sides. Clicking on the right eagle in the fireplace will open a door leading to a secret room. Destroy the communication equipment inside. Then return to the hall and go to the left door, which will open at once. After parsing with the guards, go down to the wine cellar, from there even lower, until you reach the locked door. When your comrades plant the explosives, move as far as possible. Since the room is narrow, the blast wave will spread over a considerable distance. When everything calms down, go into the room that serves as a kind of prison. Find Captain Price in one of the cells, then return to the street with him, where you sit in one of the trucks.
Mission 7: Dulag IIIA - Dulag IIIA
After talking with Captain Foley, who is sitting in the cab of the truck, go into the woods. You are holding a formidable weapon of the invisible front - a sniper rifle. Place the optical sight at the prison gate. First, remove the shooter looking at the surroundings in the sight of your machine gun, then take care of the rest of the guards. After clearing the territory adjacent to the prison, the truck will set off and, having fairly accelerated, will ram the gates of the prison. Together with the rest of the soldiers, search for the whereabouts of Major Ingram. When you reach the small pool, go under the observation tower and then turn left. After leaving the dining room, head to the open barracks, where inside you will free Major Ingram. Return to the truck together with the major.
Mission 8: Pegasus Bridge - Pegasus Bridge
Under cover of night, your group is thrown into the south of France in the town of Benouville. Nearby there is an object of strategic importance - a bridge over the canal, through which the main forces of the allies must pass. The task of your group is to capture the bridge and hold it until the main forces of the allies approach. The entrance to the bridge is guarded by a whole battalion of Fritz, on the right side of the bridge is a bunker with machine gun barrels peeping out of the loopholes. In general, at first glance, it is an impregnable fortress, but weak points can be found in every defense. Take a few steps to the right, bend down and start running towards the bunker. After passing the ravine, go forward a little, then jump into the trench. From it, go up the stairs to the bunker, where machine guns are raging, which, however, quickly become silent. After going downstairs, head towards the bridge. On the right side there is an anti-aircraft battery, which is not working at the moment. Fight through to the other side of the bridge. After taking the bridge, a tank will appear in front of the house - the last counterargument of the Germans. Find Captain Price, he will give you the order to destroy the tank with the anti-aircraft gun installed on the other side of the bridge. To repair the anti-aircraft guns, take Army Engineer Mills with you, he is located near the fence that is across the road. Together with him, get close to the anti-aircraft gun. In a couple of minutes, through the efforts of Mills, the anti-aircraft gun will be ready for battle. Aim the anti-aircraft gun sight at a tank standing in the distance and fire a volley at it. Return to your comrades and help them finish off the remnants of the German forces.
Mission 9: Pegasus Bridge. Day - Pegasus Bridge Day
Your team met the dawn with weapons in hand, protecting the approaches to the bridge. At the first rays of the sun, the Germans launched an offensive on the west bank. Hold positions until the numerical superiority of the Germans becomes clear. After the command of the captain, run to the opposite bank. A machine gun is installed in the booth on the left side of the bridge. Stand up for him and cover the retreating comrades. On the other bank from the southwest a tank approaching the channel will appear. He will start shelling your positions. Exit the booth and move to the bunker, behind it in the trench is a grenade launcher. After destroying the tank, go up to the bunker. A battalion of Fritzes is approaching the bridge from the south. Use a machine gun to clear the area from enemy personnel. During the battle, you will need to destroy tanks in the southern direction, on the other bank of the channel and in the north-western direction. At the end of the battle, go to Captain Price, he will congratulate all the fighters on a perfectly completed task.
Mission 10: The Eder Dam
Having successfully landed from the plane, you find yourself a few meters from the German Eder Dam. The sky is lit by the wandering beams of searchlights looking for the silhouettes of enemy aircraft. Go to the first spotlight, near which remove all the Fritzes. Follow the top of the dam to its other end. Set explosives on anti-aircraft batteries along the way. After destroying the last anti-aircraft gun, go back to the entrance to the service premises. The stairs will lead you to the elevator, which will take you down to the floor below. Run along the corridor to the room with electrical equipment. From it you go into the corridor to the right. The goal is to reach the elevator car, where you can go down to the foot of the dam.
Once at the bottom, run along the corridor, then down the stairs. Take a few steps to the right and then enter a long tunnel. After leaving it, go up the steps and, after passing the room, filled with various boxes, go out into the street. Run obliquely to the entrance to another building. After passing through a small room, you will find yourself in a room with generators. After destroying all the guards in this room, place four explosive packs on both generators. An anti-aircraft gun is installed not far from the exit from this room. Approach it and set the clockwork explosives. Run west to another anti-aircraft gun, where you will also install explosives. Then go through the small bridge to the last anti-aircraft gun. After all the dam's air defenses are destroyed, your part of the mission will be completed. Follow the same route to the top of the dam. A truck with Captain Price awaits at the top of your appearance. Jumping into the back of the truck, duck down and take out your weapon to shoot back from the Fritz that appear on the way of the car. After gaining a decent speed, the truck will hide in the tunnel.
Mission 11: Eder Dam Getaway
Naturally, the Germans could not help but start chasing the impudent saboteurs. Captain Price is driving the truck, and you and Sergeant Waters are in the back. The road to the airport will not be strewn with roses, but bullets from German soldiers. Fortunately, there is a fair amount of ammunition in the body, among which the grenade launcher shells play the most important role. Immediately upon leaving the tunnel, several German trucks will be tied to the eyeballs loaded with soldiers. A couple of grenade launcher shots will turn them into a pile of smoking iron. After a couple of kilometers a wooden bridge will appear. After driving over the bridge and entering the hillock, the truck will stop. Sergeant Waters will go to plant explosives under the bridge, and at this time, with the help of a sniper rifle, you will shoot all the Germans trying to cross the bridge. After a few tedious minutes, the sergeant will be back in the truck. Blowing up the bridge will buy you some time. And then another couple of kilometers wound along the mountain serpentine in the constant pursuit of your truck by the Germans. When it seems that you will never get to the damn airfield, you will hear the noise of planes taking off.
Mission 12: Airfield Escape
Having entered the territory of the airfield, the truck will start zigzagging between the hangars with the aircraft. One group will jump from a truck near one hangar, where they will try to capture a suitable aircraft. The rest of the team will move on, taking the fire on themselves. Having found a sufficiently convenient place for defense, the truck will stop near the site with the anti-aircraft gun installed. Sit down in the place of the gunner of the anti-aircraft battery. Get ready to destroy attack aircraft taking off from the right runway. Then a group of attack aircraft will appear in the air, flying up to your positions. After the air territory is cleared of German aircraft, a transport aircraft under the control of our fighters will appear from behind the hangar. Hop into the truck and ride it to the runway to the captured transport plane.
Mission 13: Batleship Tirpitz
Night. Cold Barents Sea. Your team is sailing on a captured boat to German battleship"Tirpitz". You are wearing the uniform of the German sailors, Captain Price in the uniform of the German admiral. Approaching the battleship at a distance of several cables, the battleship will give a conditional signal with a searchlight. By signaling them back, you will be able to approach the battleship. Climb to the deck of the ship after "Admiral" Price. After checking your documents, you can safely navigate the ship. Follow the captain to the open hangar, inside it there is a staircase leading down. Going downstairs, you will finally find the room where the ship's arsenal is kept. During the identity check, Price will have to shoot two guards. Probably, the sound of shots was heard by someone, since an alarm was announced on the ship. Grab explosives from the warehouse and an automatic machine with several horns leaning against the wall. Exit the warehouse and run into the corridor opposite. Price will remain to cover the corridor through which you can come from the deck of the ship. Run along the corridor and place explosives on the boilers of the ship, then, turning left, run along another corridor in the opposite direction. Having installed the last explosives, go into the weapon room. Near the entrance to the room lies the body of Captain Price, now you alone will have to complete the operation. Climb to the deck, from the hangar, run to the left to the tower. You go in the open door and go up to the communication floor. In the first room destroy the first communication cabinet, then in the adjacent room near the stairs another one. Climb the stairs to the captain's bridge, where you will kill the captain and several sailors. Destroy the last communications closet and take the list of ships from the table. Then return to the deck and start making your way to the boat, where Sergeant Waters is waiting for you.
Mission 14: Stalingrad - Stalingrad
In this mission you play as a soldier Soviet army... There is a crossing across the Volga to the coast of besieged Stalingrad. At the top of the hill, the Germans built a fortress. On the side of the ferry, the political officer reads the speech of Comrade Stalin, sometimes his speech is drowned out by the explosion of another bomb dropped from a German plane. Having got out to the shore, you understand - if it happened a couple of seconds later, you would have drowned along with the ferry, since another bomb dropped from the plane hit the ferry, and it went like a stone to the bottom. Get in line for weapons and ammunition. Having received the weapon, run after the rest of the soldiers climbing the hill. Get to the car, behind it, huddled against a fragment of the wall, is squatting sergeant Borodin. Wait for his command when you move along the hill. Immediately run to the truck and hide behind it, the sergeant will follow after you. Then, after the command, run to the car and wait for the sergeant. The only chance to escape is to go down a little lower to the dilapidated building, behind whose walls you can hide from shelling. But the Commissar of the NKVD is on duty in it, with a rifle at the ready, who shoots all the retreating fighters. Get down, and at this time the sergeant will shoot the commissar with an accurate shot. Behind one of the walls of the building is a signalman, unsuccessfully trying to contact the aviation and give them the necessary coordinates for the bombing. Finally, he will succeed, and after a while the earth will begin to shake from the explosions of numerous bombs dropped from Soviet aircraft. After the bombing, run after the rest of the soldiers climbing the hill in the direction of a dilapidated building with a large hole in the wall through which you can get into the city.
Mission 15: Red Square - Red Square
The squad takes refuge inside an abandoned building. It overlooks the square with the statue of Ilyich in the center. After the command "Forward!" run to the monument behind which you can hide from German bullets. Not far from the monument, the Germans erected powerful barricades. To attack them from the center is to expose yourself to mortal danger. After talking with the sergeant, you decide to flank, and it will be better if your position is located on top of one of the surrounding area of houses. Exit from behind the pedestal and run to a nearby house. Go inside the house through the gap in the wall. Run to the end of the corridor, then go up the stairs to the last floor. Run to the back room, where you will find the window from which the most convenient view of the barricade will open. Throw down all the grenades you have, then shoot the Fritzes from the machine gun. Try to shoot the officers first, and then ordinary soldiers. Having cleared the area from the enemy manpower, go down and take cover behind the pedestal again. The aircraft that arrived in time would destroy several German tanks dug in in the square. Now the area is under your complete control. Exit from behind the monument and head towards the barricade. After jumping into the trench, run along the underground tunnel. Leaving the tunnel, turn right and run towards the intersection. After going through a gap in the wall, you will stumble upon a machine gun nest. After destroying it, move along the destroyed streets of Stalingrad to the square in front of the railway station. After running past the padded armored vehicle, go inside the station.
Mission 16: Train Station
Go up the stairs to the second floor. Run along the corridor littered with mountains of various garbage. The corridor will lead you into the room, where a view of the railway crossings opens through a gap in the wall. Approach the machine gun installed near the window. Shoot all the Fritzes scurrying along the passage and on the roof of the opposite building. A shooter sat down in the upper window, discouraging any desire to stick out of the room. After clearing the surrounding area from the Fritzes, you can try to get to the building opposite. Run along the railway crossing, which ends with a descent to the roof of the car. Then jump to the platform and run across the rails to the building opposite. Climb the stairs to the second floor, then run along the passage in the opposite direction. Going around the corner of the building, go down the concrete slabs. Head into the room, illuminated by the light of a burning lamp. From the premises you will find yourself on the street, dug by trenches. Stand behind the machine gun and get ready to shoot back from the crowds of Fritzes trying to capture your group. After it becomes calm, go down into the trench and, bending your head, crawl to the southwest. On the next street, there is a fierce firefight between the Germans and the detachment of Sergeant Zubov. Help them fight off the annoying Germans, and then run to the end of the multi-storey building. At the entrance you will meet a soldier, he will take you directly to Sergeant Zubov.
Mission 17: The Sewers of Stalingrad - Stalingrad Sewers
Since the activity of the Germans today is greater than ever, it will be safest to move through the sewers. Go down the stairs and go forward. After turning to the left, the first Fritzes on this level will be waiting for you. Walk forward under the destroyed roof and enter the passage on the right. Go along the corridor to a small open place where snipers will shoot at you. Quickly run through this dangerous place and enter another part of the corridor. Get down to the lower level of the sewer. Run on the water until you notice a passage on the left. Make your way through it to a higher level of sewers and move along the water to the destroyed wall, behind which you will meet friendly soldiers. Together with them, make your way through the enemy's fortifications, going along the vast corridors. When you get to another group of your own, who are shooting back from enemies, get your sniper rifle and smoke all the soldiers from the building in front. Then go into this building and jump down through the hole in the floor.
Mission 18: Pavlov's House - Pavlov "s House
Follow Sergeant Pavlov into the trench, along which you can only move while bending down. Pick up a first-aid kit and a sniper rifle in the trench near it, if you threw it away in the last mission. Your task at this stage is to take a sniper rifle in your hands and kill all the snipers in the building in front, while Private Kovalenko will take their fire on himself. When all seven snipers are destroyed, quickly run across the field to the building until the artillery fire hits you. Having reached the brick wall, or rather to what is left of it, suppress the enemy who is entrenched in the building. This is best done with a sniper rifle. When the pereshist of bullets dies down, go into the building, in which you clear exactly four floors plus a basement. After completing this task, go up to the fourth floor, where you will meet with Sergeant Pavlov. After talking with him and having received from him the task - to destroy the approaching enemy tanks in the amount of two units, go down to the second floor. Take advantage of the anti-tank installation there, installed near the window from which the view of the tank opens, and, in fact, destroy the target. Then go up to the third floor, where also use the anti-tank gun to destroy the second tank. After completing this task, you and your team will have to hold the building for more than three minutes until reinforcements arrive. It is best to take a position in front of the staircase on the third floor. Miraculously waiting for reinforcements, clear the building of the remaining enemy forces, and then meet with a group of soldiers in the courtyard to complete this mission.
Mission 19: Warsaw Factory - Warsaw Factory
Run after the rest of the soldiers across the territory of the tank repair plant. The approach to the main gate is heavily guarded by German detachments. After destroying all the guards, go to the main gate. The Germans locked them from the inside and are probably holding the entrance to the premises at gunpoint. Wait for the soldiers to install explosives on the door. After the explosion, rush into the room, where you will shoot all the Fritzes who did not have time to recover after a powerful explosion. Run to the end of the corridor, then go down the stairs to the basement. Through the basement you can reach a hangar with tanks. Move to the opposite end of the hangar, to the exit to another corridor. After climbing the stairs, turn right. Go along the corridor to the entrance to the crane runways of the hangar. Run along the wall to the exit from the crane runways. In the center of a small room, behind overturned tables, the Fritzes took refuge. Not sticking out too much, try, peeking out a little from behind the doorway, to neutralize all the Fritzes. Move along the corridor to the hangar with tanks, from it through the door in the opposite wall go out into the street. After taking a few steps along the frosty street, go into another room. From it you go out into the corridor and run to the doors leading to the courtyard of the plant.
Mission 20: Warsaw Depot - Warsaw Railyards
Make your way to the northwest of the railway station, killing enemies. Go in the opposite direction from the stationary machine gun to the ruins of the building and from this position fire at the enemy near the tank hangar. After killing the enemy soldiers, return to the stationary machine gun and go left from it. Go to the hangar, along the way grabbing a grenade launcher lying on a box near the wall to the left. Destroy a tank in the hangar with it. If one shell is not enough to destroy the tank, then take another grenade launcher. In addition to the tank, there are many armed German soldiers in the hangar. Kill them and go to the office, which is located at the end of the hangar on the right. Through it, go out into the street and fight your way to the fourth division, which is near the car.
Mission 21: Oder River Area - Oder River Country
The first thing that comes to mind in this mission: "With such a technique, no enemy is afraid." This is true. All you have to do in this mission is to make your way to the outskirts of the next city. Drive along the road forward until three tanks appear to the right behind the river. Destroy them, and then ride to the next skirmish, which will happen nearby. This time there will be three times more tanks, they will be located on the opposite bank of the river, to your right. Having dealt with them, continue driving along the road. In a large open area, the final tank battle awaits you, victory in which will open the way for you to the city.
Mission 22: City on the Oder - Oder River Town
Tank races continue! After the turn to the left, the first three tanks. Eliminate it and drive on the road. Beware of soldiers with missiles in this mission, they can cause serious damage. Around the turn to the right, in the square, there are four more tanks, and a little further two more, one of which, by the way, will appear from under the arch. Drive under the archway and destroy the first anti-aircraft gun that comes into view. Wait a little, until three tanks appear from the steppe. Eliminate them from afar, and then drive to the second anti-aircraft gun and destroy it. When a tank rushes into the area, do not shoot at it - this is an allied tank. An anti-aircraft self-propelled gun stands near the second anti-aircraft gun. Eliminate it and go to the steppe.
Mission 23: Festung Recogne
Your team goes to the northeast of Bastogne in Belgium. There are several bunkers called "The Impenetrable Fortress" not far from your landing site. You will have to refute this name or confirm it at the cost of your life. Move north through the cold winter forest. Having got out on the road, go through it and go down to the bank of the frozen river. Immediately around the bend, you will stumble upon an ambush by the Germans. Quickly let them know who is who. Climb the hillock where the ambush was arranged, and run along an inconspicuous path to the first bunker. Inside in the room to the right, take the documents from the table. After leaving the bunker, head west to another bunker. After picking up the documents inside, climb the hillock, where several tanks will appear on the road in a couple of minutes. After a few shots from the grenade launcher (take it in the last bunker), the tank will turn into a burning torch.
Mission 24: V-2 Rocket Platform - V-2 Rocket Site
Get down into the river bed and run east to the huge boulders blocking the way. Then head north to the German anti-aircraft gun. After destroying all maintenance personnel of the battery, install the explosives on the body of the anti-aircraft gun and remove to a safe distance. Move west to another anti-aircraft gun. After the destruction of the local air defense system, the first part of the operation will be completed. Go north with a fighter of allies. When approaching the road, two trucks with soldiers will drive out from behind a bend at high speed. By all means, don't let them get away from your fire. After dealing with the enemy's manpower, fire several bursts at the gas tanks of the trucks. Then continue through the forest, now west towards the V2 missile launcher. Run up the hillock, where there are several barrels. After jumping into the moat, find the entrance to the bunker. Run to the end of the tunnel, then go down the steps even lower. Find a room with containers from where missile refueling is controlled. After pressing the switch, the process of filling the rockets with fuel will begin. Return to the launch pad and plant explosives on each missile in turn. After several explosions go down to the northern bunker, where through the tunnel you can leave the launch pad.
Mission 25: The Reichstag - The Reichstag
Our tanks cannot get close to the enemy, since three anti-tank guns and an enemy tank are installed on the approach to him. Your first priority is to destroy them. Get your sniper rifle and kill the soldiers in the buildings. Move on to the first weapon. Smash it to small pieces, and then carefully move behind the walls of the building, fearing an enemy tank. Go west to the second anti-tank gun. Install explosives on it and proceed to the third gun, which is installed under the building near the enemy tank. After destroying this weapon, approach the enemy tank imperceptibly so that you can touch it with your hand. Place explosives on it and ... run away! After our tank column moves, one of the tanks will drive up to the wall and blow it up. Go through the resulting passage to the square in front of the Reichstag and hide behind some shelter. Wait for our tanks to enter the square and then storm the Reichstag. Walk through the performance room and climb onto the roof. When a Russian soldier climbs onto the roof and waves the Soviet flag, it will be a signal for victory. Our victory with you in this difficult war.
Another time - another enemy.
60 people from the troops of the first level were sent against 500 enemy fighters. Their goal: to drive the enemy out of the civilian hospital, saving the lives of patients.
They held the position for three days, but the enemy numbers were too great.
Out of 60, only 15. They would not have held out one more night and the enemy knew it. They evacuated people from the hospital, sending only one of their own as a guide. The rest formed a formation, hiding behind the bodies of the fallen brothers. As they waited, the blood from the corpses poured onto them. Sand stuck to this blood. The blood changed them, a kind of anointing. 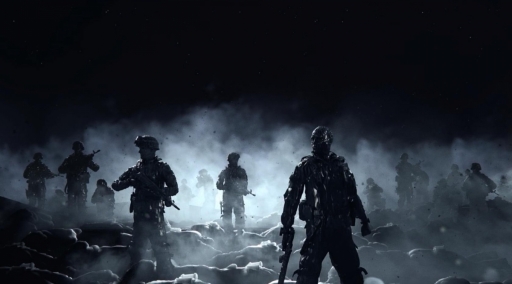
As the enemy approached, these 14 fighters rose straight out of the sand. They became invisible hunters. The enemy was powerless against their secrecy. When the cartridges ran out, bayonets were used. And when the bayonets became blunt, fists went into action.
When the dust and sand had settled, of all the enemies, only one remained alive. They found him in the desert, wandering aimlessly there in delirium. He told his comrades about powers so terribly powerful that they could only be supernatural. He called them "Ghosts". 
Follow your father and brother. When your father says go home, follow your brother.
In space, follow Mosley. When she disarms the enemy and the weapon gets to you, move the mouse over the enemy and kill him.
Then follow Mosley, doing whatever she says.
The rise of the Federation began many years ago. When the huge energy-producing deserts were destroyed, the states dependent on them collapsed. And then the rise of the Federation began.
The Federation has unified all of South America under one banner, absorbing everything in the path of its ruthless expansion northward. 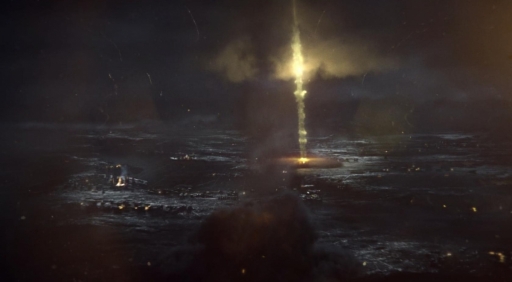
Turning ONE against us, the Federation stood on America's frontier, ready to strike.
They thought we were weakened - an easy victim waiting for the final blow.
We fought for a long time, hard, until we ended up in a stalemate.
And here, in the craters of the neutral zone, we are now waging a defensive war with an enemy superior to us. 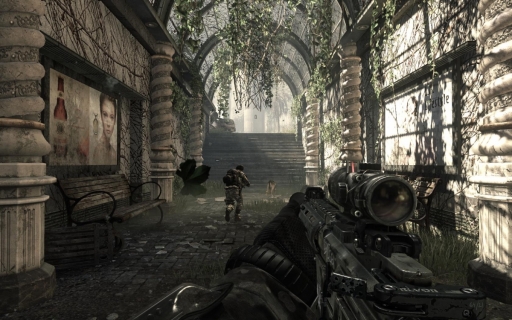
Follow Hesh and Riley.
At the gas station, enemy soldiers will execute civilians, kill them. Next, go to the tunnel.
When you enter the site, there will be a lot of enemies. Pay attention to the helicopter, you can kill all its passengers and it will fall. Move towards the green smoke. 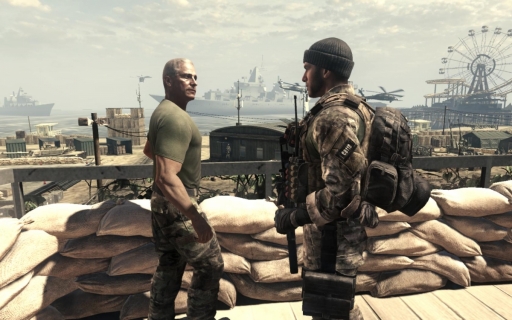
Take a laser grenade launcher and shoot down enemy helicopters. Then climb into the car from behind.
After arriving at the base, follow Hesh.
We call this the neutral zone. The areas between Los Angeles and San Diego were hit hard when the Order turned against us. The beaches that I remember from my childhood are now abandoned. Mines are everywhere. Father said few people are sent to the neutral zone, it is too dangerous, unpredictable.
Since he sent us here, this is too important. But I could not shake the thought that he was testing us again, that he wanted to teach us a lesson. 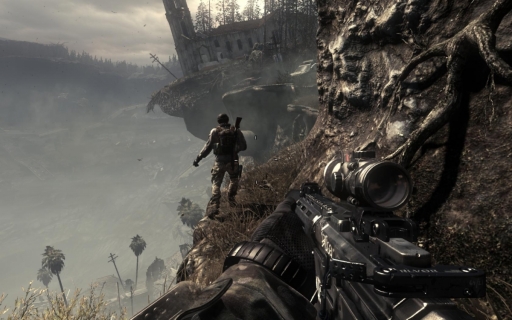
Follow Hesh. When you sync, you will see from the camera what is mounted on the dog. Kill enemies with the help of the dog. Next, go into the building.
You will enter the tunnel and an enemy column will drive. Sneak to the right of the cars. Tell the dog to attack the enemy on the right. When she kills him, go on.
Synchronize again. Drive the dog to the target and then lead the dog back to you.
Go through the woods. When wolves attack you, defend yourself, they will help you. 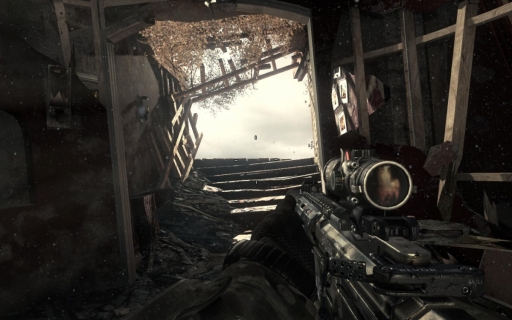
Follow the scouting party. When you enter the city, there will be many enemies. Move towards the goal, destroying everyone in your path.
They crawled out of the ground and disappeared into thin air. They have made a reputation for themselves outside the wall. It spread across the no-man's land like a cloud of fear, a weapon steeper than copper and steel.
Marya Keign. This is what my father was talking about. Ghosts. And yet someone dared to challenge them.
They were heading to San Diego, into Federation territory, to find their man, Ajax.
Ghosts, before we only dreamed of them, but now we are going to join their ranks. 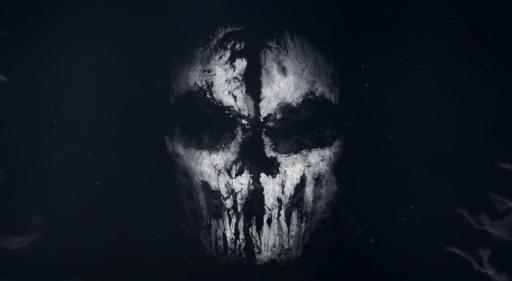
Take the grenade launcher and mark all the cars that pass by you. Then get into the truck.
When you rush into the truck in the very heat, go along the corridor, then go up the stairs. 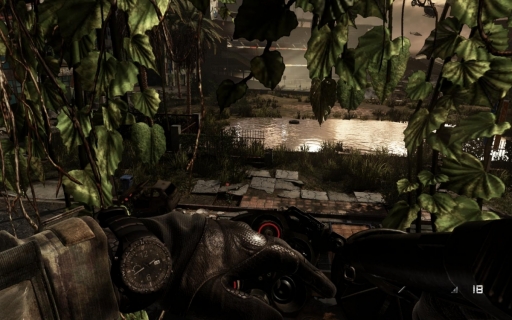
Near the doors, switch to a sniper rifle and kill everyone you see. Then, when you get ambushed, switch back to the sniper rifle and kill all the grenade launchers.
When you put on your gas mask, throw gas grenades under the door and move forward.
After reaching the door behind which Ajax will probably be, go with Keegan to the right. 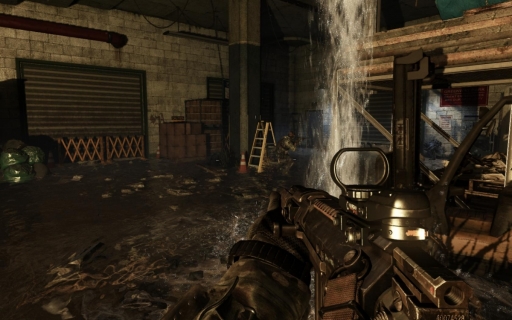
It's time to do your legs. Switch to the sniper rifle and cover your comrades so that they can reach the helicopter. Then make your way to the helicopter yourself. When you sit in the turntable, destroy all the turrets on the cars with a sniper rifle so that you can fly away.
I saw before how the fallen were picked up. But not like these people. It was a sign of the Ghosts' respect for Ajax - the exact opposite of how he apparently died. If this Roarke killed him, he was clearly in no hurry, enjoying the process, and now he was hunting the Ghosts.
And again we fought with the Federation and again we went into the chaos. Excavation, Target Lists, Ghosts. And somewhere in the midst of this carnage was our father. I had to find him. 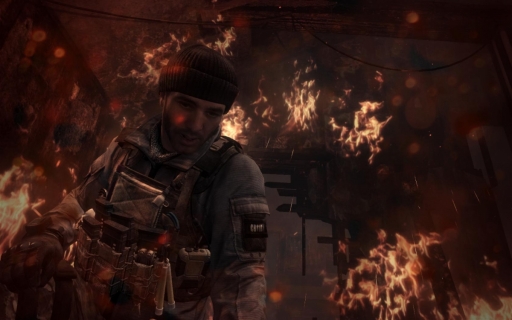
Get up for a machine gun and destroy enemy helicopters. When the machine gun is destroyed, use drones to destroy helicopters and tanks.
You need to make sure your father gets out. You will go to the house. Crawl under the obstacle that your brother will raise. Then go up the stairs. An unknown person will attack you. Protect yourself ..
It all started 20 years ago. The Federation army began to threaten South America. Their leader, General El Magro, demanded the capture or execution of all US-born citizens.
It was Roarke who convinced Washington to trust the Ghosts to solve this problem.
The United States sent troops to destroy the Federation. Roarke went to eliminate El Magro, but Roarke became obsessed with the man. He spoke of it as a reward, a hunting trophy. And he was ready to do anything to get this trophy. ![]()
Follow the group. When the tank appears, run to the parking lot on the right. Next, go to the transport and throw a grenade into it.
Move forward along the street, when you run to the installation, it will have time to shoot and blow up the dam. Run into the alley on the right and follow the group. After climbing to the roof, kill enemies.
When the building collapses, you will be left with Roarke alone. Do what he says. Join the rest of the group. 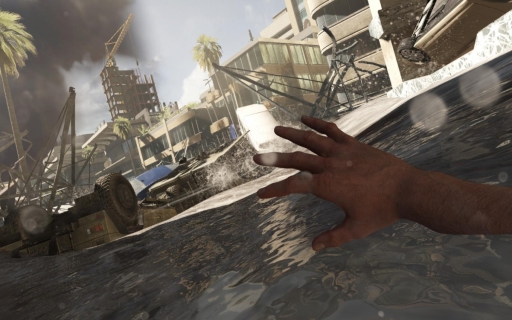
A helicopter will arrive. Climb to the second floor, go through the doors and jump onto the helicopter. When you take away the pistol, shoot the enemy.
El Margo will knock the pistol out of your hands, quickly raise the pistol and kill the enemy. Next, save Roark, and then release your hand to save everyone else.
- So what happened to him? With Roarke?
“We searched for his corpse for weeks, but they recalled us, and he was declared missing.
- But why does he need Ghosts?
“The Federation got to him first. I don't know what they did with it, but if they changed it, they can change anyone. The ghost will not stop until the task is completed.
- So find him before he finds us.
- Exactly. There is a man in Caracas who knows where his lair is. Victor Ramos is the head of scientific projects of the Federation. Few can call someone like Roarke a friend. Ramos is one of them. To find Roark, you'll have to go back to where it all started. 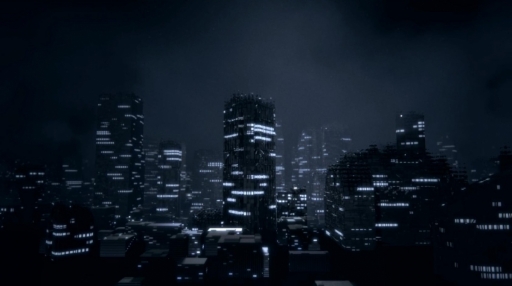
Use an optical scanner to identify the target. Then go down, open the rig, shoot the cable, attach the hook and go down the cable.
When you find yourself on the building, go down two floors below and eliminate the person at the computer. Walk to the right and eliminate two more.
Get down further, do not rush to shoot. Go left, wait until the second person enters the kitchen and eliminate him. The second will be eliminated by your friend.
Next, eliminate the remaining three at the table. Get down below and climb through the window. 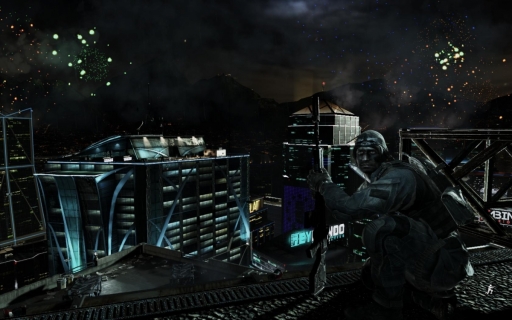
Follow Keegan and load the virus into the power system. When loaded, quickly hide to the left in the dark.
Go back and grab the cable. Turn off the lights in the building.
Kill the two enemies on the left. Next, throw a knife at one more, and then throw the knife at one of the two enemies who will come running to you.
Follow Keegan. When you go to a cafe, there will be a lot of people. Shoot the TV on the left on the wall to keep the room dark. Then turn on the stroboscope to catch enemies off guard and destroy everyone in the room. 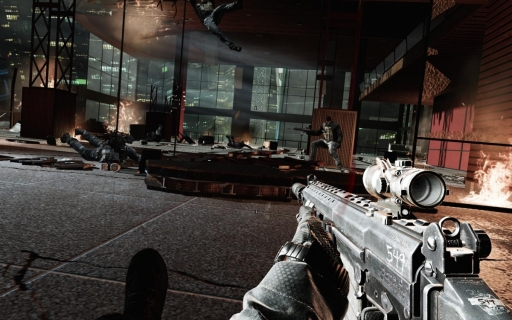
Help Keegan turn off the power to the elevators, then go and cling to the cable and go down the building, shooting enemies who will look out of the windows.
When the building starts to collapse, run after your comrades. Then, after jumping out of the building, open the parachute.
Ramos's laptop was badly damaged. But "Narat" found something interesting. Roarke moves twice a day. But for now, we know exactly where he is - a floating plant in the Persian Gulf, occupied by the Federation. They call him Freeport.
"Narat" found everything, now they need him alive.
For hunting, you will be provided with a couple of restored birds. I will coordinate everything from the spectrum.
- It will be a hell of a hunt.
“Big game, but you know what to do. 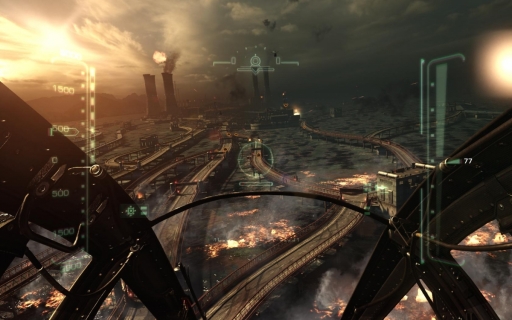
You are flying a helicopter. Follow your allies.
Open fire on enemy installations, and on everyone you see. Use light traps to defend against missiles.
After, enemy helicopters will arrive. Destroy them and fly to clear the landing zone. 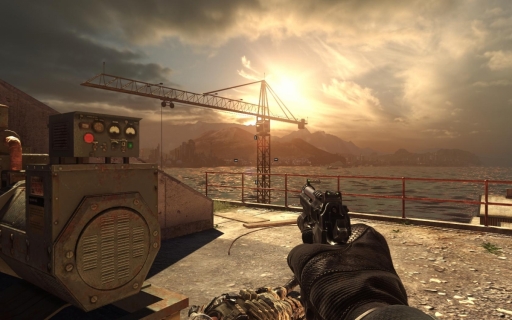
When you disembark, follow your group to Roark's lair.
There are tribes in the Amazon jungle that have perfected the art of torture for hundreds of years. The Federation took them into their family, providing them with slightly more sophisticated methods.
They kept Roarke burrowed for months. Nude. And fed on low-protein porridge. Bowing the body, they began to work on his mind. When the mind also gave up, they took up the soul.
What was left was redone, saturating it with lies. Turned into a puppet - a painful process, cruel. Roarke became their ghost - the perfect weapon against us. 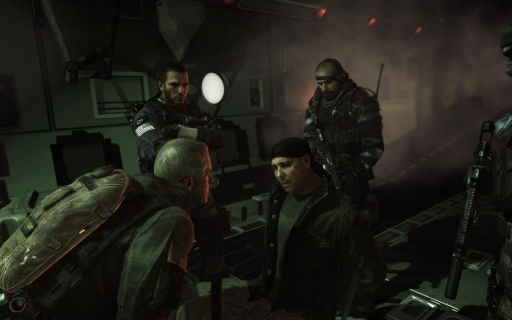
Take Roarke's chair and move to the edge. You will be attacked and the plane will crash.
Team up with your own as you move quietly through the forest.
Follow the group. Listen to everything they tell you. 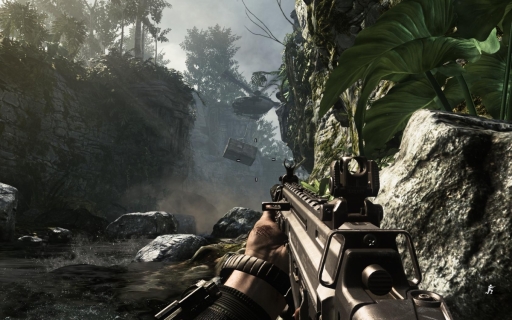
When you get to the field, there will be helicopters. They will fly away. Sneak across the field, don't glow.
Further, when you see a rocket, helicopters will fly at you. Lie down and do not move, and after that, run after the group and jump from the waterfall.
Narat officially announced that the missile launched from Yucatan did not strike the United States.
- Where did she go?
“This is what you guys have to find out. 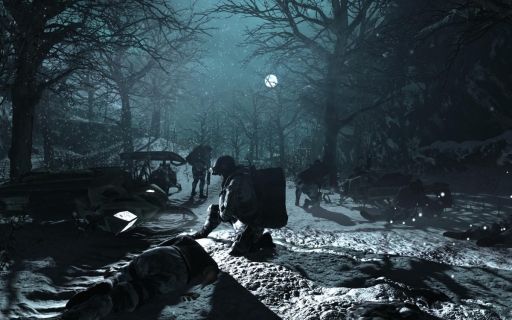
Operation "Ziferblat" - the assault on the Vanta Federation complex. There we will get the information we need.
You need to enter the complex and collect any information on the missile program.
- What about your old friend Roarke? He will not leave us behind.
- We'll deal with Roarke, but for now, the main priority is Dial. 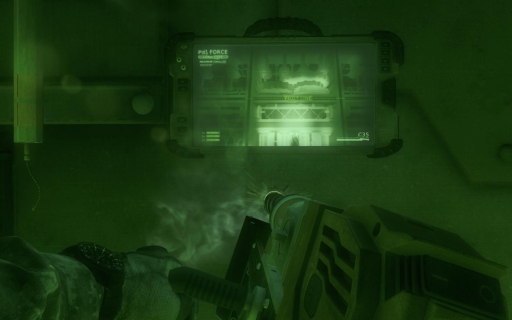
Follow the group. When you reach the checkpoint, first remove the enemy on the large tower on the right. Then, the central one on the left tower. Kill the rest.
Hide the corpses. Then a car will drive up. Kill the driver with a knife and get into the car.
When you arrive at the Federation base, follow yours. The light will turn off. Turn on the night vision device, kill everyone and follow your comrades. 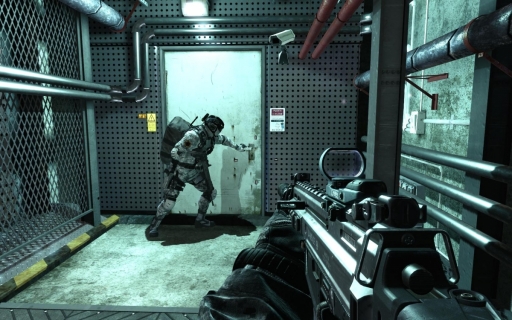
When you reach the large door, drill two holes. Then step back so you can blow up the door.
Follow the group. Place your bag on the table and start defending your position. Place a turret, mines and defend your position while Hash downloads all the files. Then take the elevator.
Leaving the elevator, do not shoot, move to the parking lot and get into the car. When you are declassified, shoot the enemy transport that will follow you.
“Sir, they're on board.
- What did we get from this data?
- Yes, the Federation's missile program is being developed in a high-tech complex. 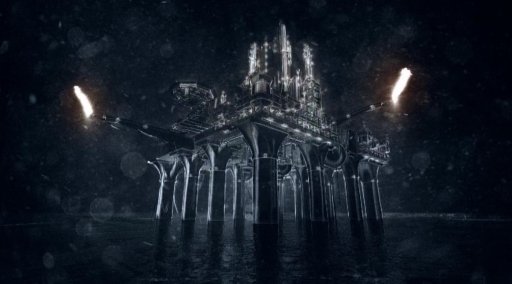
“The third Federation fleet holds the coastline.
“That's why we're heading south to divert their attention by attacking the Atlas Platform in the heart of Drake Passage.
- It's far abroad, why capture this target now?
- Atlas provides a lot of fuel, the Federation will last for many years. And I don't want you to capture her, sink her. 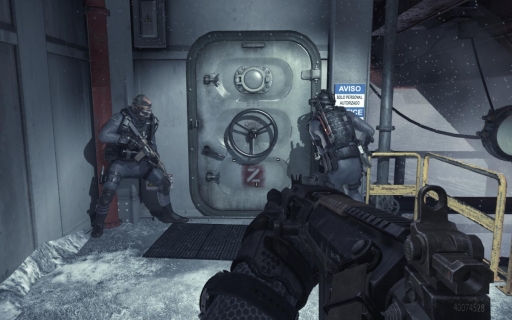
Explode the charges. Climb to the top and break through enemy defenses. Use the hooks to climb up. Then follow the group.
Put charges on the door. When the door explodes, throw a flashbang grenade and clear the room. Go into the room on the right and press the remote control. 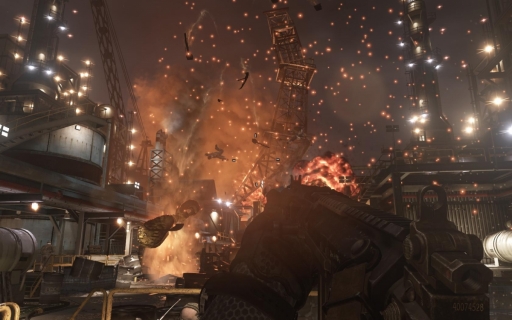
Follow the group. Destroy two machine gunners, then remove the corpse from the remote control and hold the pressure in the green zone. Then run and grab the helicopter ladder.
We lured out the Federation fleet. They left one ship - a destroyer guarding the harbor and the plant.
It is crammed with modern air defense. But he has one weak spot 20 meters below the waterline.
“Keegan, Logan, you’ll take the Proteus torpedo with you, which will hit the heat exhaust.
- Understood. Let's send one more ship to the cemetery. 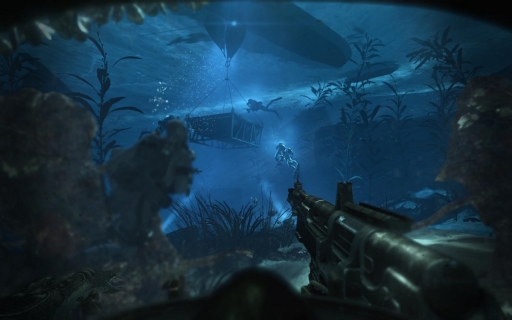
Swim after Keegan and listen to what he has to say. Enemy scuba divers will appear in front of you, kill them.
After passing the cave, cut off the doors.
Swim into the lighthouse and launch the Proteus torpedo. Aim the torpedo at the red spot of the ship. After the explosion, the blast wave will destroy the lighthouse and you will find yourself pinned to the bottom. Keegan will help you, swim after him, destroying scuba divers. 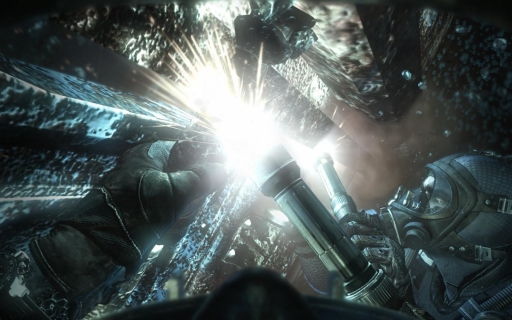
When they start dropping bombs, you will swim into the ship. It will contain sharks. Swim carefully between them and follow Keegan.
Roarke hung above me like a black shadow. We destroyed the platform, took the entire fleet away, flooded the destroyer and all this time I was worried about only one thing, where Roarke was. Here? Ahead? Is he waiting?
He was so good, Ghost. But what happened to him?
There was something important at this plant. The Federation did its best to hide it from us. And we almost found out what it was. 
Jump onto the enemy from the cliff. Go forward. Team up with a group and quietly kill the enemy near the carriages.
Enter the building. And go up the stairs to the left. When the gate rises, clear the room from enemies, and then go along the white corridor.
Download the images of the fighting rods, then follow your comrades. 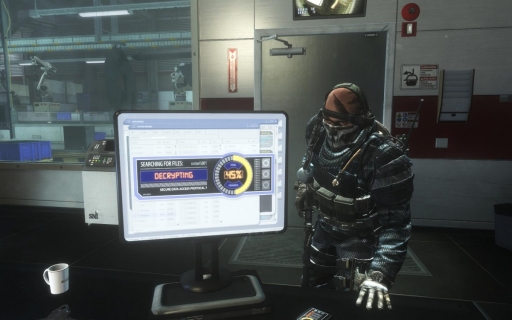
When you enter the room with computers, copy the data. You will be attacked, kill everyone and move with the group to the exit. When yours blow up smoke, use the thermal imager to destroy enemies.
Out on the street, fight your way through the crowd of enemy soldiers and jump on the truck that will arrive there. Shoot the cars chasing you.
The worst fears were confirmed. The Federation has recreated the Orbital Weapon System from the debris of ODINA.
"Will they be able to use it soon?"
- Unknown. The data you have collected is sent to Colorado Springs. The Minister of Defense is expecting a report from you.
- Keegan. You're getting poisoned in Colorado Springs.
- Still would.
- Meet me in secret tomorrow in Vegas at 12 sharp. 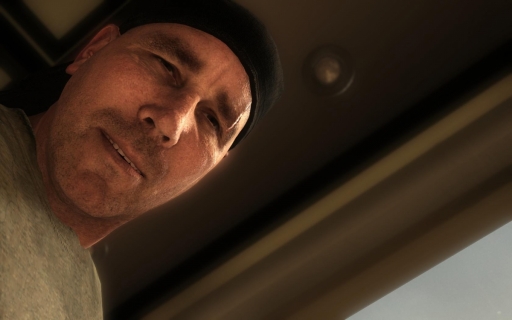
Raise the gun and kill all the enemies in the room.
When you meet Keegan, hide in the kitchen in the room to the left.
After passing into a large room, there will be a lot of enemy soldiers. Break through with the fight and climb through the gate. 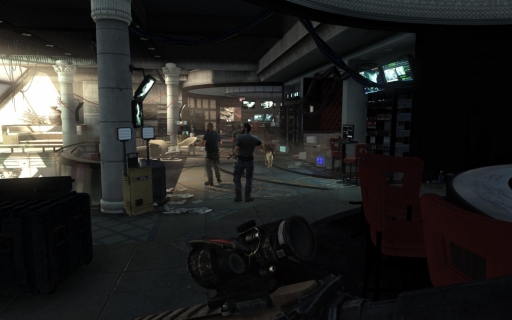
When you open the doors in the corridor, there will be many soldiers. Turn around and run after your comrades.
Pick up Riley and move towards the helicopter.
If the ghost dies, his body is laid face down, so that his head points in the direction of the house. The weapon is placed next to it.
We always do this, and when our fallen find themselves in the next world, they watch us, and our enemies too. 
The father died, it could not be changed. But Logan and I, we're still here. The Federation is still here. Roarke is still here. The war is not over, it is still a long way off.
Goodbye dad, I can't compare with you, but I will try to the end. 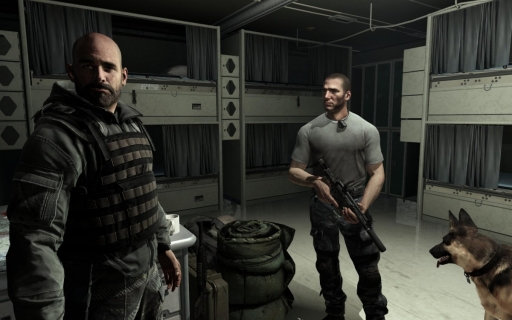
Taking the mask from the table, follow Hesh to the deck.
Take the guidance system. Run and defend the ship's side destroying enemy boats. Use a guidance system.
Then follow Hash and use rockets to destroy helicopters and a Federation plane. Then run with Hesh to the helicopter.
We attack two targets at the same time. We sent an assault team to space station Federation. Their task is to capture the station and take control of the orbital weapon. For them to do this, we must destroy the early warning repeater on the ground. 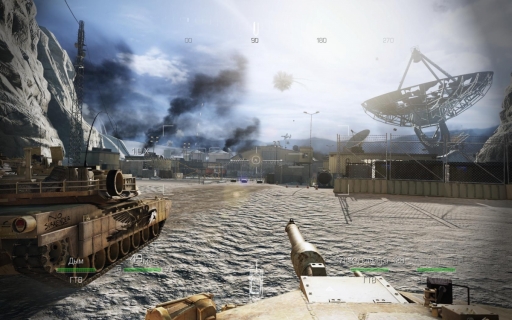
Hesh, you and your group will have to capture their headquarters and launch a rocket into the relay. Roarke might be there, but the mission comes first.
The tank battalion will breach your defenses. Resistance will be the kind that you have not met in the entire war.
If everything works out, our guys in space will have a chance to win. 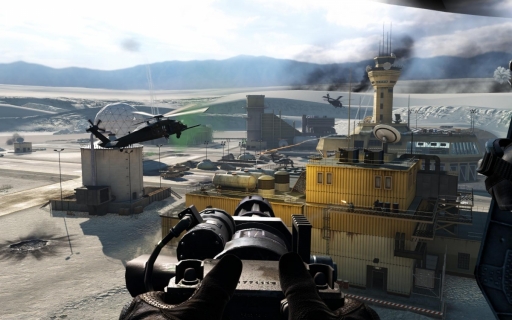
Move with a group destroying enemy tanks on your way. Use guided missiles to destroy the helicopter.
When you arrive at the enemy base, destroy all defensive structures near the runway.
Using a machine gun, destroy enemies in the building. Then jump off the helicopter and follow Hesh. 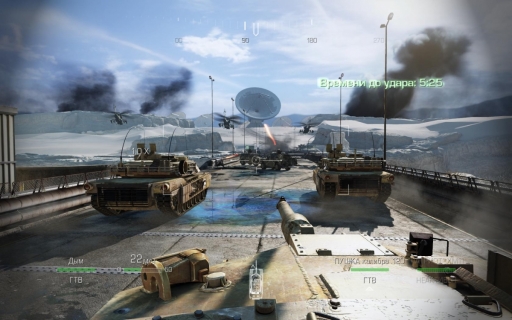
Hack the door and clear the room. Launch the rocket and go down the stairs with Hesh.
Make your way to the train and get on it.
When you control the tank again, destroy the enemy turrets. Then get out of the tank and run into another tank. Get behind the machine gun and cover your retreat.
- Icarus, ground mission completed successfully. They are blind, attack them.
- Icarus, says the center, you must see the station.
- Understood, the second separated, aiming at the target.
- It's huge. There is a whole ring of Federation satellites, they are activated.
- Mary says, we won't last long here, come in and do your job.
- That's right, let's go. 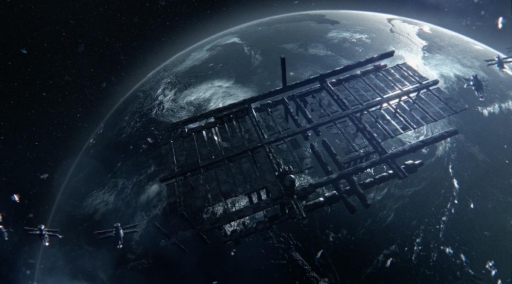
Follow the group, destroying opponents. Make your way to the hatch. An explosion will occur and you will be thrown back. Fly into the round passage and follow your allies.
Set charges. When there will be an explosion, fly in and kill everyone.
Use the console to control satellites. Mark targets on the ground and the satellite will destroy them.
My father taught us a lot, but one of the lessons I remember forever.
Most people try to live by avoiding this lesson, as long as fate does not force them before it. It all depends on what choice a person makes.
Logan and I made our choice, made a promise for the lost ghosts, for my father. 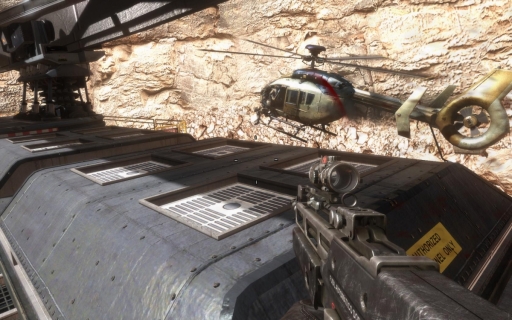
Follow Hesh. Run along the carriages, killing enemies. On one of the cars, lower the bridge to the right and run further.
When you reach the last carriage, storm the door.
Raise your pistol and shoot Roark. It turns out that the pistol has no cartridges. Hash will throw ammo at you, load the pistol and shoot at Rork. 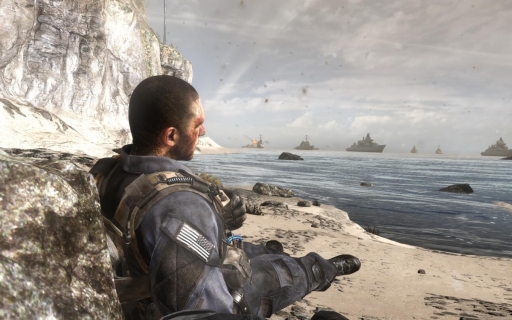
Take your brother and swim to the surface. When you are on the shore, pull it and then lift it up.
Judging by the ending of the game and the picture after the credits, it should be continued ..
- The use of uavs in rescue operations of the Ministry of Emergency Situations of the year
- The day of the founding of the Russian Navy - the day of the sailor-surface sailor A Brief History of the Russian Navy
- Where does irritation come from?
- Modesty: its pros and cons, how to get rid of modesty His silence does not mean resentment against you
- Day of the Borodino battle
- Day of the Borodino battle
- Basic physical properties of minerals