Vector and raster graphics of a lecture presentation. Computer science presentation on the topic "Raster and vector graphics. Graphic editors." Motivation for learning activities

 Live Journal
 Facebook
 Twitter
Literature 1.S.V.Glushakov, G.A.Knabe Computer graphics // Educational course. - M.: AST, - 503 p. 2.V.N.Porev Computer graphics. - St. Petersburg: BHV-Petersburg, - 432 p. 3.L.A. Zalogova Workshop on computer graphics. – M.: Basic Knowledge Laboratory, – 320 p.


Comparison criterion Vector graphics Bitmap graphics Method of image representation A vector image is described using a sequence of graphic commands A raster image is built from a set of discrete objects Quality of image modification (transformation) Image transformation without quality loss Image transformation is highly limited due to quality loss and distortions using technical devices If the display device implements the appropriate principle, then the quality is high. Display on the opposite principle device The display quality can be provided with any predetermined accuracy. If the display device implements the corresponding principle, then the quality is high. When trying to display on a device of the opposite principle, the display quality is either low or does not have a practical possibility at all Reflection of real world objects Display is somewhat artificial Display is extremely realistic

Fundamentals of the theory of image transmission using color; features of color perception by the human eye; the essence of color reproduction in the main models: RGB, CMYK, HSB, L*a*b; the main parameters of the models; additive and subtractive colors; scope of color models; features of image formation (color rendering) by technical means: computer monitor and printing devices


Text Text Text Text Text Text Text Text Text Text Text Text Text Text Text Text Text Text Text Text Text Text Text Text Text Text Text Text Text Text Text Text Text Text Text Text Text Text Text Text Text Text Text Text Text Text Text Text Text Text Text Text Text Text Text Text Text Text Text Text Text Text Text Text Text Text Text Text Text Text Text Text Text Text Text Text Text Text Text Text


Format, in cm Resolution, in dpi or ppi Size, in dots or pixels Image mode Image data size Note 5 x x 170 Monochrome (Bitmap), (1 bit per color) 3 KB For viewing on a monitor Grayscale (black and white) , (8 bit per grayscale) 24 KB RGB, (8 bit per color) 71 KB CMYK, (8 bit per color) 95 KB x 628 Monochrome (Bitmap), (1 bit per color) 41 KB Rough Grayscale ( black and white), (8 bit per grayscale) 322 KB RGB, (8 bit per color) 966 KB CMYK, (8 bit per color) 1.26 MB x 1417 Monochrome (Bitmap), (1 bit per color) 205 KB For quality printing Grayscale (black and white), (8 bit per grayscale) 1.6 MB RGB, (8 bit per color) 4.8 MB CMYK, (8 bit per color) 6.4 MB x 2835 Monochrome ( Bitmap), (1 bit per color) 820 KB For high quality (photographic) printing Grayscale (black and white), (8 bit per grayscale) 6.41 MB RGB, (8 bit per color) 19.2 MB CMYK, ( 8 bit per color) 25.6 MB

9 x X 369 Monochrome (Bitmap), (1 bit per color) 12 KB For viewing on a monitor Grayscale (black and white), (8 bit per grayscale) 92 KB RGB, (8 bit per color) 276 KB CMYK, ( 8 bit per color) 368 KB x 1364 Monochrome (Bitmap), (1 bit per color) 158 KB Rough Grayscale (black and white), (8 bit per grayscale) 1.23 MB RGB, (8 bit per color ) 3.69 MB CMYK, (8 bit per color) 4.91 MB X 3076 Monochrome (Bitmap), (1 bit per color) 800 KB For quality printing Grayscale (black and white), (8 bit per grayscale) 6 24 MB RGB, (8 bits per color) 18.8 MB CMYK, (8 bits per color) 25 MB X 6151 Monochrome (Bitmap), (1 bit per color) 3.13 MB For high quality (photographic) printing Grayscale ( black and white), (8 bit per grayscale) 25 MB RGB, (8 bit per color) 74.9 MB


Computer graphics
A section of computer science, the subject of which is working on a computer with graphic images (drawings, drawings, photographs, etc.)

Computer
Images
Raster
Vector

Bitmaps
Raster images are formed from dots of different colors (pixels) that form rows and columns.


The quality of a bitmap depends on:
1. From distance
between neighboring
pixels
2. From quantity
in the picture
16x16=256 pixels
1 bit is required to store each pixel
Figure size = 256 bits
256 bits = 32 bytes

Advantages of bitmaps
- Raster graphics effectively and realistically represent graphic objects and allow you to create (reproduce) almost any drawing, regardless of complexity;
- Prevalence - raster graphics are now used almost everywhere: from small icons to posters;
- High speed processing of complex images;
- Most external devices for entering photos, slides, drawings work with raster graphics (these include scanners, video cameras, digital cameras, graphics tablets)

Disadvantages of bitmaps
- Large file size with simple images;
- Impossibility of perfect scaling;

Graphics editor
program for creating, editing and viewing graphic images.


Vector graphics
Vector drawings are used to store high-precision graphic objects (drawings, drawings and diagrams) for which the preservation of clear and distinct contours is important.

Vector graphics
A vector image is created from graphic primitives (points, lines, circles, polygons, etc.) and is described by mathematical formulas.
In this case, the position of the arrow is described by the coordinates of the beginning and end of its constituent lines and mathematical equations.

Advantages of vector graphics
- vector drawings can be enlarged or reduced without loss of quality.
- small information volume of files compared to the volume of files containing bitmap images.

Disadvantages of vector graphics
- Vector graphics do not provide a photographic quality image, and not every object can be easily drawn in vector form.
- Converting vector graphics to raster is quite simple. But there is usually no way back.
- Vector graphics are described by thousands of commands and when printed, they look different than on the monitor.


BMP – universal format, i.e. a format that all raster graphics editors “understand”.
PNG – an improved version of the GIF format.

Raster graphics file formats
JPEG- the most common raster format, almost identical to the GIF format. Its main differences are that it uses a different compression algorithm (with loss of information quality) and is not intended for storing animated drawings.
TIFF- also a raster format. It is used in cases where it is necessary to reduce the size of the graphic file without losing its quality. Therefore, this format has found wide application in printing and publishing.

Vector Graphics File Formats
WMF – this format is used to store a collection of Microsoft Clip Gallery graphic images.
ODG – proprietary format of the OpenOffice program. org Draw.
CDR – CorelDraw's own format.
SVG is Inkscape's own format.


Question 1
Graphics, represented in computer memory as a set of points, is called:
1) Three-dimensional
2) Fractal
3) Raster
4) Vector

Question 2
Graphics, represented in the computer memory in the form of a mathematical description of objects, is called:
1) Vector
2) Three-dimensional
3) Fractal
4) Raster

Question 3
The simplest graphic objects (oval, rectangles, etc.) created by the tools of a graphic editor are called:
1) Geometric objects
2) Pixels
3) Primitives
4) Tools

Question 4
Choose from the proposed list of graphic file extensions.

Question 5
The format that all raster graphics editors understand is ...

Question 6
Which graphic file format will require the most memory?

Homework
- § 1.2
- Writing in a notebook

Information sources
- N.D. Ugrinovich. Informatics and ICT. Grade 9, M., BINOM, 2010
- M.G. Gilyarov. Computer science. Grade 9 Lesson plans for the textbook Ugrinovich N.D. Volgograd, ITD Corypheus, 2009
- Student drawings
- http://images.yandex.ru/

Zagorodnikova Svetlana Nikolaevna,
IT-teacher
MBOU "Secondary School No. 12 with in-depth study of individual subjects" of the city of Biysk

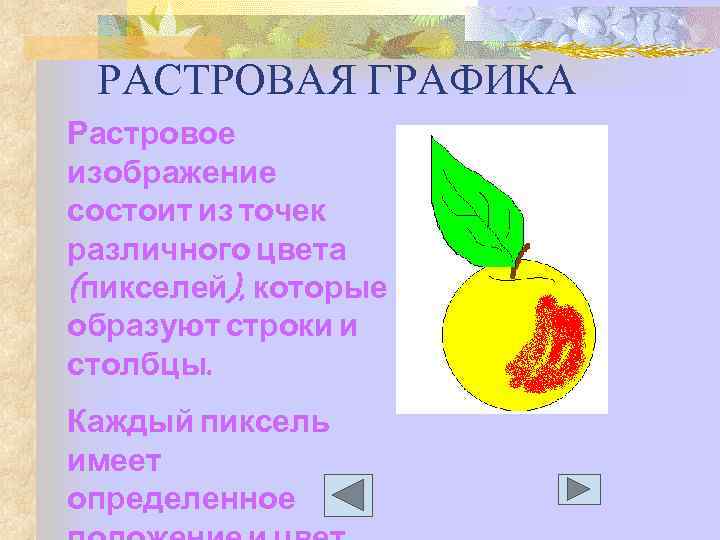 BITTER GRAPHICS A bitmap image consists of dots of different colors (pixels) that form rows and columns. Each pixel has a specific
 The quality of a raster image depends on: n n the size of the image (number of pixels horizontally and vertically); the number of colors that pixels can take on.
 Files that store bitmap images have a large amount of information. Especially raster graphic images of multi-color photographs and illustrations obtained using a scanner.
 Raster images are very sensitive to scaling (enlargement or reduction). n n When zoomed out, several adjacent points are converted into one, so the intelligibility of small image details is lost. Zooming in increases the size of each dot and produces a stepped effect that can be seen with the naked eye.


 Vector graphics. n n the best medium for storing high-precision graphic objects (drawings, diagrams, etc.) for which maintaining sharp and clear contours is important. images are formed from objects (point, line, circle, rectangle, etc.)
 Vector graphics objects are described by mathematical formulas. the point is given by its coordinates (x, y); n line - the coordinates of the beginning (x 1, y 1) and end (x 2, y 2); n circle - coordinates of the center (x, y) and radius R; n rectangle - by the size of the sides and the coordinates of the upper left corner (x 1, y 1) and the lower right corner (x 2, y 2), etc. n A COLOR IS SET FOR EACH PRIMITIVE. n
 Advantages of vector graphics n n files that store vector graphics are relatively small. vector graphics can be enlarged or reduced without loss of quality.


 Raster graphic editors n n are the best means of processing photographs and drawings, because they provide high accuracy in the transmission of color gradations and halftones. Paint, Imaging, Adobe Photoshop, Corel Photo-Paint


 The window of the graphic editor Paint The window has a standard view of the Windows system, with the addition of a color palette that allows you to select not only the color of the image, but also the background color. Most of the window is occupied by empty space - the drawing area. To the left of it is a group of icons - the toolbar. At the bottom of the window is the color palette.
 Imaging - Picture Viewer is designed to work with graphics exported by digital cameras and scanners for viewing fax documents.
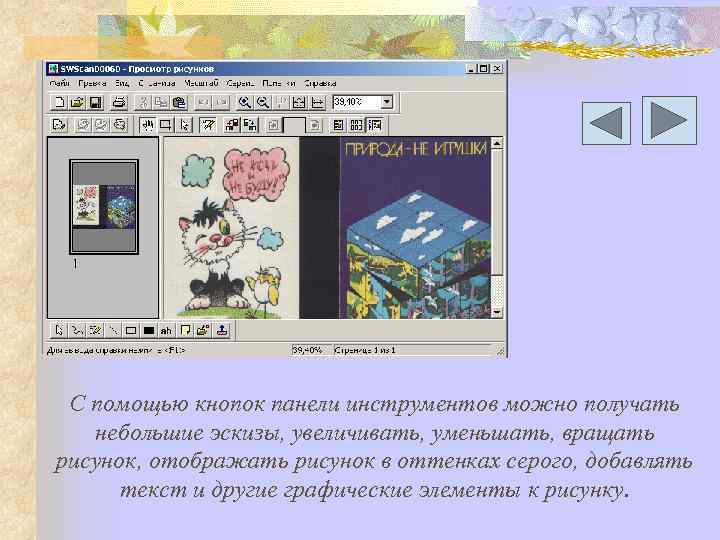 Using the toolbar buttons, you can get small thumbnails, enlarge, reduce, rotate the picture, display the picture in grayscale, add text and other graphic elements to the picture
 Adobe Photoshop is a tool for professional editing of raster graphics and photographic images, allowing you to perform almost any necessary image editing.


 Corel Photo-Paint, unlike Corel Draw, works exclusively with bitmaps and includes a huge number of tools and effects for manipulating bitmap images for professional work and creativity.


 Starting the Paint program n n Click on the Start button From the Main menu, select the command Programs From the submenu that appears, select the command Accessories From the next submenu, select the command Graphic Editor Paint

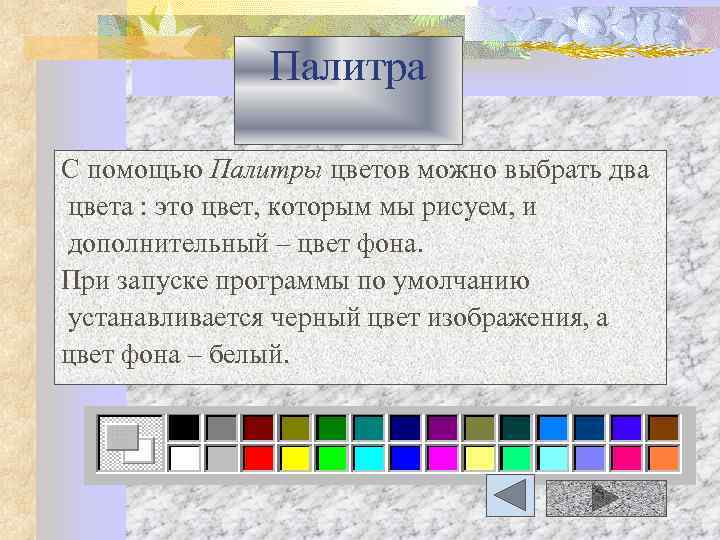 Palette With the help of the Color Palette, you can select two colors: this is the color with which we draw, and an additional one - the background color. When you start the program, the default image color is black and the background color is white.
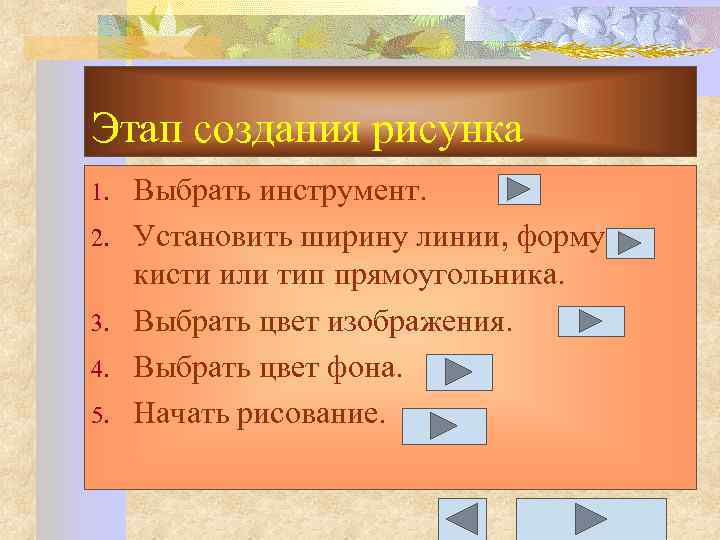 Drawing creation stage 1. 2. 3. 4. 5. Select a tool. Set line width, brush shape or rectangle type. Select an image color. Select a background color. Start drawing.

 Selection This tool is called Selection and is used to select a rectangular fragment of the picture. How to select an arbitrary area, see the previous slide. Return
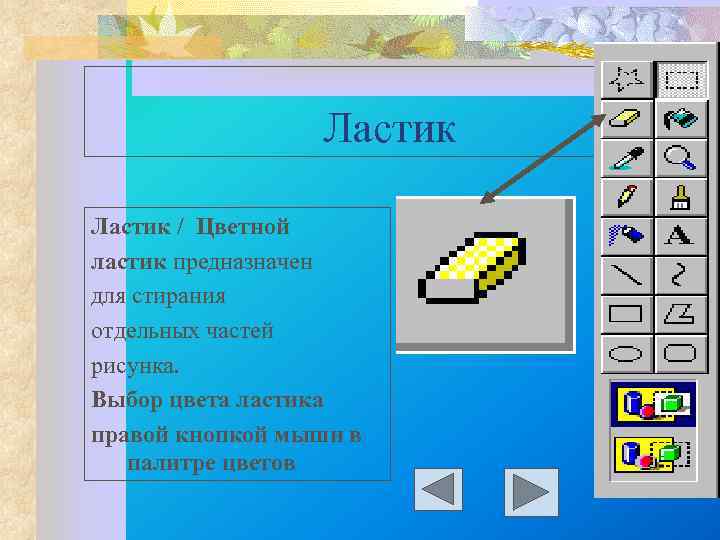 Eraser / Colored eraser is designed to erase individual parts of the picture. Selecting the color of the eraser with the right mouse button in the color palette

 Color Picker The Color Picker tool changes the color of an image or background color to the color of any point in the picture.
 Magnifying glass Zoom allows you to enlarge individual fragments of the picture. You can select with the left mouse button how many times you want to enlarge the image


 Caption places text in the drawing. Having selected the tool, you need to draw a frame where the text will be located, enter the text, click the mouse outside the frame. When working with text, it can be edited and formatted using the Text Attribute Panel (View. Text Attribute Panel)
 Line is used to draw straight lines. You can choose the line thickness. If you hold down the Shift key while drawing a line, you will get either a strictly horizontal, or a strictly vertical, or a line at an angle of 450.

 Rectangle is used to draw rectangles and squares. To get a square, you need to hold down the Shift key. Kinds of rectangles: 1. border only 2. filled rectangle with border 3. filled rectangle without border

 Ellipse is used to represent ellipses and circles. The circle will turn out if you draw while holding the Shift key. The types of ellipses and circles are the same as those of a rectangle.
 Rounded Rectangle allows you to draw rectangles and squares with rounded edges. The views are the same as those of other figures.
 This can be done in a special area, which is located directly below the toolbox. You can draw lines with a thickness of one to five points and use several types of brushes and rectangles.
 To select the color you want to draw with, place the mouse pointer on the square with the desired color in the palette and click the left mouse button.
 To select a background color, place the mouse pointer on the desired palette color and right-click. This step is necessary if you are working with a tool that creates objects using a background (rectangle, polygon, ellipse, rounded rectangle).
 To use any tool for drawing, you must do the following: 1. Place the mouse pointer on the tool you want to draw at the moment and click on it. 2. Place the mouse pointer on the square with the color in the palette and. left click. 3. Move the pointer in the drawing area to where you want to start drawing. 4. Press the mouse button and without releasing it, drag the pointer in the desired direction. 5. Release the mouse button at the end point of drawing.
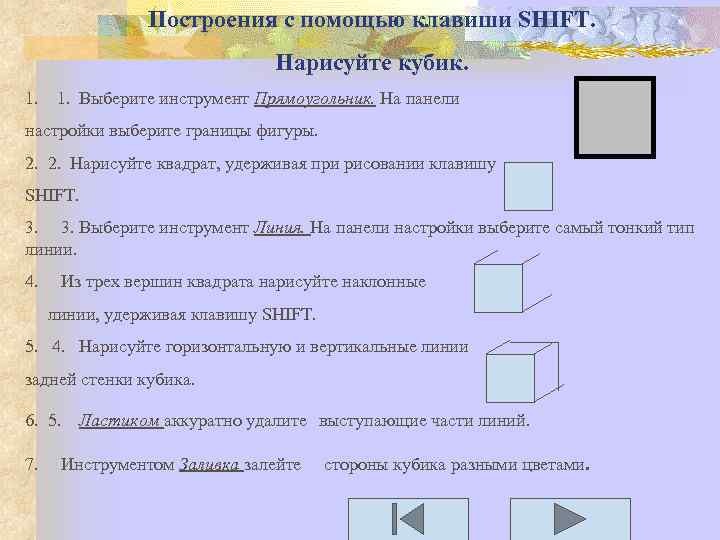 Constructions using the SHIFT key. Draw a cube. 1. 1. Select the Rectangle tool. In the Options Bar, select the borders of the shape. 2. Draw a square while holding down the SHIFT key while drawing. 3. 3. Select the Line tool. In the settings panel, select the thinnest line type. 4. From the three vertices of the square, draw slanted lines while holding down the SHIFT key. 5. 4. Draw horizontal and vertical lines for the back wall of the cube. 6. 5. With an eraser, carefully remove the protruding parts of the lines. 7. Use the Fill tool to fill the sides of the cube with different colors.
 Performing various operations with drawings. selection of a fragment of a picture copy of a fragment of a picture reflection of a fragment of a picture Next rotate the image
 To select a fragment of a picture, 1. Select one of the selection tools 2. Make a frame near the desired fragment of the picture by dragging the mouse and holding the left button.

 To rotate a fragment by 900, 1800, 2700: 1. Select a fragment of the picture. 2. From the Picture menu, select the Flip/Rotate command. When this command is selected, a dialog box appears. 3. Click in the Rotate Angle boxes, and specify an angle of 900.

 To get a copy of a picture fragment: 1. Select a picture fragment. 2. Copy it. Paste it. Edit - Copy Edit - Paste Return
 To flip a copy of a drawing: 1. In the Picture menu, select the Flip / Rotate command. 2. Select the Flip Left to Right or Flip Top Down action.


 Back forward
Attention! The slide preview is for informational purposes only and may not represent the full extent of the presentation. If you are interested in this work, please download the full version.
Duration: 1 lesson, 45 minutes.
Grade: Grade 8.
Technologies:
- computers with OS MS Windows;
- graphic editor Paint;
- projector;
- screen (interactive whiteboard);
Lesson outline.
Lesson Objectives:
- Educational - to form concepts about raster and vector graphics, a raster graphics editor; to form the ability to create and edit raster graphic images.
- Educational – to continue the development of cognitive mental and emotional-volitional processes: attention, memory, imagination.
- Educational - attentiveness, accuracy, interest in the subject.
Type of lesson: a lesson in the formation of new knowledge and skills.
Teaching methods by the nature of cognitive activity:
- Explanatory and illustrative.
- Reproductive.
Lesson equipment:
- computers with OS MS Windows;
- graphic editor Paint;
- projector;
- screen (interactive whiteboard);
- presentation “Computer graphics”;
- textbook - Informatics and ICT. Textbook for grades 8–9. Makarov.
- cards with tests (or a testing program with automatic checking of student answers, for example);
- a program for demonstrating the activities of a teacher on the screens of students (for example, NetOp School).
Basic concepts:
- raster;
- raster graphics;
- pixel
- Color palette;
- Vector graphics;
- graphic primitives;
- graphics editor.
Lesson plan:
- Organizing time.
- Updating the basic knowledge and practical experience of students.
- Motivation of educational activity.
- Learning new material.
- Consolidation of new material.
- Primary control of the results of educational activities.
- Homework assignment.
- Summing up the lesson. Reflection.
During the classes
1. Organizational moment.
Greeting students. (Slide 1)
2. Updating the basic knowledge and practical experience of students.
(Slide 2) Since ancient times, people have sought to convey their perception of the world in the form of a drawing, a picture. Guys, pay attention to the board (images of rock art, paintings by artists appear on the board). (Slide 3) The first skill acquired by a person in his life is the ability to draw. People from early childhood draw on paper, on asphalt in the yard, on the blackboard at school, on canvas.
(Slide 4) Computers have been part of our lives for a long time. They have changed the world and human capabilities, and lately, those who want to draw are increasingly attracted to the computer. Images created on a computer are shown in motion or static. (Slide 5) The advantage of computer graphics is the ability to see how an image is formed at all stages, and to make unlimited adjustments. (Slide 6)
3. Motivation of educational activity.
(Slide 7) A real designer is unthinkable without art education, he must be fluent in the technique of drawing (pencil, charcoal), graphics (watercolor, gouache, pencil, ink, etc.), painting (gouache, watercolor, tempera, acrylic, oil). Is it possible in the modern world, using a computer, knowledge and skills to work with a computer, to become an artist, a designer without special talent? ( Student responses.)
A computer in the hands of an ordinary person can turn into an obedient tool for the embodiment of his artistic thought - the very one that he cannot translate on paper.
(Slide 8)
What wonderful opportunities the modern computer provides us, but what happened before.
(Slide 9)
The first computers worked with numerical and symbolic data and did not have separate tools for working with graphics, but they were already used to receive and process images.
(Slide 10)
By programming the memory of the first electronic machines, built on the basis of lamps, it was possible to obtain patterns. The advent of computer technology set the task of transmitting an image.
(Slide 11) (Slide 12) Today in the lesson we will get acquainted with two types of graphic images: raster and vector. Also in the lesson we will learn how to create and edit a bitmap graphic image. So, guys, open notebooks, write down the number and the topic of the lesson: “Raster and vector graphics. Raster graphic editor”. (Students write the topic of the lesson in their notebooks.)
4. Learning new material.
(Slide 13) Raster graphic images are formed in the process of scanning drawings and photographs existing on paper or film, as well as when using digital cameras and video cameras. You can create a bitmap graphic directly on your computer using a graphic editor.
(Slide 14) A bitmap is created using dots of different colors (pixels), which form rows and columns. The set of dotted lines forms graphic grid or raster
Each pixel can take on any color from palettes, containing tens of thousands or even tens of millions of colors, so raster images provide high fidelity in the reproduction of colors and halftones.
(Slide 15)
Guys, what do you think, if you increase the number of pixels in the image, what can be said about the clarity of the image? (If you increase the number of image dots, the image clarity will become clearer, the image will become clearer.)
Guys, what do you think, if you increase the size of the dots of the image, then what can be said about the clarity of the image? (If you increase the image dot size, the image will become less clear.)
(Slide 16) Raster images are very sensitive to enlargement or reduction (scaling). When a raster image is reduced, several neighboring pixels are converted into one, so the clarity of small image details is lost. Increasing it increases the size of each dot and produces a stepped effect that can be seen with the naked eye.
(Slide number 17) Unlike raster images, vector graphics are used to store high-precision graphic objects (drawings, diagrams), for which the preservation of clear and bright contours is important .
(Slide 18) (Slide 19) (Slide 20)
Vector images are formed from elements - a point, a line, a circle, a rectangle, etc. For each element, coordinates are specified, as well as a color.
What two coordinates define a point on a plane? (Dot is given by its coordinates (X, Y).)
Guys, if a circle is depicted on a plane, what coordinates set the center of this circle? (Circle is given by the center coordinates (X, Y) and the radius R.)
The line is set by the coordinates of the beginning (X 1, Y 1). And what are the coordinates of the end of this line? (End coordinates (X 2 , Y 2).)
The rectangle is defined by the coordinates of the vertices located along the diagonal: (X 1 , Y 1) and (X 2 , Y 2).
Vector image elements are called graphic primitives.
(Slide 21) The advantage of vector graphics is that vector graphics can be enlarged or reduced without loss of quality. This is possible because the image is enlarged and reduced using a formula.
(Slide 22) Guys, what type of graphic image (raster or vector) will you use:
1) To design our school's logo, given that it will have to be printed on small business cards and large posters? (In this case, it is advisable to use the vector image type.)
2) For digital photo editing. (In this case, it is advisable to use a bitmap image type.)
Currently, software developers create programs that help users work with graphic images.
(Slide 23) To process images on a computer, special programs are used - graphic editors. Graphic editors can be used to view and edit finished images, as well as to create drawings and drawings using a mouse or graphics tablet.
So let's write the definition: Graphics editor - is a program for creating, editing and viewing graphic images.
Our task in the lesson is to create a bitmap graphic image.
(Slide 24) Raster graphics editors are the best means of processing digital photographs and scanned images, as they allow you to improve their quality by changing color palette images and even the colors of each pixel. You can enhance the brightness and contrast of old and low-quality photos, remove minor image defects (such as scratches), convert a black-and-white image to color, and so on.
(Slide 25) In addition, raster graphics editors can be used for artistic creation by using various image transformation effects. An ordinary photo can be turned into a mosaic panel, a pencil or charcoal drawing, a relief image, and so on.
(Slide 26) Among raster graphics editors there are simple ones, for example - paint- standard operating system application Windows, Paint.Net– replacement for the standard GR Paint, StarOffice Image– component of an integrated office application Staroffice, as well as powerful professional graphics systems, such as Adobe Photoshop.
Today in the lesson we will work with the raster graphics editor Paint.
To launch GR Paint, you need to perform the following sequence of actions:
START - Programs - Accessories - Paint
. You can also launch the Paint graphics editor by double-clicking on the graphics editor icon.
(Slide 27)
Let us analyze in detail the structure of the Paint program window.
Structure of the Paint editor window

Rice. 1
5. Consolidation of new material.
Guys, I suggest you take your seats at the computers to do practical work. Open the textbook on page 120, find the practical work number 8.
Read the title and purpose of the work (I suggest one of the students).
(Editing images in the bitmap editor Paint. The purpose of the work: to learn how to create and edit bitmap graphics.)
In practical work, we need to perform the following tasks:
Create a copy of the Windows desktop screen and edit the resulting bitmap graphic image:
- place in the center of the image a circle drawn in blue and painted over in pale blue;
- draw the Russian flag inside the circle;
- place the inscription “Desktop” on the picture.
Guys, we will work as follows: I will show you how to perform each action, and you carefully look at the screen of your monitor and repeat after me. So, let's do the first task of practical work, i.e. get an image of the Desktop and load it into a graphical editor (I show the first task with the help of the NetOp School program and suggest that students repeat it).
- Place a copy of the screen on the clipboard at the moment when the Desktop is loaded, to do this, press the key (Print Screen).
- Launch the Paint editor with the command [ Start-Programs-Accessories-Paint].
- Load images from the clipboard into the Paint editor with the command [ Edit-Paste].
The desktop image containing the icons will appear in the editor window.
Guys, follow these steps.

Rice. 2
Let's do the following task: draw a circle.
4. Using Palettes set the foreground color to blue and the background color to pale blue. To do this, left-click on the blue color in the palette - select the foreground color, and to select the background color, right-click on the pale blue color in the palette. Select a tool from the toolbar Ellipse , on the additional panel that appears - filled in. Draw a circle while holding down a key (Shift). Repeat on your computers.

Rice. 3
Let's complete the following task: draw the Russian flag.
5. Consistently draw using the tool Rectangle three equally sized filled rectangles (white, blue, and red) whose foreground and background colors are the same. Repeat on your computers.

Rice. 4
Let's create the inscription “Desktop” at the top of the image.
6. Select tool Inscription , use the mouse to create a label area and enter text.
Text formatting can be done by calling the text attribute panel using the command [ View-Panel Text Attributes] or context menu. The result of editing will be this image. Repeat on your computers.

Rice. 5
6. Primary control of the results of educational activities.
I suggest you complete a test task on today's topic using the Cognition test shell. (After the students complete the test, I display the results of the test tasks completed by the students and conduct an initial analysis of the test results).
Test.
Computer graphics.
1. A raster graphic image is formed from...
2. Vector graphic image is formed from...
a) dots of different colors - pixels;
b) elements - point, line, circle, rectangle, etc. (graphic primitives).
3. What type of graphics will you use to develop a diagram, drawing, school logo?
a) Raster graphics;
b) Vector graphics.
4. What type of graphics will you use to edit your digital photo?
a) Raster graphics;
b) Vector graphics.
5. The program for creating, editing and viewing graphic images is called ...
a) Text editor;
b) Graphic editor;
c) Spreadsheet editor.
(Slide 28) Complete the table by answering the following questions:
- Where are raster and vector graphics used?
- How are raster and vector images formed?
- What changes happens to images when scaling?
| Raster graphics | Vector graphics |
8. Summing up the lesson. Reflection.
- What new did you learn?
- What did you like and what difficulties did you experience in working with the graphic editor?
- Where can you apply what you have learned?
(Students answer the questions and draw the following conclusions: Today in the lesson we learned that there are two types of computer graphics: raster and vector. We learned that there are special programs for creating and editing graphic images, and also learned how to create and edit raster graphic images. We enjoyed it today… We experienced difficulties in… The acquired knowledge can be applied….)
- New time (XV-XVIII centuries
- Presentation on computer science on the topic "Raster and vector graphics
- Now we get the equation of the tangent to the graph of the function. Basic differentiation formulas
- Presentation on the topic "road signs" Presentation on the topic of basic road signs
- Agriculture of the Leningrad region
- A16 Personal verb endings
- Genus Salmonella - methods for detecting Salmonella in pathological material and products